Walking into my sewing room should be exciting. A room full of fabrics and shiny threads should make me happy not stressed. When I can see all my supplies and they are organized I feel creative. Can focus on my projects. The clutter is. I can enjoy sewing.
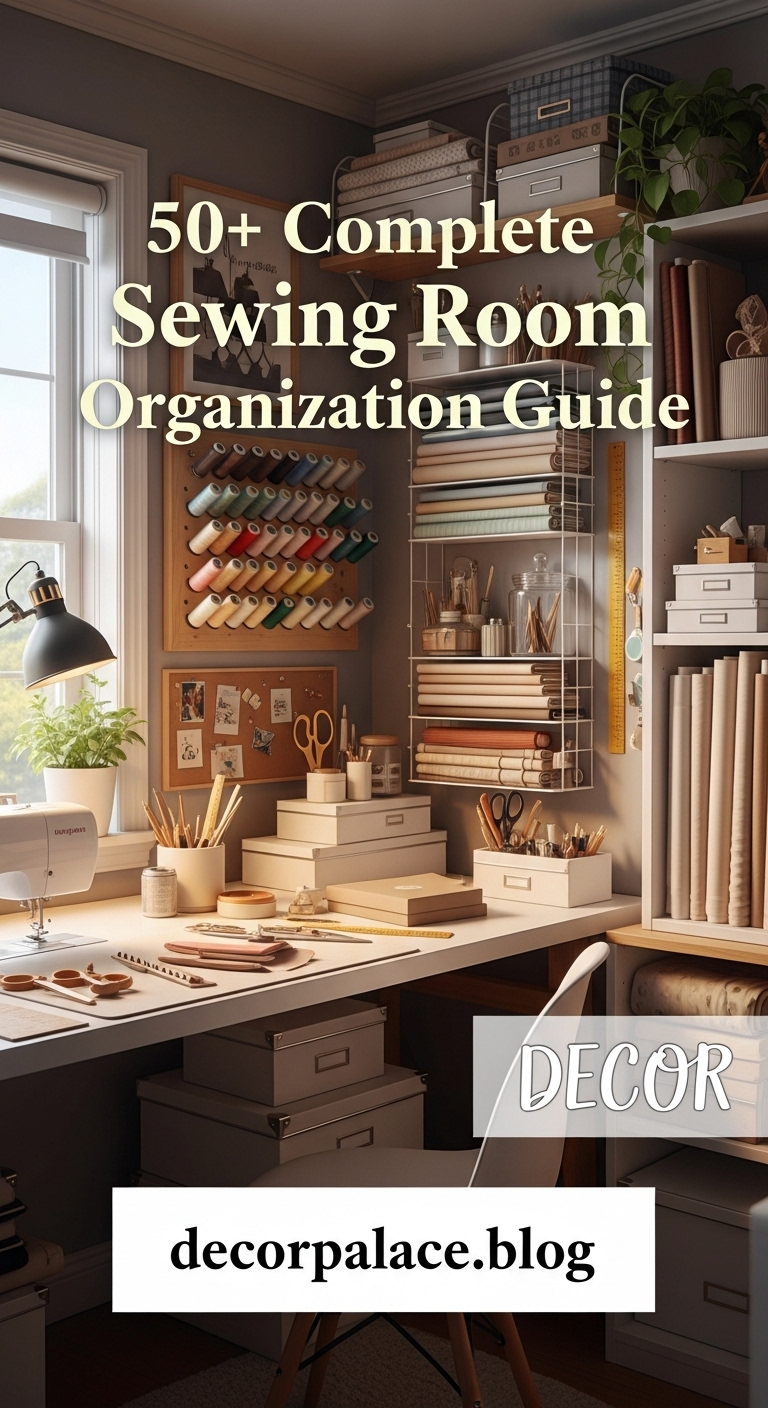
If you have a room for sewing or just a small corner the way you set it up is really important for what you do every day. The right setup makes a difference, in your daily sewing process. Let us look at this guide for organizing a sewing room. It is full of inspiring ideas to help you turn your workspace into a neat and peaceful place.
1#. Wall-Mounted Pegboard Systems
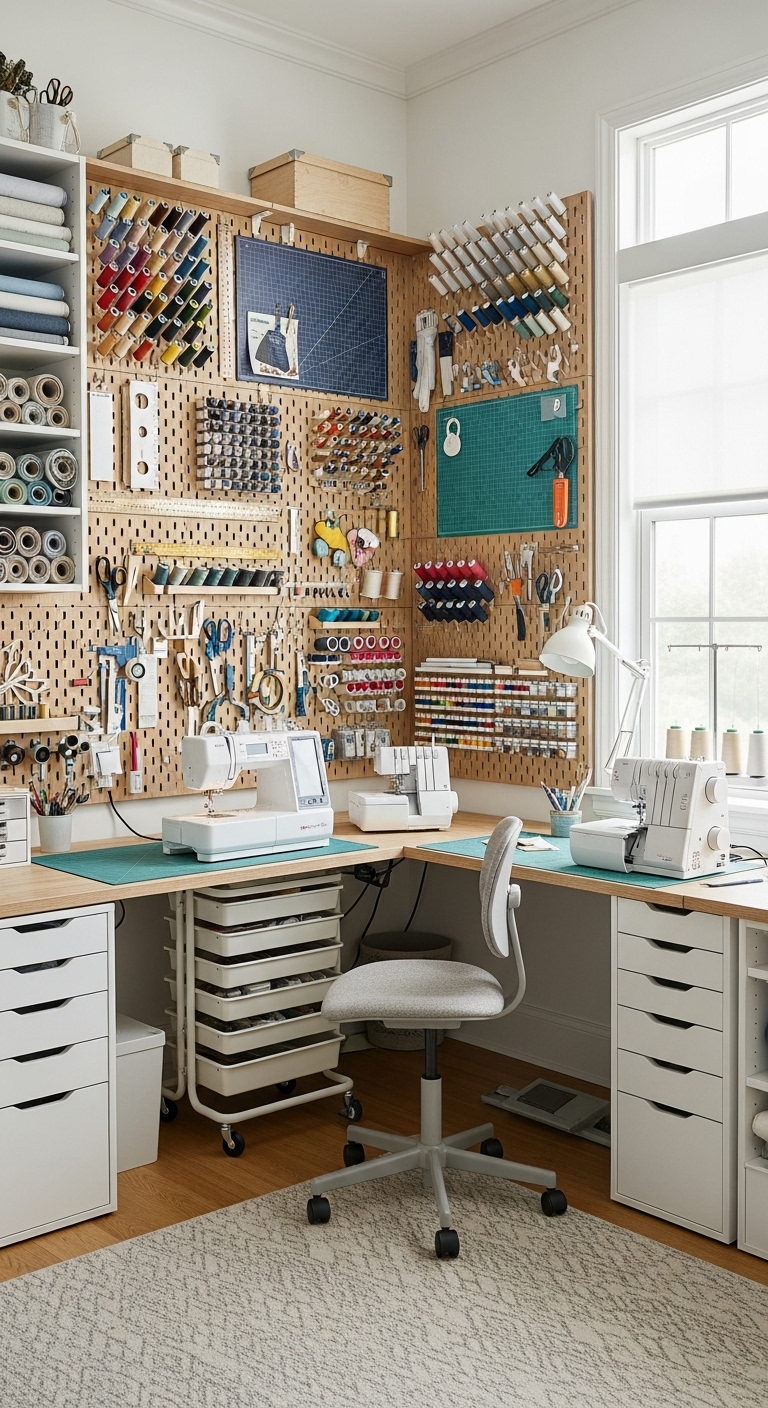
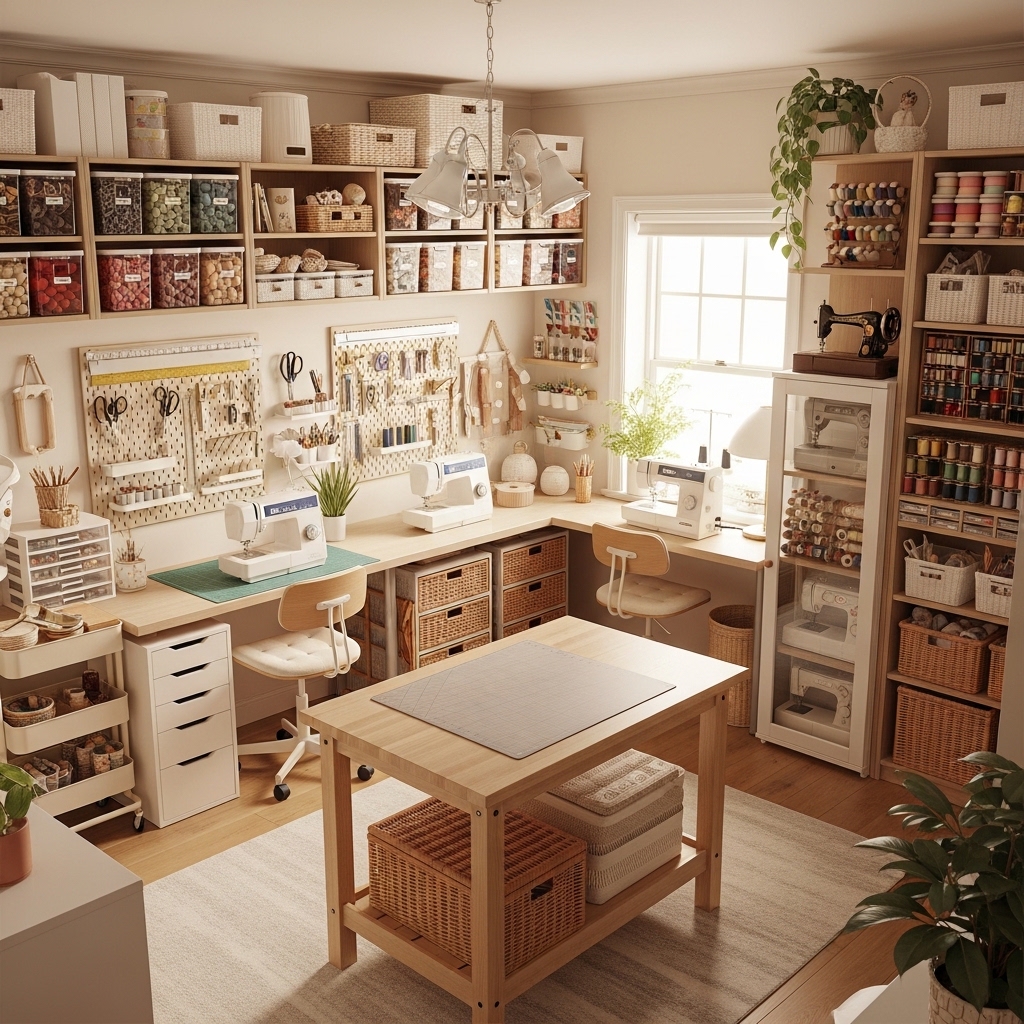
Utilizing the vertical space directly above your main work surface is a major game-changer for compact creative studios. Hanging your essential fabric scissors, rotary cutters, and clear quilting rulers on a sleek pegboard keeps them instantly accessible while keeping your desk clear.
Transform a basic utility board into a beautiful design feature by applying a fresh coat of crisp white or soft pastel paint. This simple aesthetic upgrade elevates the entire room, ensuring your functional storage seamlessly blends into a stylish, curated backdrop.
Keeping your most-used tools visible and neatly arranged drastically reduces creative friction and cuts down on search time. A thoughtful layout ensures everything has a designated home, making cleanup effortless and maintaining an organized workspace after a busy project.
This vertical setup is the ultimate solution for creators who prioritize both efficiency and a beautiful, inspiring work environment. It maximizes every inch of available square footage, proving that highly practical storage solutions can also look incredibly chic.
2#. Rainbow Thread Spool Racks
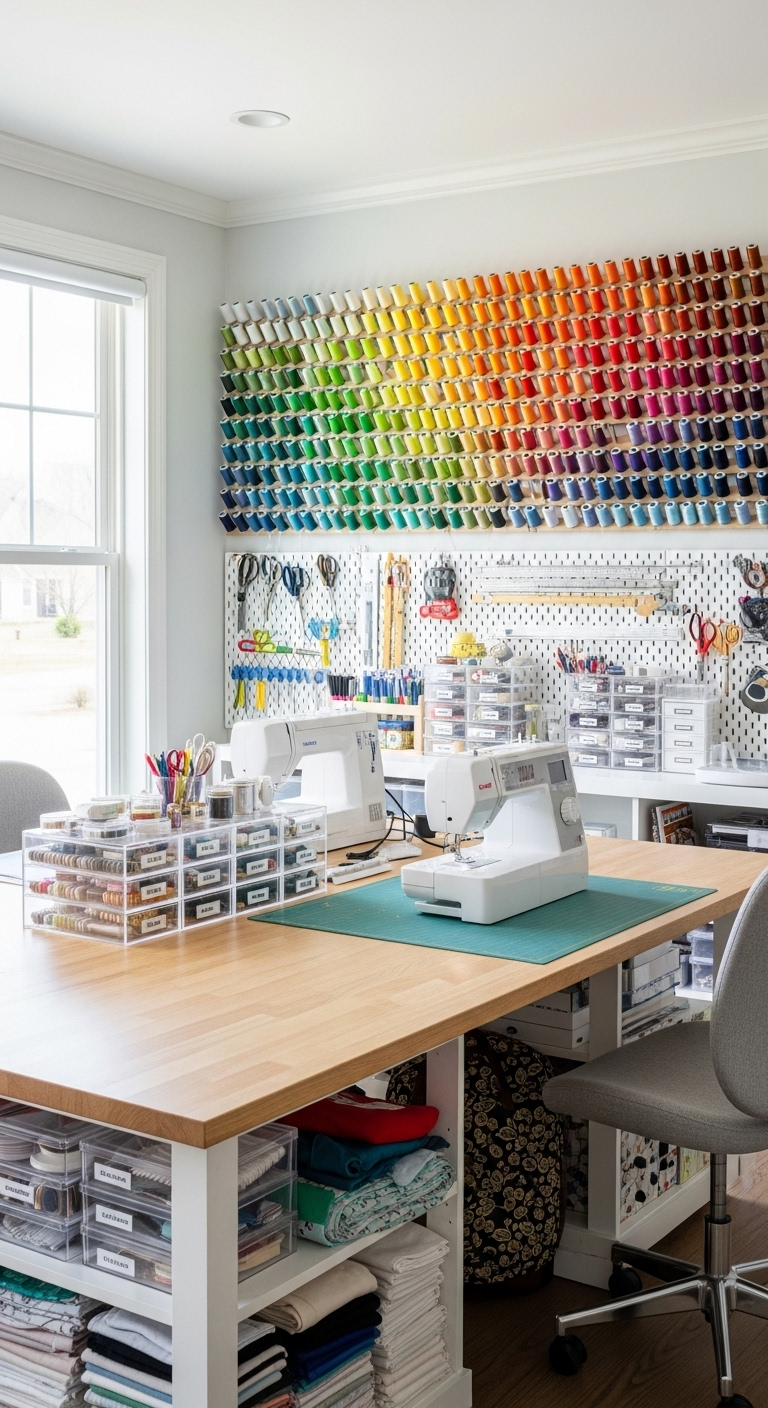
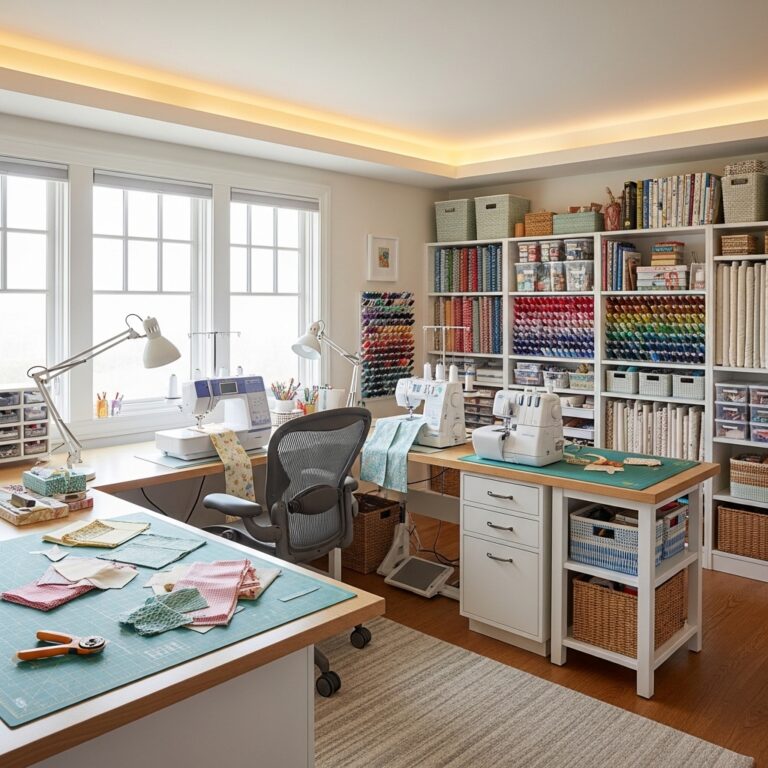
Arranging your thread spools by color on a multi-tiered wall rack creates an instantly striking visual centerpiece. This setup transforms ordinary sewing supplies into an organized rainbow, allowing you to scan your options in seconds.
Mounting your collection on the wall eliminates the daily frustration of digging through deep drawers or cluttered bins. You can instantly match your thread to fabric swatches, streamlining your workflow and keeping your creative momentum going.
Neatly lined rows show off your materials while protecting delicate strands from getting tangled or dusty in storage. This open display demonstrates a true pride in your craft, turning essential utility items into a beautiful design feature.
This accessible storage method perfectly balances everyday workplace efficiency with a clean, inspiring aesthetic for your studio. It keeps your favorite colors within arm’s reach, ensuring your workspace stays both highly functional and visually stunning.
3#. Clear Acrylic Drawer Dividers
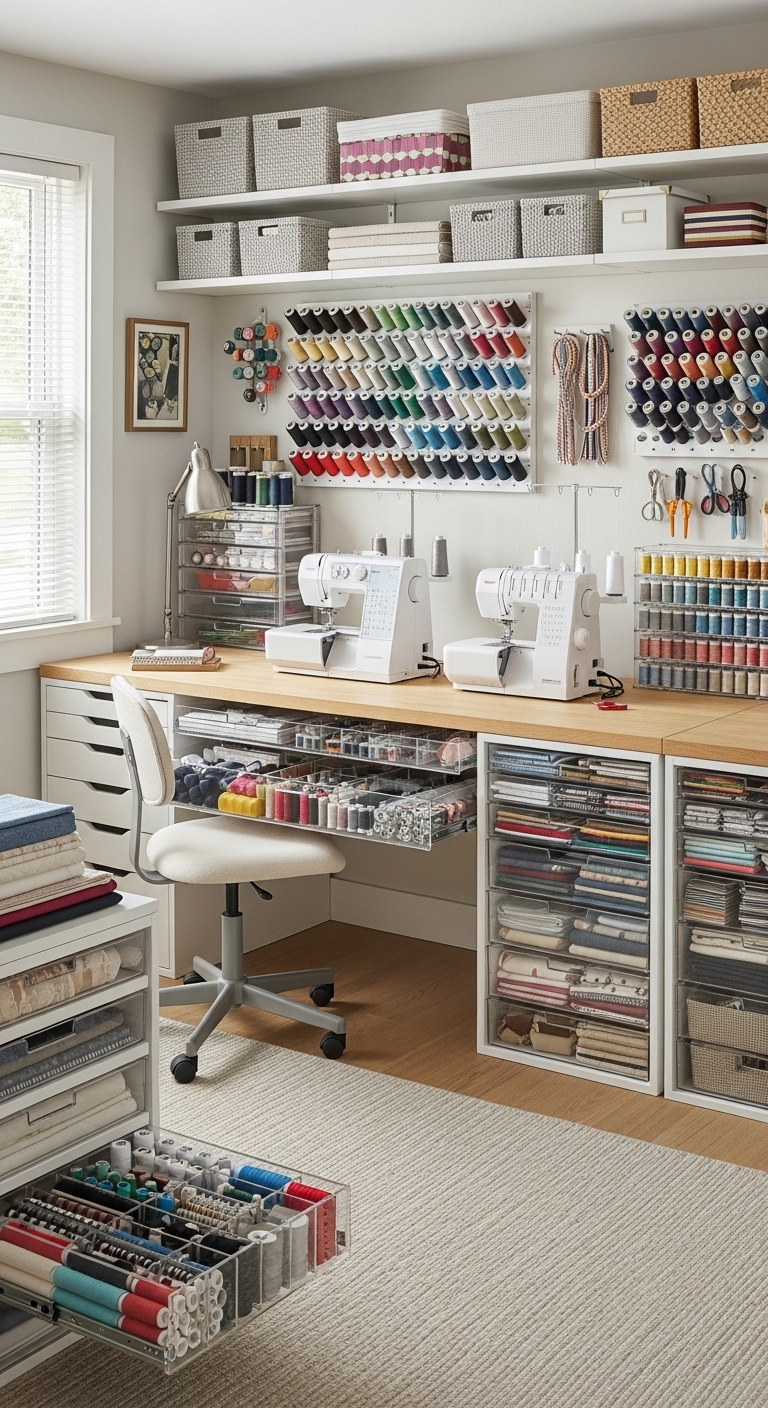
Taming the chaotic mess inside your desk drawers is incredibly simple when you assign dedicated spots for tiny notions. Utilizing shallow trays ensures that small essentials like pins, tailor’s chalk, and measuring tapes never get lost in the back corners.
Clear acrylic dividers allow you to see exactly where your seam rippers and safety pins are hiding at a single glance. This transparency eliminates the frustration of rummaging through cluttered spaces, saving you precious minutes during a complex sewing project.
Keeping these tiny items completely separated prevents them from sliding around and getting jumbled every time you open the drawer. This systematic approach protects delicate tools from damage, ensuring your sharpest cutters and premium pins stay in perfect working condition.
Maintaining organized interiors keeps your primary creative surface completely clear of distracting clutter and looking beautifully styled. Dedicated drawer compartments prove that efficient, hidden storage is the true secret to sustaining an inspiring and peaceful studio environment.
4#. Floor-to-Ceiling Fabric Cubbies
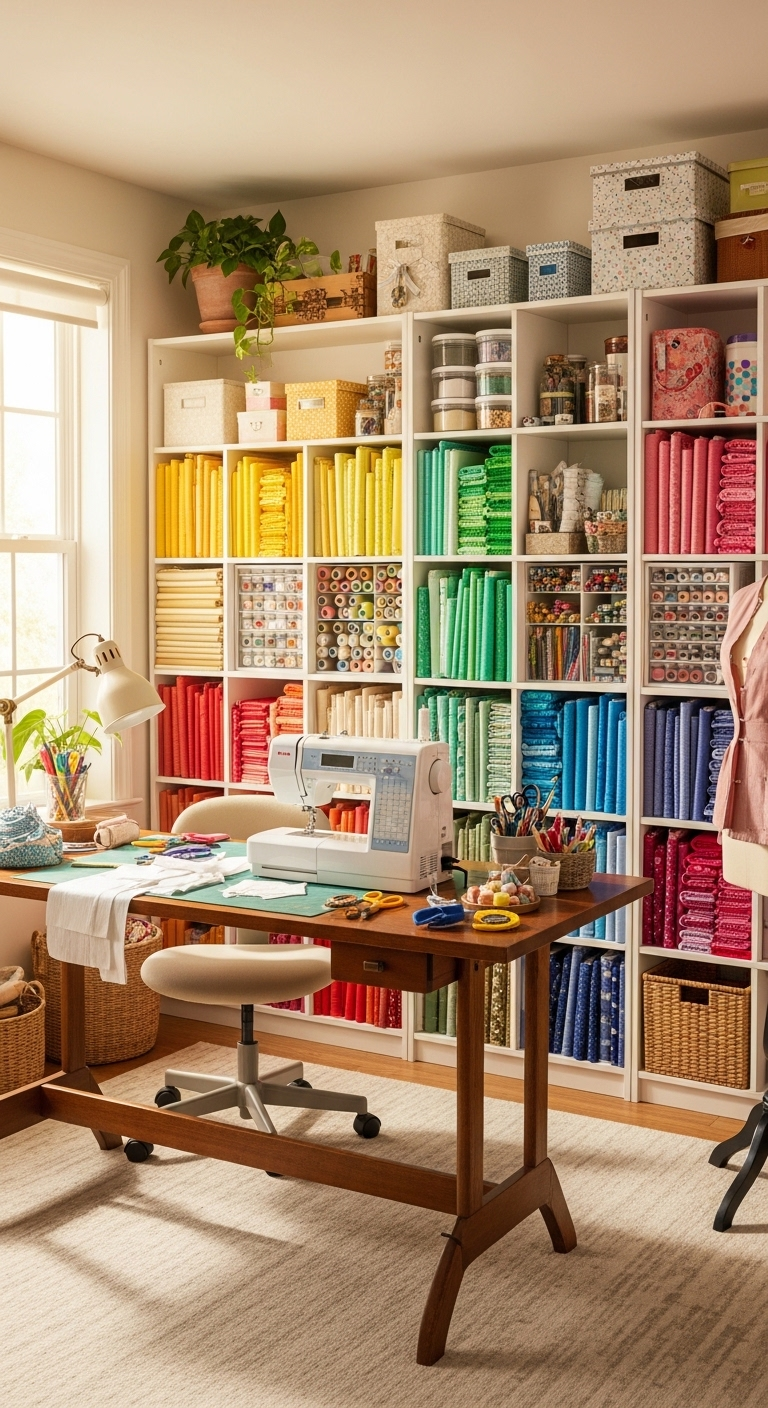
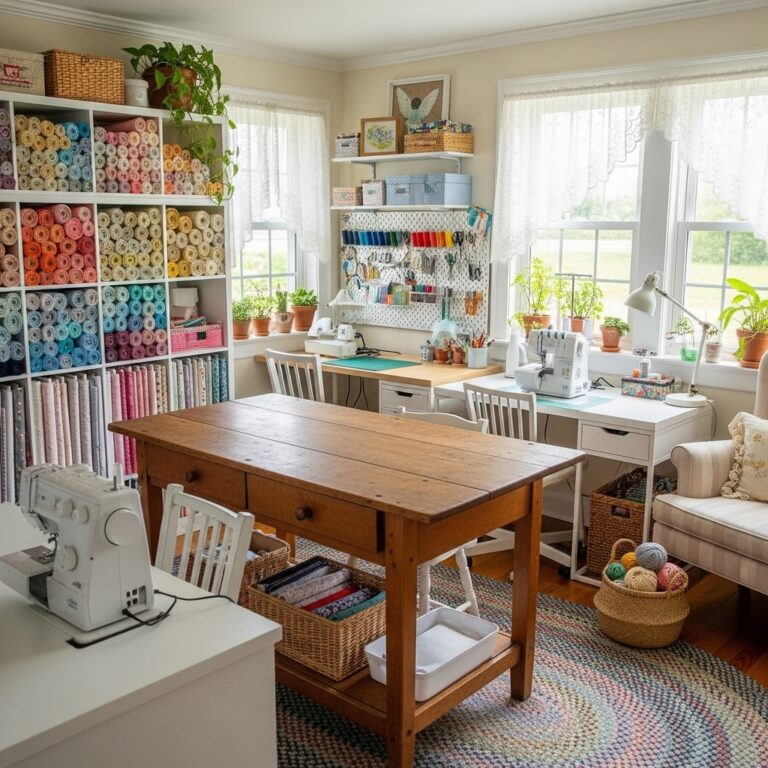
Displaying your beautiful fabric stash on open shelving turns your textile collection into a striking, boutique-style focal point. Stacking your materials out in the open allows you to view your entire inventory at a single glance during project planning.
Folding your fabrics into uniform bundles ensures the shelves look incredibly neat and prevents tall stacks from accidentally toppling over. This disciplined approach keeps bulky yardage perfectly contained while maximizing every inch of available vertical shelf space in your room.
This visual storage method helps you track your current inventory effortlessly, preventing you from accidentally purchasing duplicate materials later. Knowing exactly what textiles you have on hand saves money and streamlines the initial design process for upcoming projects.
An open shelving system is the ultimate solution for creators wanting a comprehensive approach to sewing room organization. It beautifully balances daily functional accessibility with a clean aesthetic, making it an essential component of an inspiring craft studio.
5#. Rolling Tiered Utility Carts
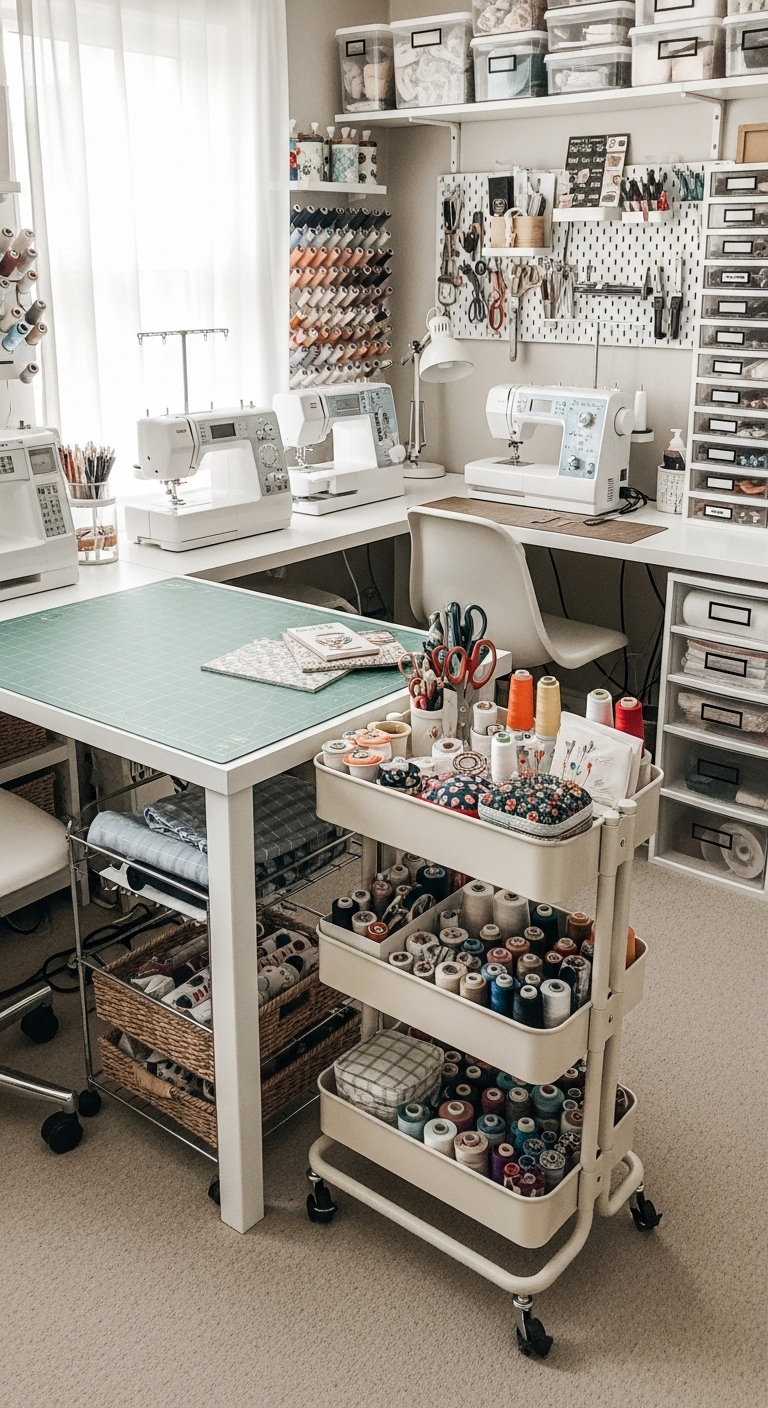
Mobile utility carts are incredibly efficient for housing all the specific materials required for your current active project. They allow you to effortlessly transport your tools from the cutting mat to the ironing station and right over to the sewing machine.
You can easily wheel these rolling storage units completely out of the way when you need to clear floor space for larger layouts. They provide the perfect temporary home for work-in-progress pieces, keeping your active project pieces grouped together and safely off your main desk.
These compact units roll smoothly beneath standard table surfaces, offering a hidden yet mobile home for everyday items like spray starch and marking pens. They maximize tight corners, keeping small rulers and pressing cloths within arm’s reach without cluttering up your permanent workspace.
A adaptable rolling setup is a favorite for dynamic creators who require a flexible studio environment that changes with every project. Investing in versatile, mobile storage ensures your room remains highly functional, adaptive, and tailored to your specific creative routine.
6#. Glass Jar Notion Galleries
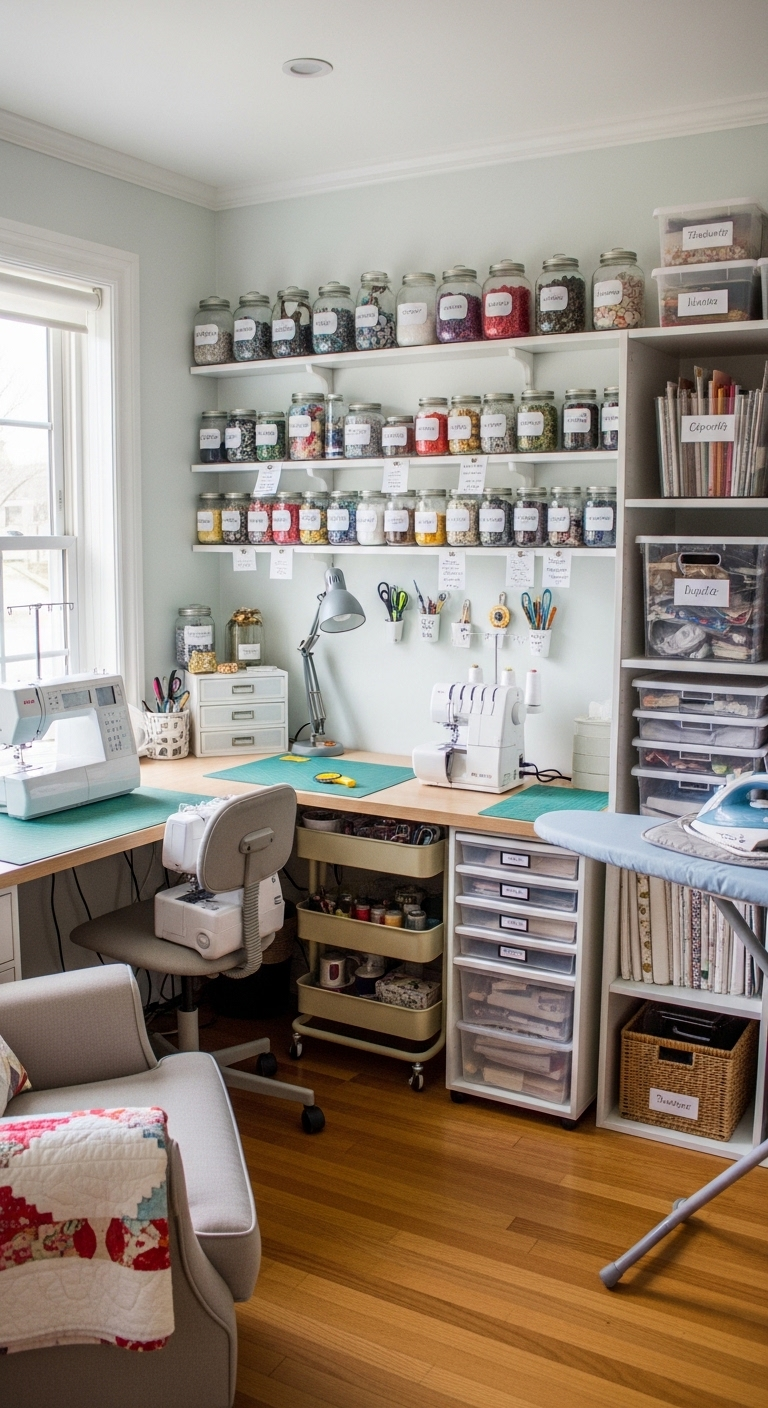
Sorting colorful buttons, metal zippers, and delicate vintage lace into clear glass jars transforms basic craft supplies into beautiful visual displays. Arranging these clear vessels on a prominent shelf mimics the charm of old-fashioned candy shops while keeping tiny notions perfectly contained.
This transparent storage method lets you instantly catalog thousands of individual pieces, ensuring small items never get lost in dark drawers. The nostalgic aesthetic adds a warm, personal touch to your creative space, making everyday functional utility feel incredibly special.
Viewing distinct colors and unique textures directly through the glass helps you select the perfect matching accents for your project immediately. This eliminates the need to open multiple containers, keeping your creative momentum steady while you focus on finishing your latest design.
Repurposing old kitchen jars is an eco-friendly and budget-conscious way to craft beautiful, functional decor for your creative studio. Giving these glass containers a second life keeps your workspace highly organized, uniquely styled, and filled with inspiring visual character.
7#. Magnetic Pin Dish Accents
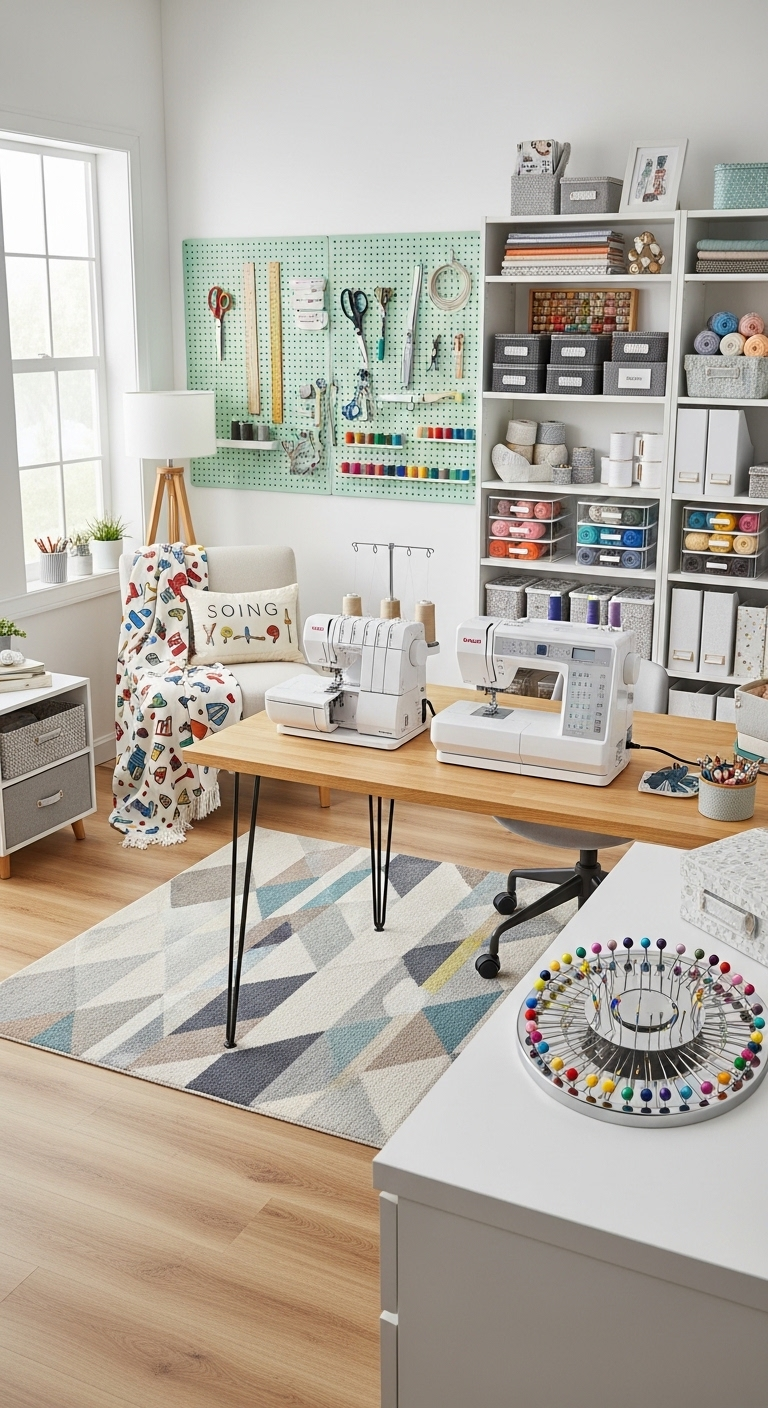
A heavy-duty magnetic dish is incredibly helpful for instantly gathering dropped straight pins from your cutting table or hardwood floor. It keeps sharp notions safely contained in one secure spot, preventing them from hiding in carpets or causing painful accidents later.
These practical tools are available in a wide variety of metallic finishes and bright colors to match your personal style. They add a sleek, modern touch to your sewing surface while providing immense functional value during fast-paced assembly work.
Having a magnetized surface nearby means you can simply toss pins in its general direction without breaking your creative rhythm. It eliminates the tedious task of picking up individual pieces manually, making your entire sewing process much smoother and safer.
Every organized workspace used by a dynamic creator should feature one of these compact dishes sitting directly next to the machine. It is a tiny but incredibly powerful accessory that keeps your immediate workspace clean, professional, and entirely accident-free.
8#. Under-Shelf Ribbon Rods
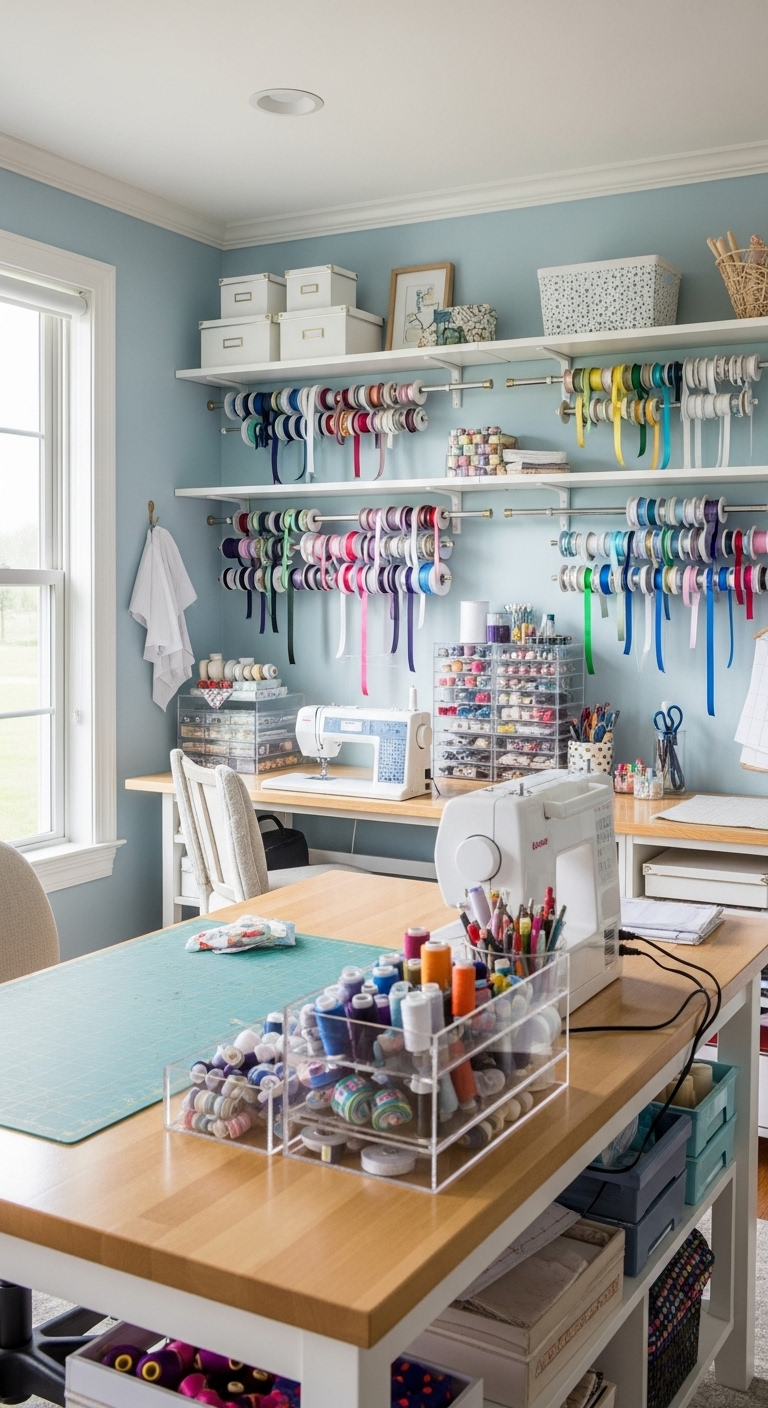
Installing sleek wooden dowels or adjustable tension rods directly beneath your existing wall shelves keeps delicate ribbons perfectly organized. This smart setup prevents your favorite trimmings from tangling together into an unmanageable, knotted ball inside dark storage bins.
You can simply pull the loose end of a ribbon and cleanly snip the exact length required for your current project. This method eliminates the tedious task of removing the entire spool from its holder, making your daily workflow incredibly efficient.
Suspending your collection out in the open keeps every vibrant color and unique texture completely visible at a single glance. They create a beautiful, decorative accent along your wall or inside a cabinet, adding immediate visual charm to your creative studio.
This clever layout is an essential detail for creators who regularly work with delicate laces and colorful silk ribbons. It ensures your most inspiring materials remain beautifully displayed, instantly accessible, and perfectly preserved for your next intricate handmade project.
9#. Pattern Display Ring Binders
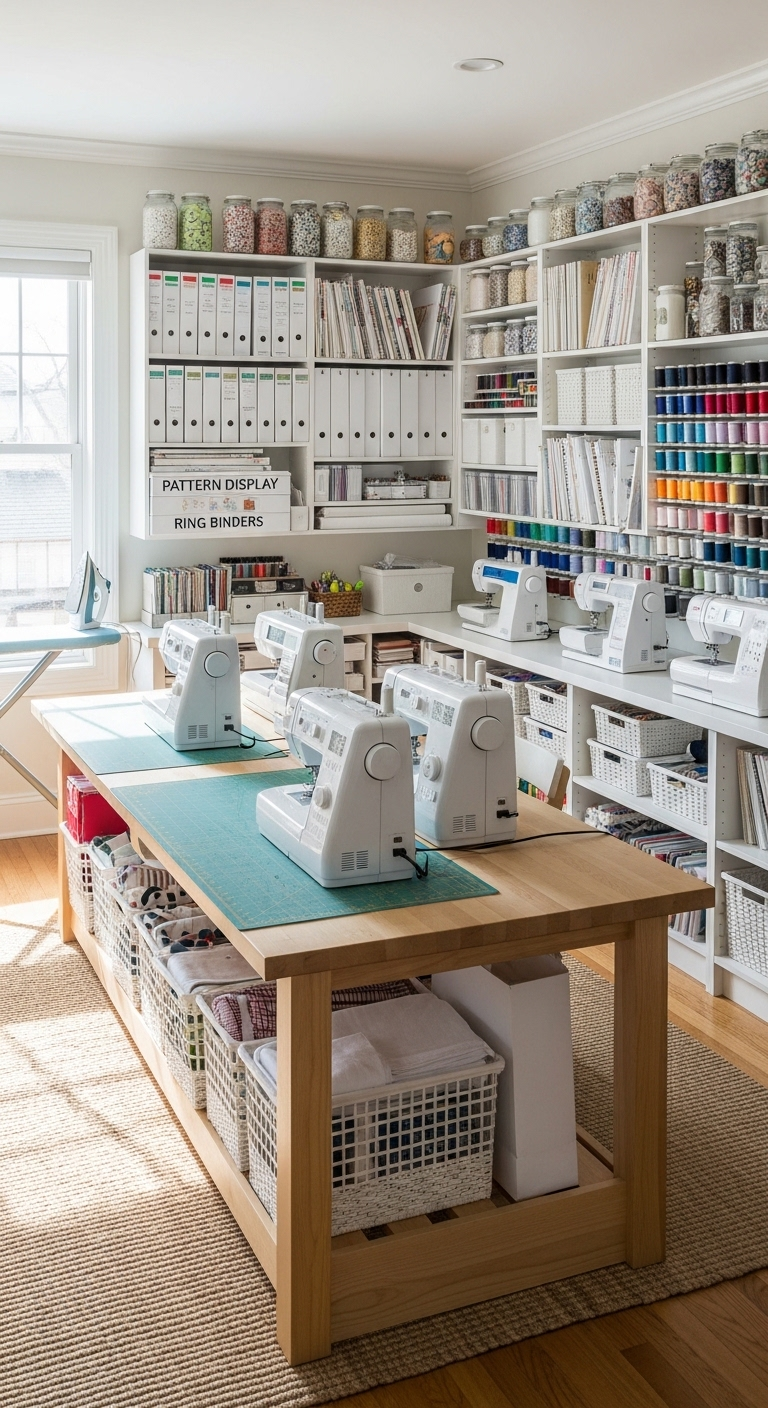
Storing your delicate paper patterns inside clear plastic sleeves within large ring binders keeps them perfectly preserved over time. This protective method prevents fragile tissue sheets from tearing, getting misplaced, or collecting dust between different garment projects.
Labeling the spine of each binder by garment type or specific pattern brand makes finding a precise design incredibly quick. You can easily slide a binder off the shelf and locate the exact template you need without digging through messy boxes.
This organized system allows you to flip through your pattern library as if you were browsing a favorite fashion magazine. It offers an instant dose of creative inspiration, letting you visualize upcoming garment combinations while planning your next sewing session.
A compact binder archive is the ultimate space-saving solution for creators looking to manage a growing independent pattern collection. It consolidates bulky envelopes into a streamlined, uniform layout that neatly tucks away on any standard bookshelf or floating wall ledge.
10#. Hanging Fabric Bolt Racks
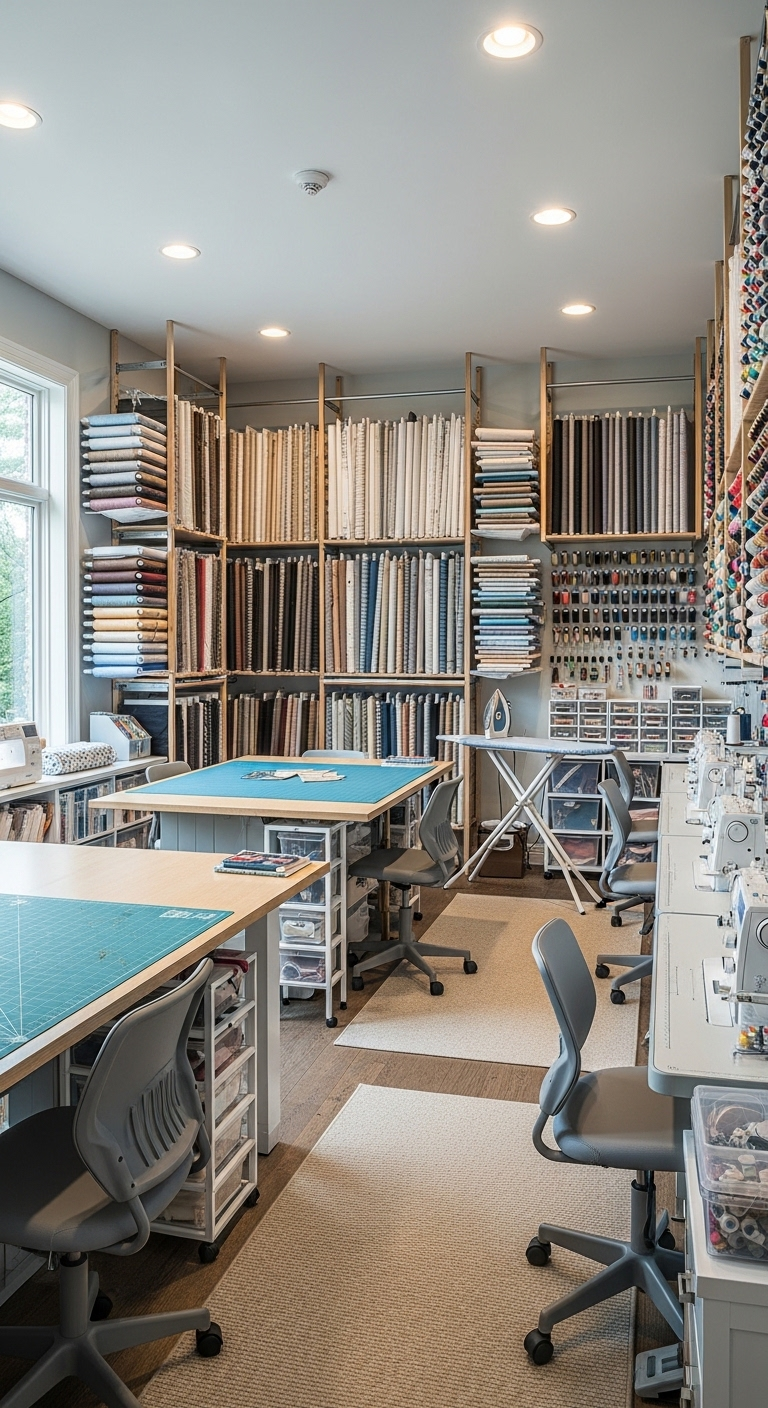
Vertical Fabric Bolt Racks
Investing in a specialized storage rack allows you to store wholesale fabric bolts vertically without damaging delicate fibers. This smart commercial-style solution mimics a professional design studio, preventing heavy textiles from crushing each other under their own weight.
Standing your material upright utilizes the empty space from floor to ceiling, maximizing every available inch in a small room. It turns bulky yardage into an organized visual library, making it simple to evaluate your inventory before starting a new project.
Keeping your premium bolts completely off the floor stops dust and pet hair from gathering on raw fabric edges. This simple elevation ensures your expensive textiles stay pristine and clean, eliminating the need for extra prep work before cutting.
Clearing large rolls off the ground instantly makes your creative workspace feel significantly more spacious, open, and professional. It is an essential strategy for managing large fabric collections, keeping your floor area entirely free for comfortable moving and cutting.
11#. Slim Pull-Out Pantries
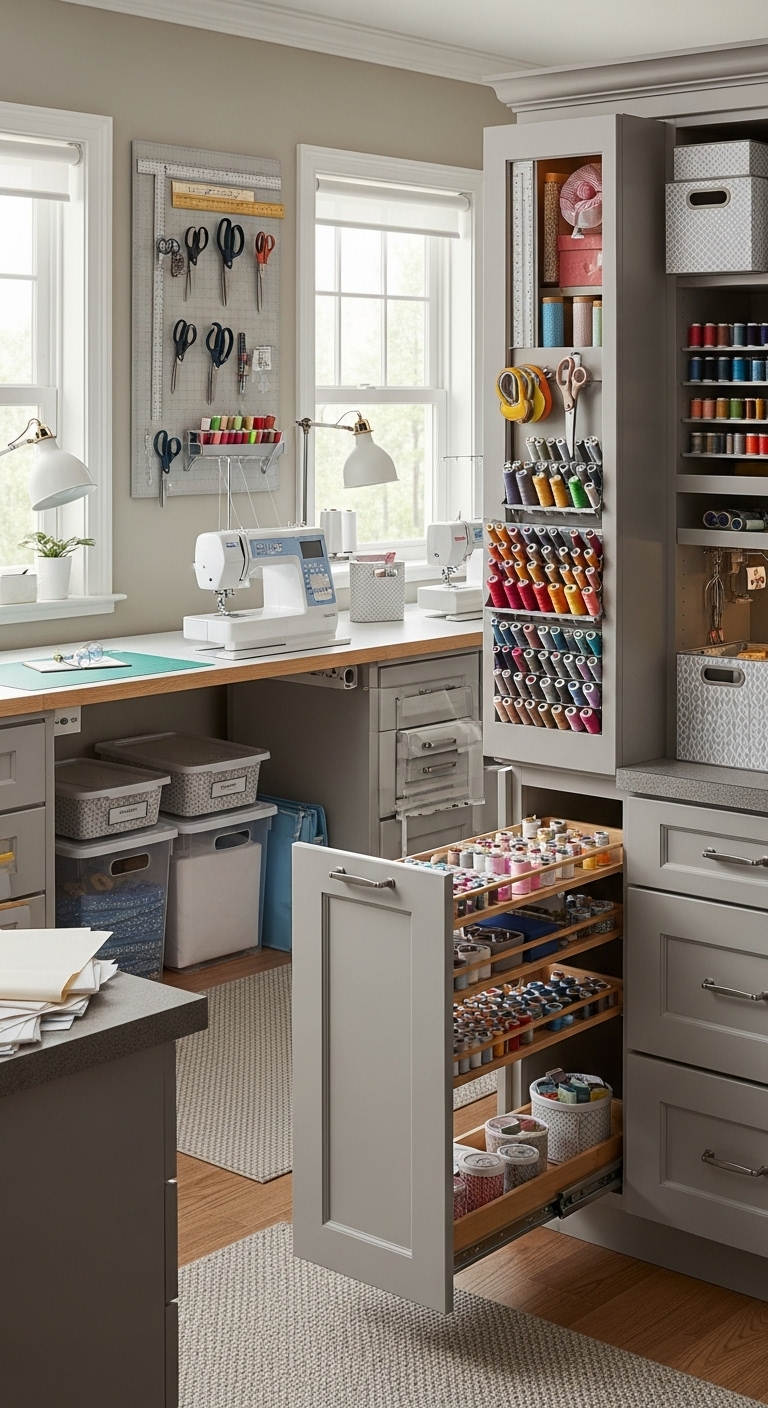
The awkward, narrow gap between your cutting desk and the studio wall is the absolute perfect home for a slim, slide-out storage tower. This specialized cart easily holds everyday liquid supplies like spray stabilizers, fabric glues, and premium sewing machine oils perfectly upright.
Utilizing this hidden slot keeps these highly essential maintenance items close at hand without letting them clutter your main creative workspace. You simply slide the narrow shelving unit out when a machine needs quick oiling, then tuck it away instantly.
This clever hidden storage trick ensures that absolutely every single inch of your available square footage actively supports your organizational layout. Keeping these odd-shaped bottles neatly tucked out of sight instantly eliminates visual clutter, making the entire room feel much more open.
Implementing a slide-out tower is an exceptional space-saving strategy for creators working inside compact apartments or narrow spare bedrooms. It proves that even the smallest, most awkward structural gaps can be converted into highly functional and valuable storage assets.
12#. Overhead Loft Storage Bins
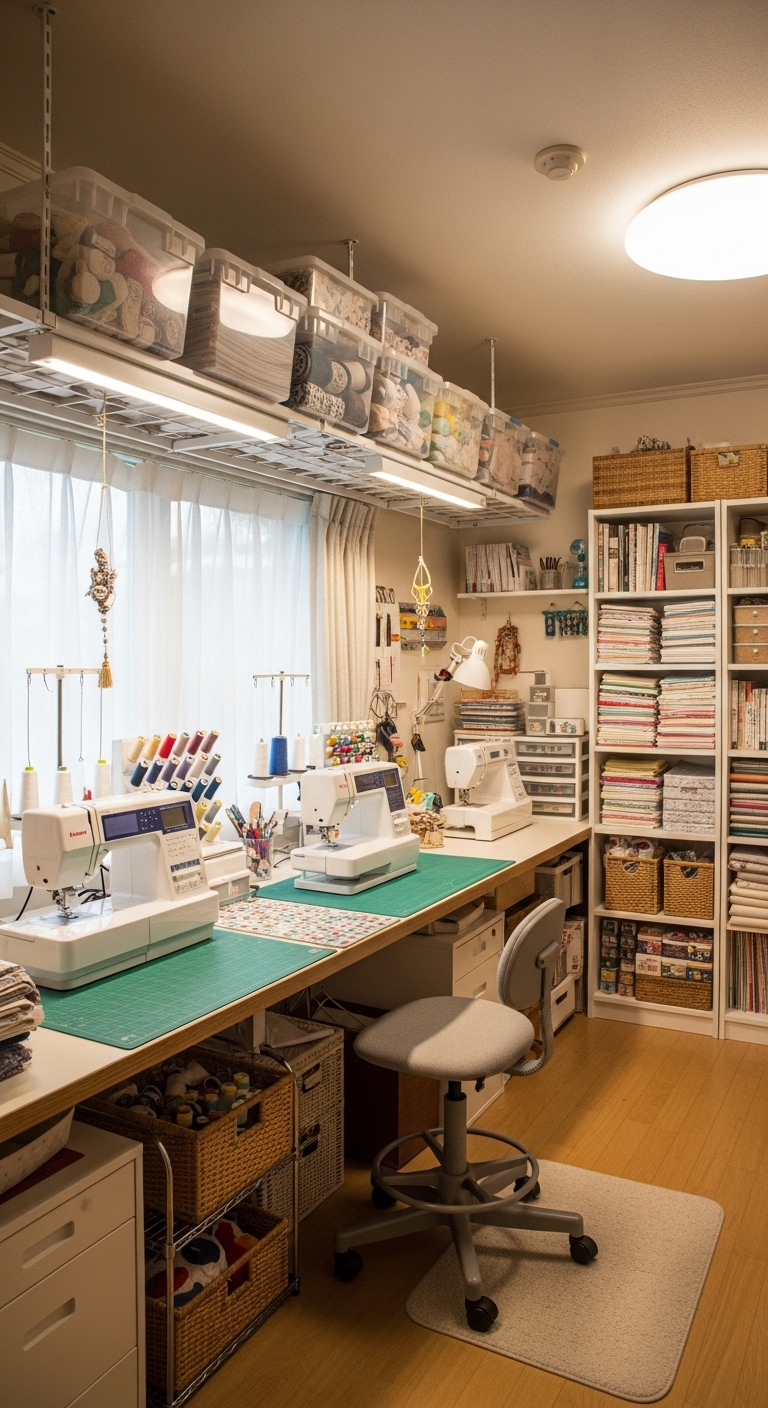
Installing a sturdy floating shelf directly above your studio doorway is a brilliant way to capture underutilized vertical real estate. This elevated surface is perfect for holding bulky items like extra quilt batting, pillow stuffing, or seasonal fabric bundles completely out of the way.
Placing matching storage bins up high keeps the main floor area completely clear for active cutting, piecing, and pressing tasks. Affixing large, clear labels to the front of each container ensures you always know exactly what is stored inside without needing a ladder.
This remote overhead zone serves as the ultimate storage spot for specialty materials you only need to access once or twice a year. Tucking away holiday-themed prints, costume fabrics, and backstock supplies prevents them from crowding your everyday workspace and drawing your focus away.
Utilizing this hidden architectural area significantly expands your total storage capacity without making a small room feel cramped or claustrophobic. It maximizes your square footage vertically, proving that smart structural planning can keep a heavy inventory organized, accessible, and beautifully out of sight.
13#. Industrial Bobbin Storage Cases
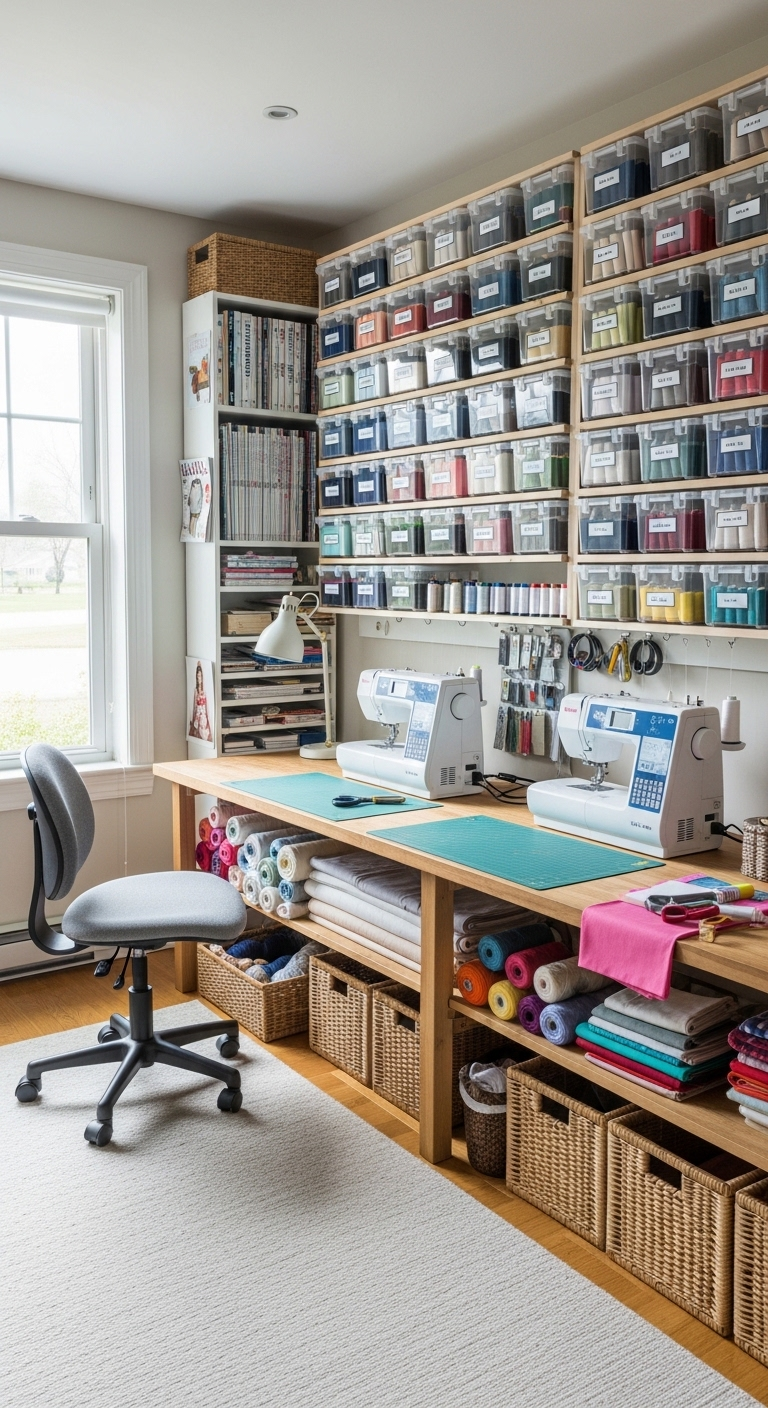
Clear plastic cases outfitted with custom foam slots are incredibly efficient for keeping pre-wound bobbins from unraveling and tangling together. They isolate each individual spool within its own secure compartment, preventing different thread ends from mixing and creating messy knots.
Sorting your bobbins systematically by thread weight and color profile within these transparent containers streamlines your entire sewing preparation process. This high visibility allows you to locate and swap out matching lower threads in just a few seconds while working on a project.
Securing your thread collection inside a dedicated box prevents these tiny rounds from rolling around loosely inside deep desk drawers. It also shields the delicate strands from gathering airborne lint, thread dust, and pet hair that could eventually clog your machine.
Investing in a specialized organizational case provides an instant upgrade to your daily sewing workflow with very little effort. Keeping these essential accessories neatly cataloged and completely dust-free ensures you spend your valuable studio time creating rather than untangling threads.
14#. Hanging Scissor Magnet Strips
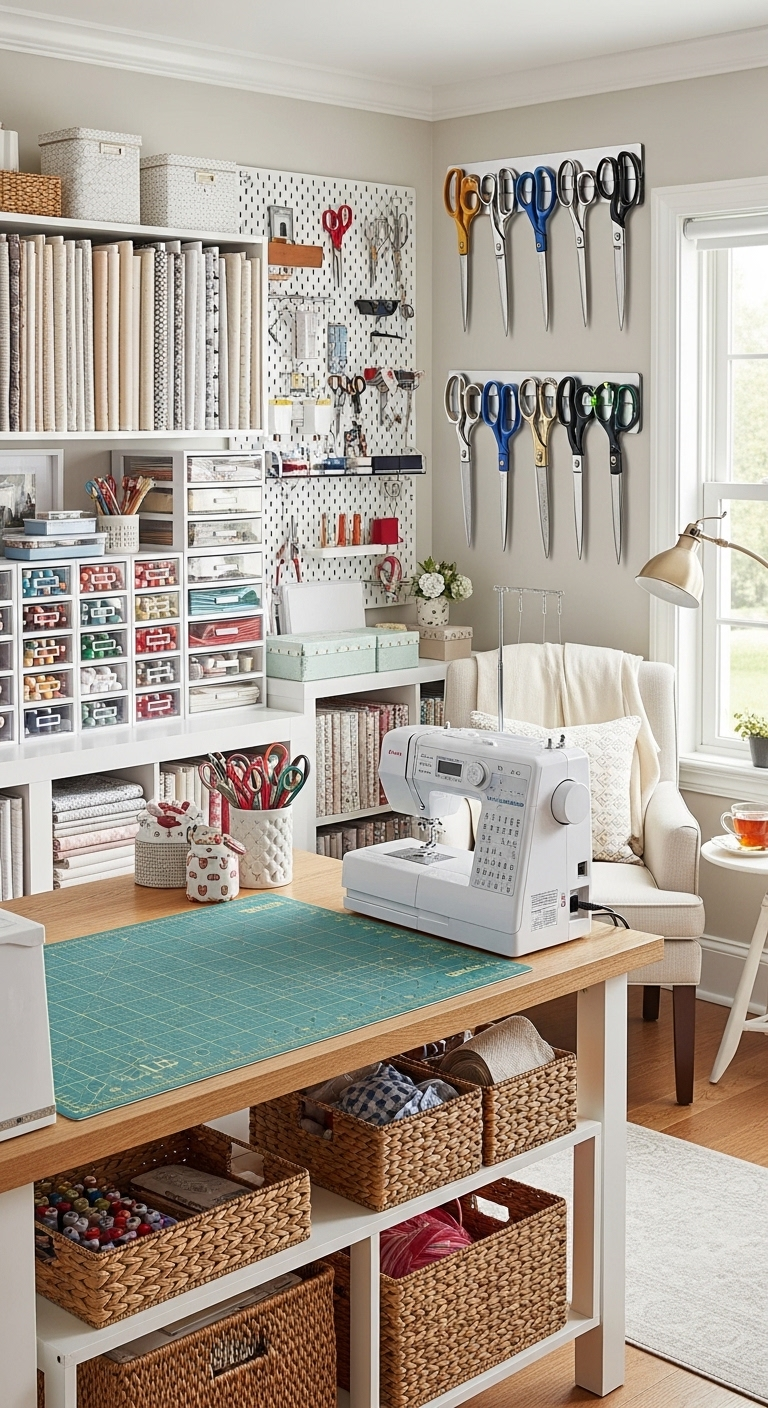
Mounting a heavy-duty magnetic strip to your studio wall keeps premium shears and thread snips perfectly aligned and instantly accessible. This sleek, industrial-style display neatly arranges your sharpest cutting instruments into a striking visual grid that mimics a high-end professional design workshop.
Elevating your cutting tools onto a magnetized bar protects delicate metal blades from getting nicked or dulled inside crowded utility drawers. It ensures your specialized fabric shears never slam against other metal items, preserving their razor-sharp edges for incredibly clean fabric cuts.
Keeping your most essential scissors completely out in the open prevents them from constantly getting buried beneath shifting piles of fabric. You can instantly reach for the exact pair you need mid-project without breaking your creative focus to search the entire room.
This open-wall storage method beautifully showcases your high-quality tool collection while keeping your immediate cutting table entirely free of clutter. It transforms basic, everyday utilitarian items into a compelling design statement, injecting an authentic maker-space personality into your creative environment.
15#. Woven Basket Scrap Sorting
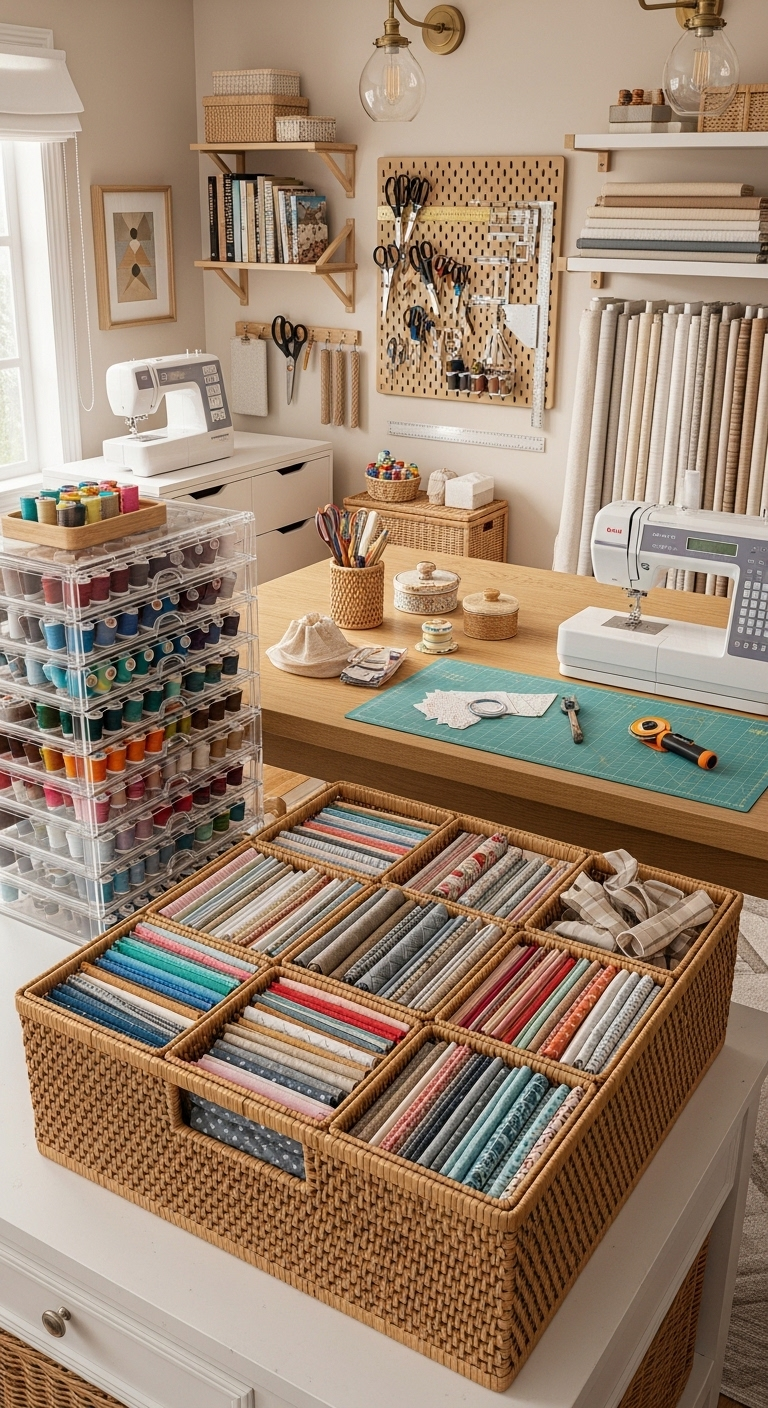
Placing natural seagrass or woven wicker baskets beneath your primary workstation offers an attractive way to conceal unruly fabric leftovers. Tucking these textured bins under the desk keeps messy, irregular scraps completely hidden from view while keeping them within arm’s reach.
Sorting your leftover fabric pieces by color profile directly inside these distinct baskets makes retrieving small remnants for patchwork incredibly simple. This system transforms potential trash into an organized design resource, allowing you to quickly scan for accent pieces.
Lightweight woven baskets are exceptionally easy to slide out and transport across the studio floor as your project needs shift. This flexibility allows you to bring your entire scrap collection right next to the sewing machine during intensive piecing sessions.
Incorporating natural organic fibers adds an inviting layer of warmth that beautifully balances the cold look of metal shelving. This simple styling choice softens the industrial feel of heavy equipment, creating a cozy and inspiring creative environment.
16#. Swing-Arm Lamp Attachments
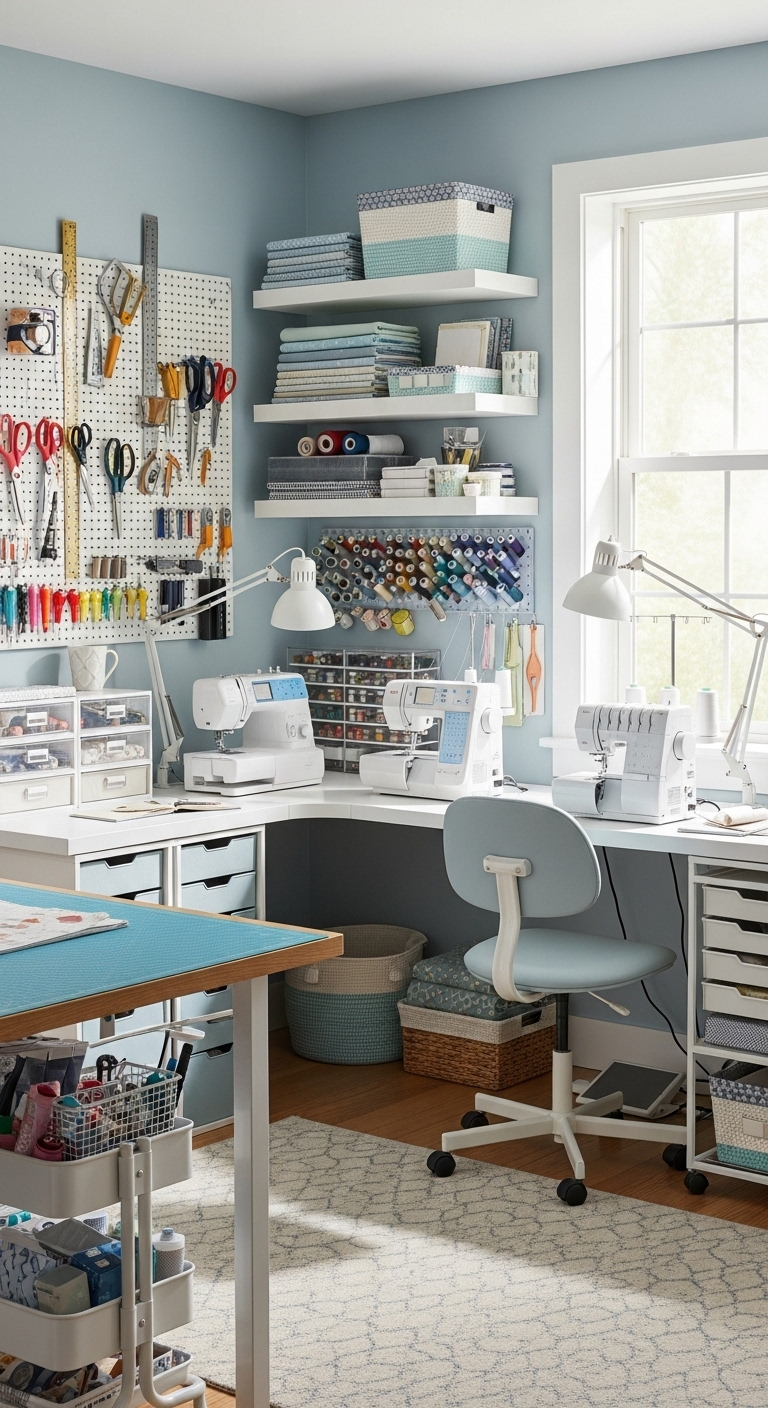
Installing a flexible swing-arm lamp is incredibly effective for directing bright, focused light exactly where your current project demands it. These adjustable fixtures move effortlessly, allowing you to seamlessly pivot the illumination between your cutting table and your sewing machine needle.
Clamping the base of the lamp to a nearby wall shelf or desk edge keeps your primary work surface completely clear of bulky bases. This smart positioning maximizes your available table space, ensuring your fabric can slide freely across the desk without knocking over your light source.
Sufficient illumination is absolutely vital for executing intricate details like precise topstitching, threading small needles, and matching subtle fabric prints. Elevating your brightness levels instantly boosts accuracy, ensuring your seams remain perfectly straight and your cuts stay completely on grain.
Eliminating dark shadows drastically reduces evening eye strain and prevents tension headaches during long, intensive sessions at the machine. Investing in high-quality, targeted workspace lighting makes your creative hours significantly more enjoyable, comfortable, and productive from start to finish.
17#. Dedicated Interfacing Drawers
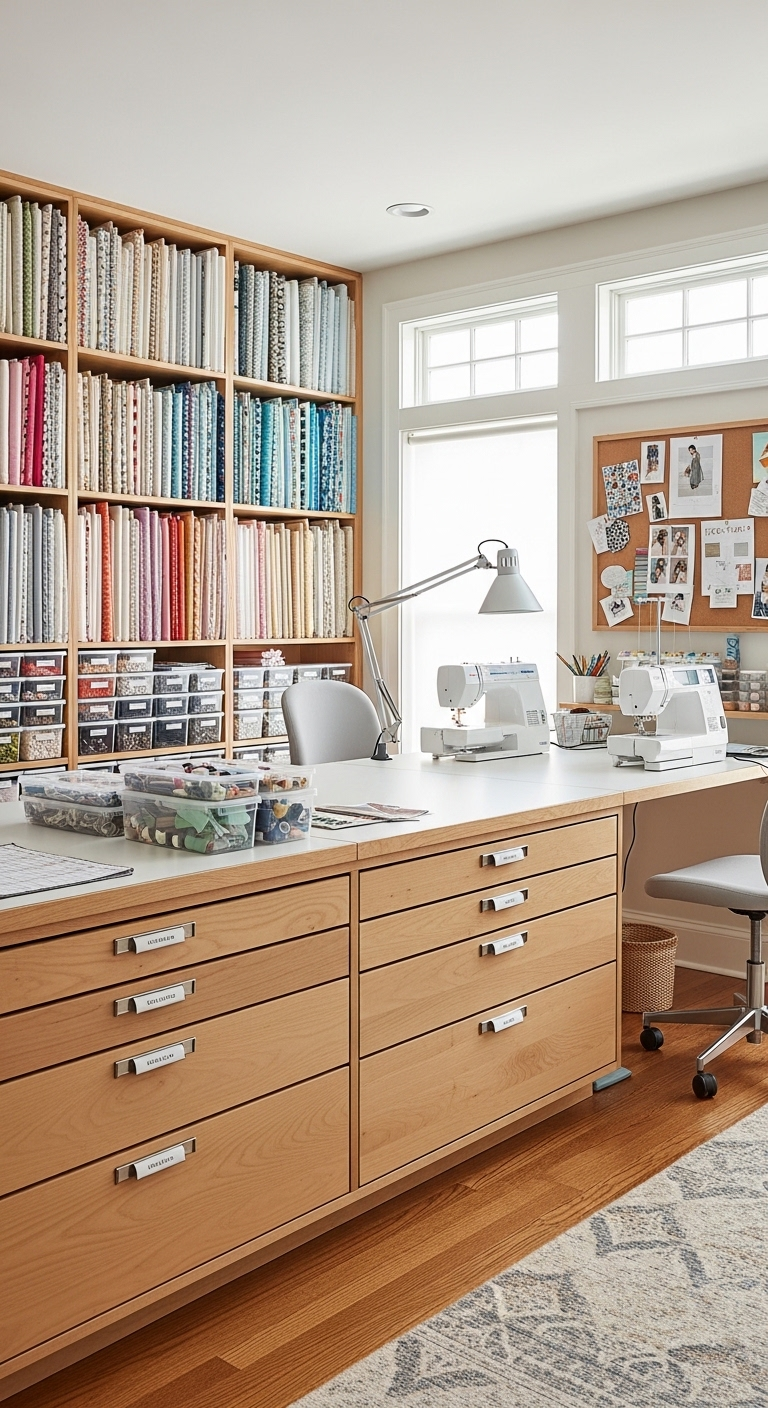
Removing interfacing and stabilizers from their original packaging often makes these chemically treated backing materials look completely identical. Storing your rolls and sheets inside clearly labeled drawers ensures you never accidentally mistake one utility product for another during a busy session.
Using a permanent stabilizer when your delicate project actually requires a temporary, wash-away version can completely ruin an intricate embroidery design. Keeping your structured backings explicitly separated prevents costly mistakes, protecting fragile fabrics from irreversible warping, pulling, or tearing.
Sorting these technical materials systematically by their exact weight and adhesive type streamlines your prep work for garments. Grouping lightweight fusibles apart from heavy tear-aways allows you to instantly select the ideal support layer for your specific fabric type.
This organized approach is an absolute game-changer for consistently achieving crisp collars, clean button plackets, and professional garment edges. Maintaining a labeled inventory ensures your handmade clothing items retain their intended structure, wash after wash, elevating the overall quality of your finish.
18#. Antique Spool Cabinet Accents
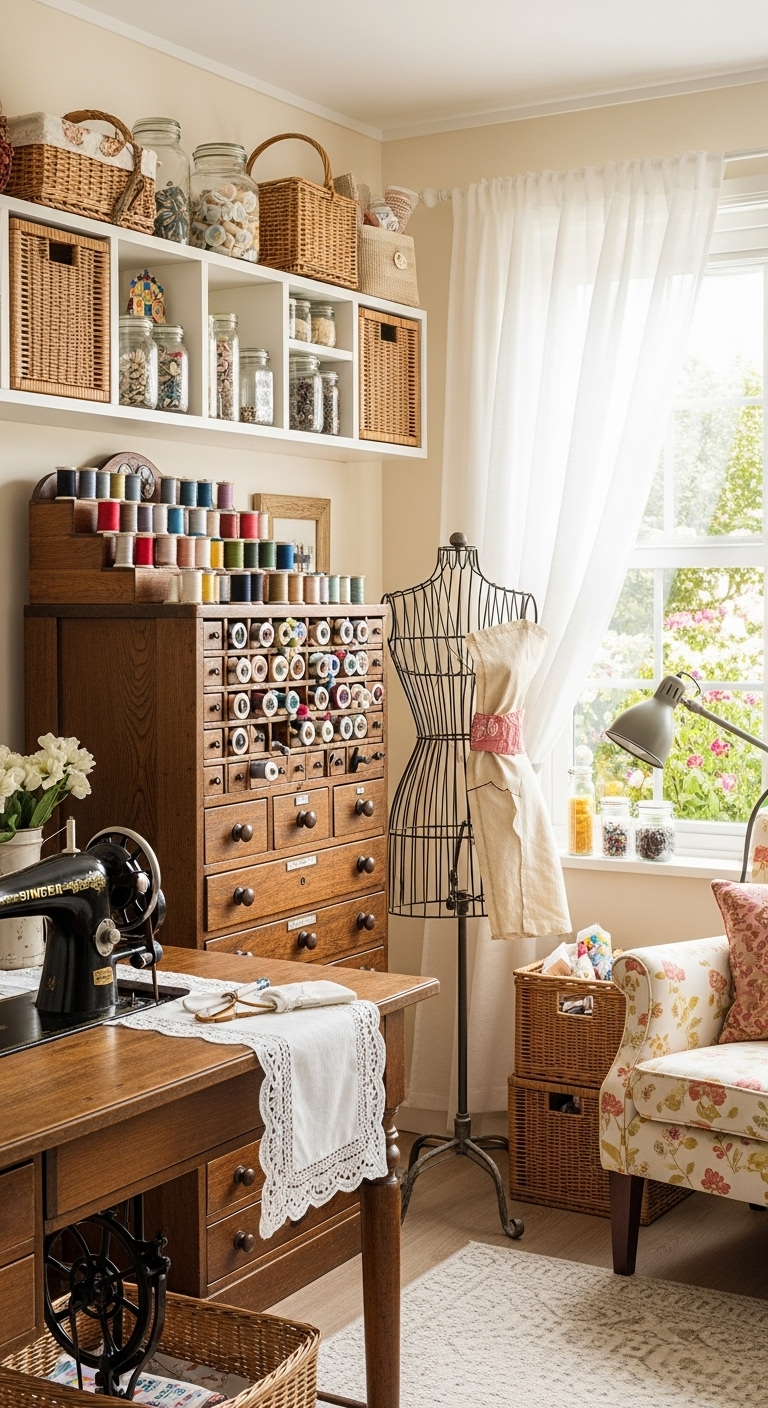
Repurposing a vintage wooden spool cabinet is an incredible way to inject authentic historical charm into a modern creative studio. These antique merchant pieces feature shallow, specialized drawers originally designed to showcase thread spools, making them uniquely suited for sorting tiny notions.
Utilizing these compact compartments allows you to meticulously organize delicate items like hand-sewing needles, specialty buttons, thimbles, and safety pins. This dedicated layout keeps your smallest essentials completely organized, preventing them from floating around randomly in oversized storage boxes.
The rich, weathered wood grain provides a beautiful textural contrast against the slick plastic and bright digital screens of modern sewing equipment. Incorporating this natural element grounds your room, creating a balanced and visually compelling environment that inspires classic craftsmanship.
Positioning a historic piece prominently on your workspace instantly transforms it into a stunning focal point and conversation starter. It serves as a highly functional statement piece that celebrates traditional making, adding an undeniable layer of soul and character to your daily creative routine.
19#. Pattern Drafting Paper Rolls
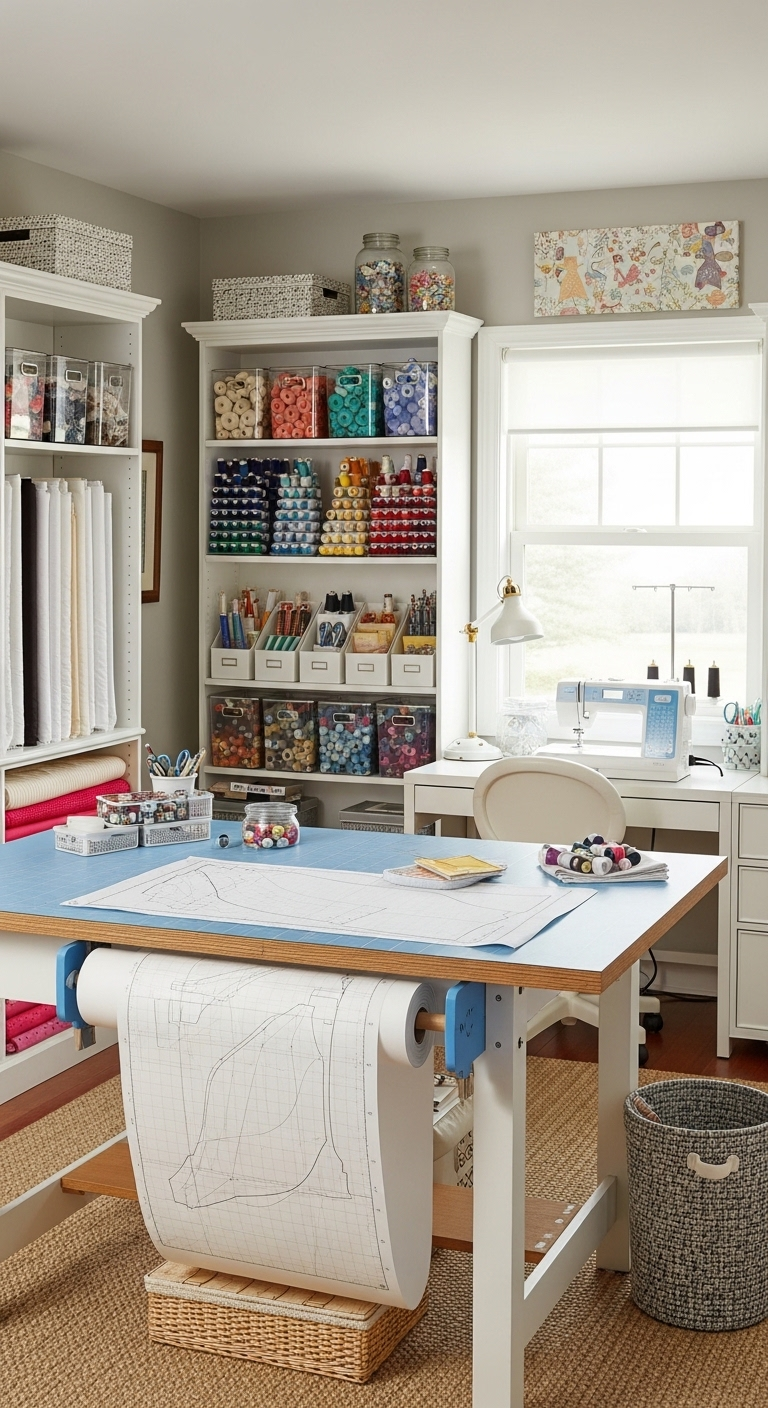
Mounting a heavy-duty roll of brown kraft or white drafting paper directly to your wall allows you to smoothly tear off the exact length needed for custom pattern drafting. This streamlined vertical delivery system prevents premium paper stock from getting creased, bent, or torn on the studio floor.
Suspending the roll flat against a vertical surface ensures you always have a completely crisp, smooth sheet ready for sketching and grading designs. It eliminates the hassle of wrestling with curling edges, allowing you to focus entirely on mapping out accurate garment measurements.
This smart architectural setup is significantly more efficient than tucking awkward, top-heavy paper rolls into corners where they constantly tip over and unravel. Elevating the roll keeps your floor perimeters entirely clear, creating a safer and more organized environment for moving around cutting tables.
Integrating a wall-mounted paper dispenser is a hallmark feature of a highly functional, professional-grade design and stitching studio. It turns a bulky utility item into a sleek, accessible design feature that maximizes your workspace efficiency while keeping your essential drafting materials pristine.
20#. Stackable Notion Suitcases
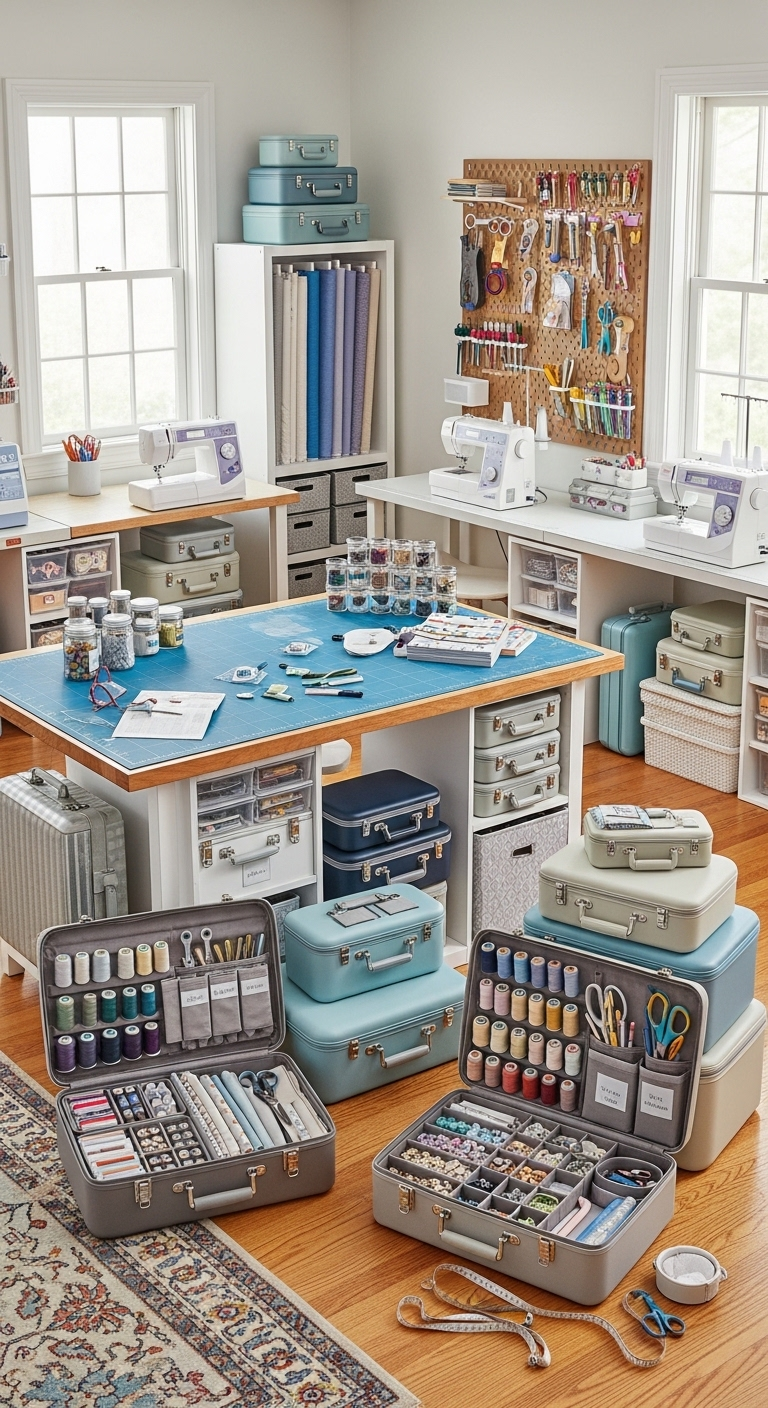
Utilizing vintage-style suitcases or modern clear plastic bins is an excellent strategy for sorting bulk specialty hardware like elastics, zippers, and hook-and-eye closures. Affixing a clear, descriptive label to the front of each container ensures you can immediately identify and retrieve the exact fastening mechanism required mid-project.
These uniform containers are specifically designed for secure stacking, allowing you to maximize the vertical storage capacity of your closet shelves or modular bookcases. This structured approach consolidates hundreds of tiny, loose sewing notions into a compact footprint, keeping them organized without consuming precious table space.
Enclosing your hardware collection inside dedicated bins safeguards delicate metal components from humidity and prevents elastic bands from degrading due to dust exposure. It ensures your structural supplies remain in pristine, production-ready condition, preventing them from scattering into disorganized clutter.
Implementing a modular stacking system transforms a chaotic assortment of fastening supplies into a streamlined, highly functional inventory. It allows your storage layout to effortlessly scale upward as your collection expands, keeping your creative environment feeling spacious, orderly, and professional.
21#. Under-Table Storage Hammocks
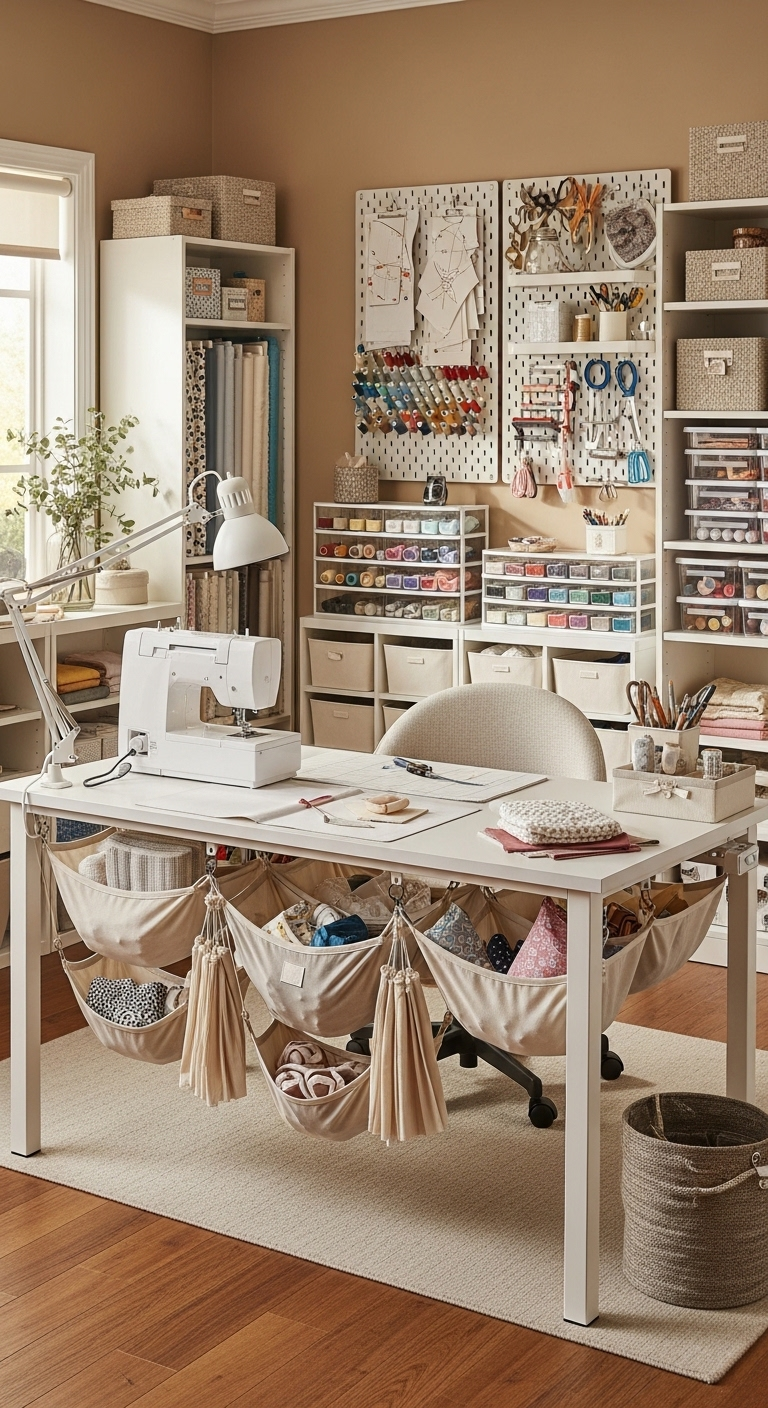
Suspending a custom fabric hammock directly beneath your primary cutting table is an ingenious way to utilize empty, under-the-counter real estate. This flexible sling offers the perfect resting place for oversized rolls of quilt batting, heavy textile bolts, or long cardboard storage tubes.
Elevating bulky soft goods off the studio floor protects them from gathering dust, lint, and stray threads while keeping them completely within arm’s reach. This smart setup ensures your premium materials remain pristine and ready for use, eliminating the need to dig through deep closets mid-project.
Utilizing this forgotten architectural zone allows you to clear out crowded corner areas, instantly making your creative workspace feel more open and organized. The swinging mesh or canvas sling naturally contours to the shape of your rolls, preventing heavy materials from shifting or rolling around on the floor.
Integrating a low-profile textile hammock is a highly practical solution for compact studios where every square inch of storage matters. It transforms an empty structural cavity into a high-capacity storage asset, keeping your floor perimeter clear and your essential materials seamlessly tucked away.
22#. Peg-Rail Finishing Stations
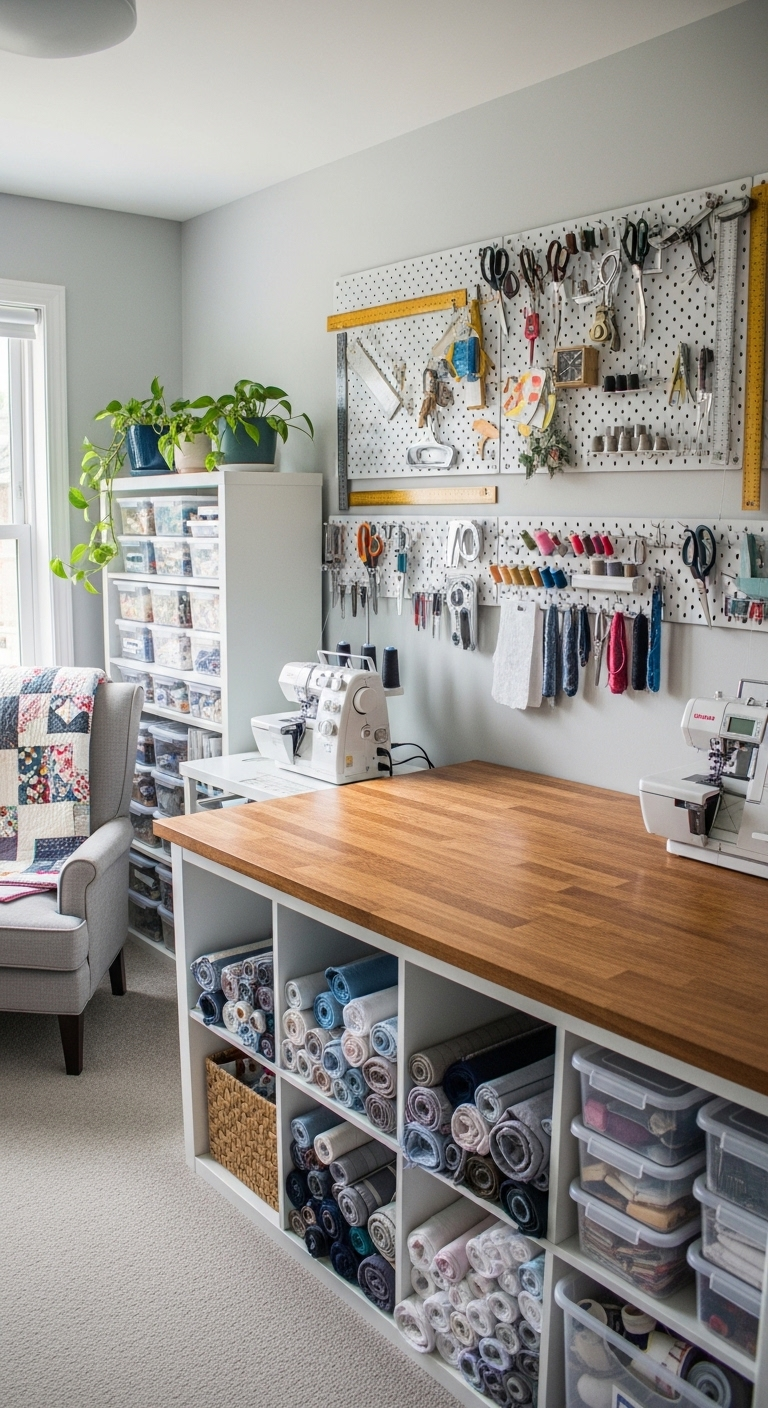
Installing a simple wooden peg rail along your studio wall provides an incredibly practical station for hanging finished garments or freshly pressed fabrics awaiting assembly. This dedicated vertical space keeps your newly sewn items safely off the backs of workspace chairs, preventing them from getting wrinkled, dusty, or caught in rolling wheels.
Utilizing a classic peg rail creates a highly visible “outbox” zone for your completed work, keeping your weekly creative projects organized and ready for final pressing, photography, or packing. This open layout streamlines your production workflow, ensuring your final pieces remain pristine and unblemished before they leave your desk.
Beyond its functional utility, a timeless row of wooden pegs injects a charming, old-fashioned aesthetic that perfectly complements a warm, farmhouse-style craft room. It transforms your active garments-in-progress into a beautiful, rotating wall display, adding a touch of traditional craftsmanship and cozy character to your creative environment.
23#. Retractable Measuring Tapes
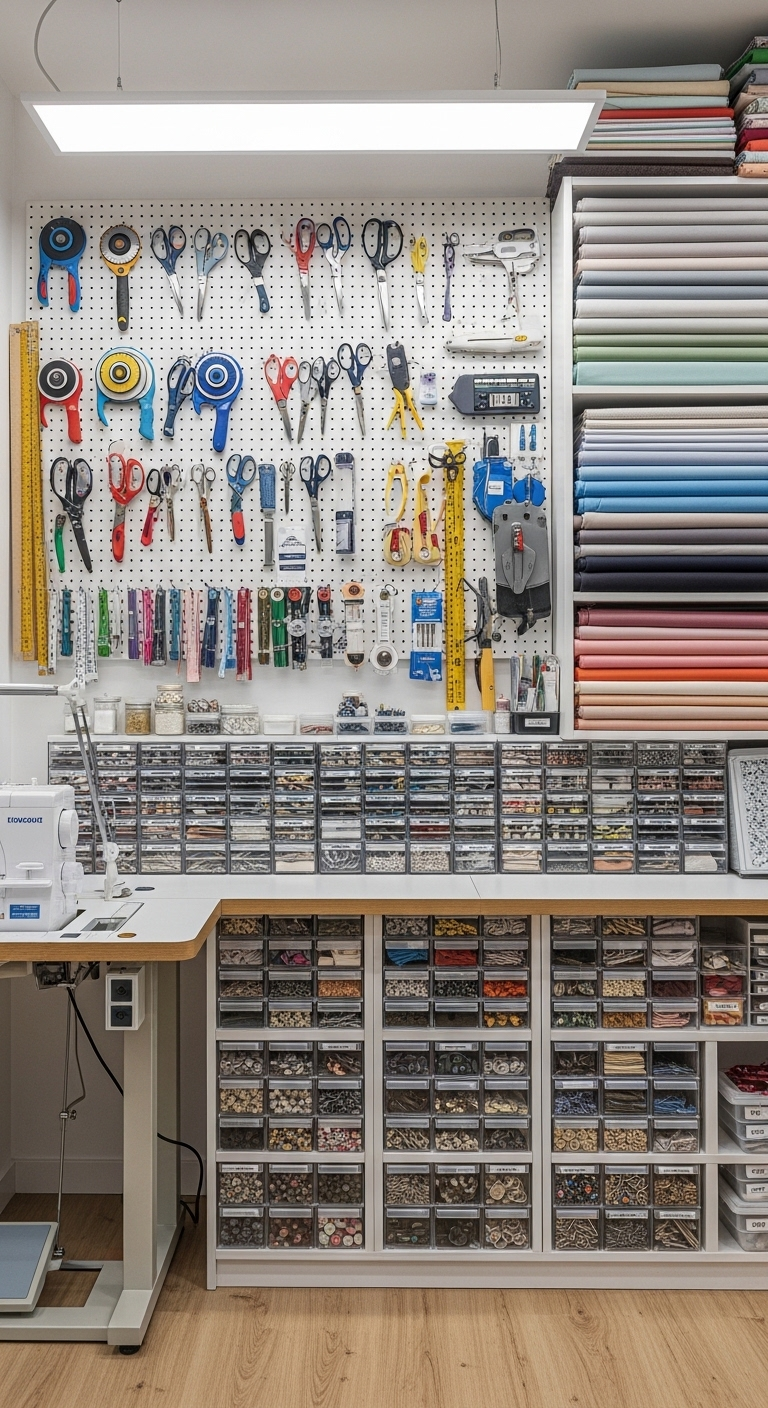
Mounting a retractable measuring tape directly to the edge of your sewing machine table ensures a reliable ruler is always positioned exactly where you need it most. This fixed placement prevents your flexible tape from getting lost, tangled, or completely buried beneath shifting piles of fabric scraps and paper patterns.
Having a dedicated, stationary measuring tool means you can instantly check hemlines, seam allowances, and trim lengths without breaking your creative flow to search the entire room. Because the housing is securely anchored to the side of your machine table, you never have to worry about your tape disappearing or getting misplaced mid-project.
This quick-access setup makes measuring significantly more precise when you are seated directly at the machine, allowing you to double-check fabric dimensions right before lowering the presser foot. It streamlines your daily production workflow, helping you save valuable time while maintaining strict accuracy across every single seam.
Integrating this simple, low-profile tool is a highly practical workflow trick that instantly improves your studio efficiency. It transforms a loose, easily misplaced accessory into a permanent, highly functional station, making your daily construction process smoother, faster, and entirely stress-free.
24#. Acrylic Pattern Weight Trays
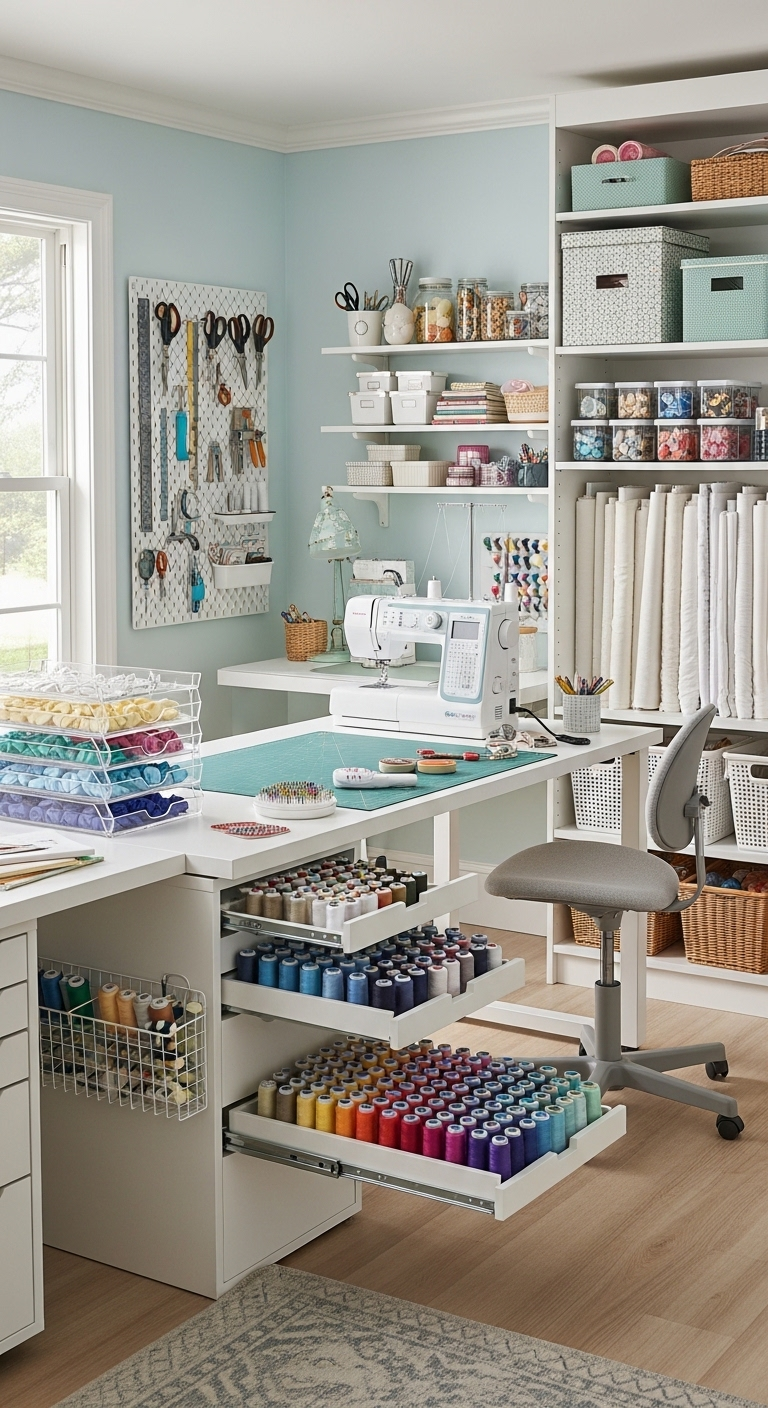
Keeping your pattern weights arranged inside a shallow tray directly on your cutting table is an excellent way to prevent them from rolling around and getting lost. Confining these heavy, compact tools to a single designated vessel keeps your immediate cutting surface look pristine, orderly, and beautifully styled.
Giving your weights a permanent, visible home ensures you can instantly reach for them without interrupting your layout or cutting workflow. Instead of scattering randomly across your project pieces, the weights remain corralled in front of you, turning essential utility items into a cohesive design feature.
This simple organizational habit adds a polished, professional touch that elevates the entire aesthetic of your creative environment. It proves that a well-planned workspace functions best when even the smallest cutting accessories have a clear, stylish home right at your fingertips.
25#. Desktop Needle Organizers
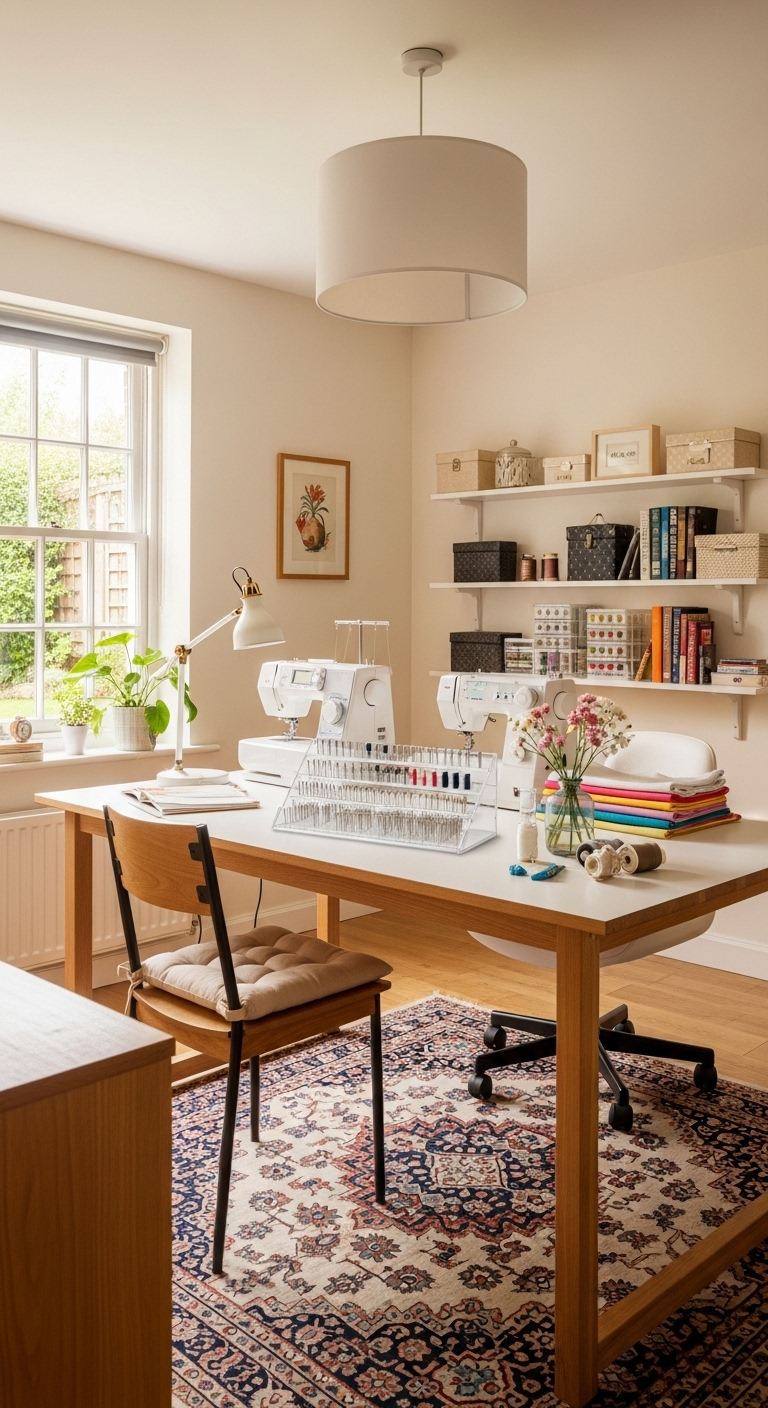
Keeping your sharp universal needles completely separated from ballpoint and stretch needles inside a dedicated, divided dish is an essential step for flawless garment construction. Having distinct compartments prevents you from accidentally grabbing the wrong point type and using it on a delicate or stretchy fabric by mistake.
This simple sorting dish allows you to organize your active machine needles neatly by their specific type, size, and coating, making it incredibly easy to swap them out quickly as you change project materials. It eliminates the guesswork of inspecting tiny, unlabeled shanks under a magnifying glass mid-project.
Using the correct needle point for your specific textile is absolutely vital because it prevents skipped stitches, puckered seams, and irreversible fabric damage like runs or snags. This small habit ensures your stitch tension remains flawless and your finished garments look completely professional.
Incorporating a dedicated needle dish into your immediate workspace is a must-have setup for anyone aiming for high-precision results. It guarantees that the exact tool required to protect your fabric is always organized, visible, and ready to drop into the needle bar.
26#. Uniform Plastic Scrap Bins
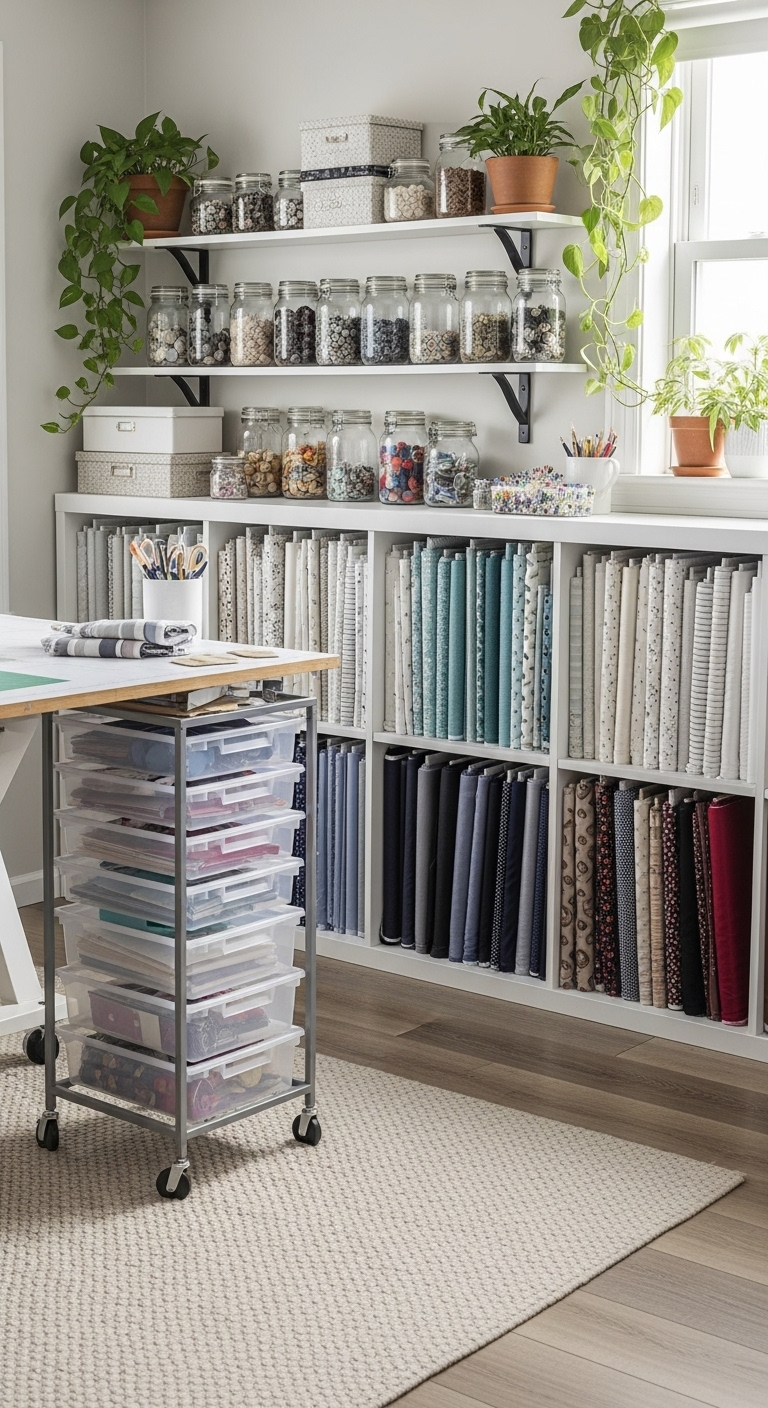
Sorting your fabric leftovers into clearly labeled, color-coded bins makes finding the perfect piece for small applique motifs or intricate quilt blocks incredibly easy. This systematic approach ensures your valuable textiles never devolve into a chaotic, tangled pile at the bottom of a dark utility closet.
Maintaining a highly visible, color-sorted system allows you to immediately evaluate your current inventory before cutting into pristine, full-yardage fabric bolts. It keeps your storage areas impeccably tidy and keeps your immediately usable remnants organized, accessible, and ready for production.
Transforming your daily textile waste into a beautifully organized creative resource is an excellent way to cultivate sustainable, zero-waste crafting habits. It allows you to maximize the utility of every single square inch of designer fabric, reducing workshop waste while saving money on future project materials.
Implementing these dedicated sorting bins is an essential strategy for managing the high volume of leftovers generated in a busy, productive maker life. It turns a potential mess into an inspiring palette of pre-curated color stories, making your entire design and construction process far more efficient and environmentally conscious.
27#. Hanging Ironing Board Hooks
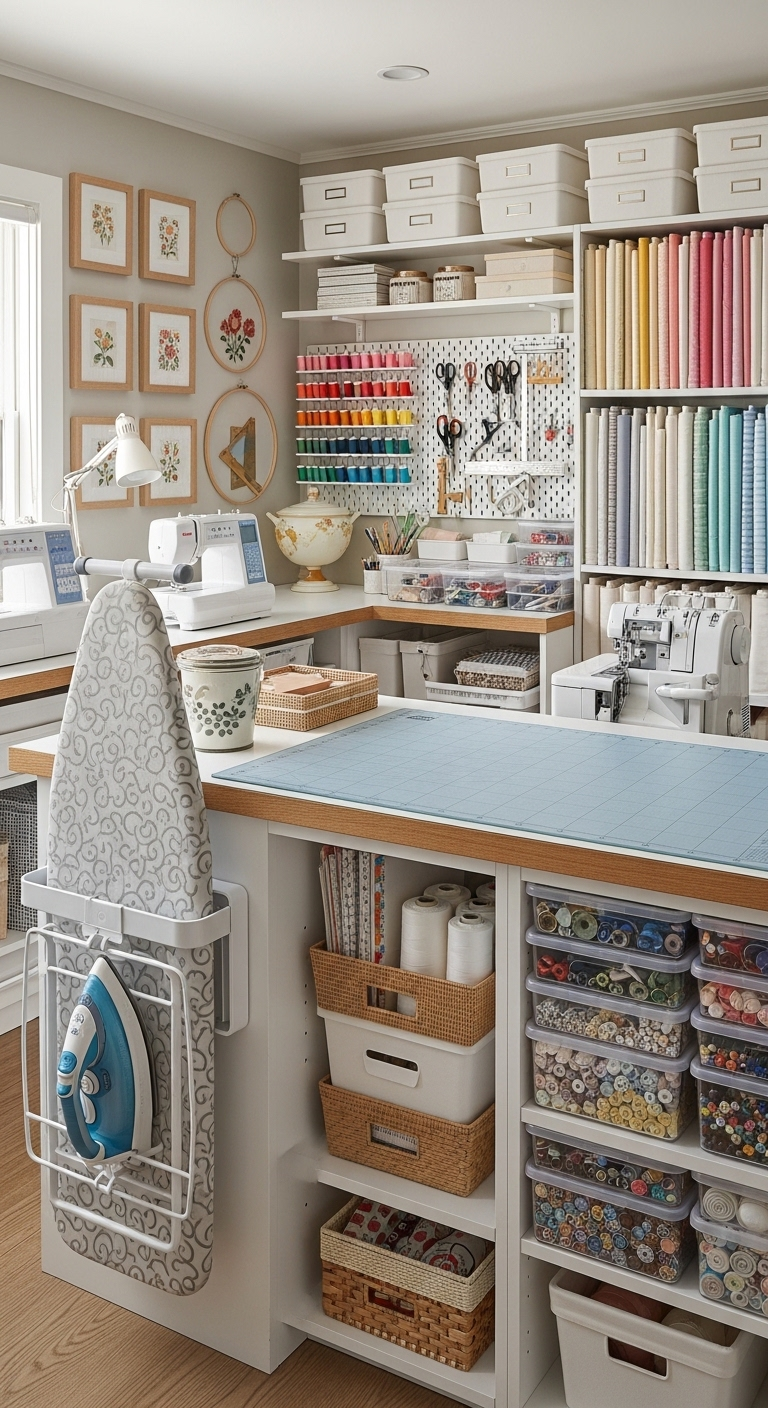
Storing your ironing board flat against a wall or suspended on the back of a studio door is an exceptional way to clear valuable floor perimeter space. This vertical setup ensures your heavy pressing equipment stays completely out of the way of rolling chairs and fabric bolts while remaining instantly accessible whenever you need to press a seam.
Keeping your board permanently mounted yet off the floor means you can easily retrieve it mid-project without wrestling with cluttered closets or tight corners. Because it drops down or slides off its hooks effortlessly, it encourages a seamless workflow where pressing every single seam becomes second nature.
Suspending the board vertically also prevents airborne lint, threads, and workshop dust from gathering on the fabric cover between projects. This cleanliness is vital for garment construction, ensuring your pristine, light-colored silks and cottons never absorb stray grime or heat-set stains during a press.
Implementing a wall or door mount is a highly practical, space-saving strategy for multi-use creative rooms where square footage is at a premium. It transforms a bulky, awkward utility item into a streamlined fixture that maximizes your studio layout while keeping your pressing station clean, efficient, and production-ready.
28#. Tiered Ruler Display Racks
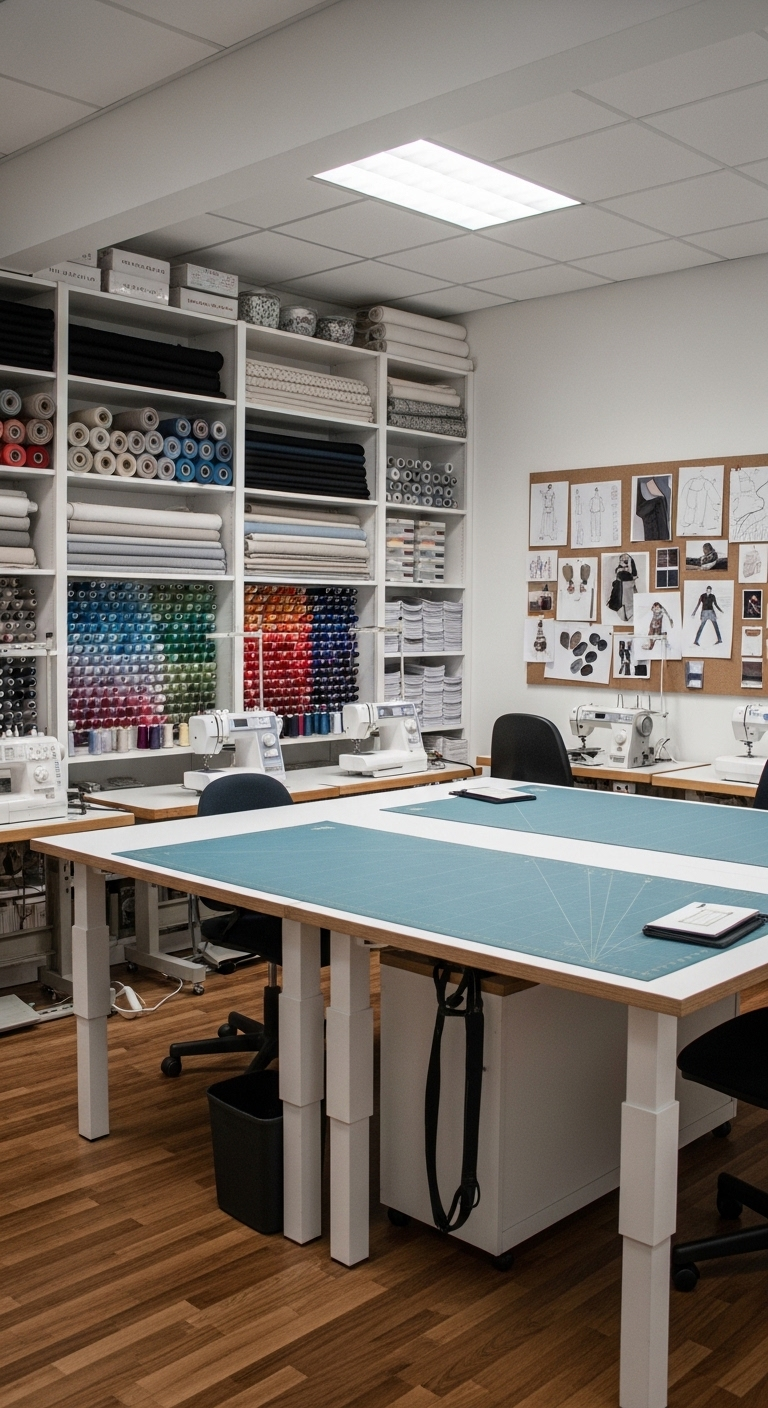
Utilizing a dedicated wooden rack with vertical slots is an exceptional strategy for organizing your acrylic quilting rulers systematically by size and shape. Keeping each ruler upright in its own individual channel prevents the smooth plastic surfaces from rubbing against one another, completely eliminating the risk of surface scratches that can blur critical measurement grids.
Displaying your transparent rulers in a structured, upright layout right on your cutting table instantly gives your workspace a polished, highly professional appearance. Because these specialized measuring tools are securely corralled in a central desktop hub, they remain perfectly visible and immediately within arm’s reach the moment you need to square up a block or draft a precise line.
Storing long, rigid rulers vertically is significantly safer than leaving them flat on a crowded table where they can easily be buried, chipped, or cracked under heavy cutting mats and irons. Having a fixed home on your desk completely eliminates the frustration of hunting for a misplaced grid tool, keeping your premium acrylic gear pristine and structurally sound.
This organizational approach is a favorite workflow secret among precision quilters who demand absolute accuracy and efficiency in their sewing rooms. It transforms a scattered pile of awkward, slippery plastic tools into a streamlined, high-functioning inventory system, providing an essential foundation for flawless, stress-free cutting and design work.
29#. Vertical Stabilizer Tubes
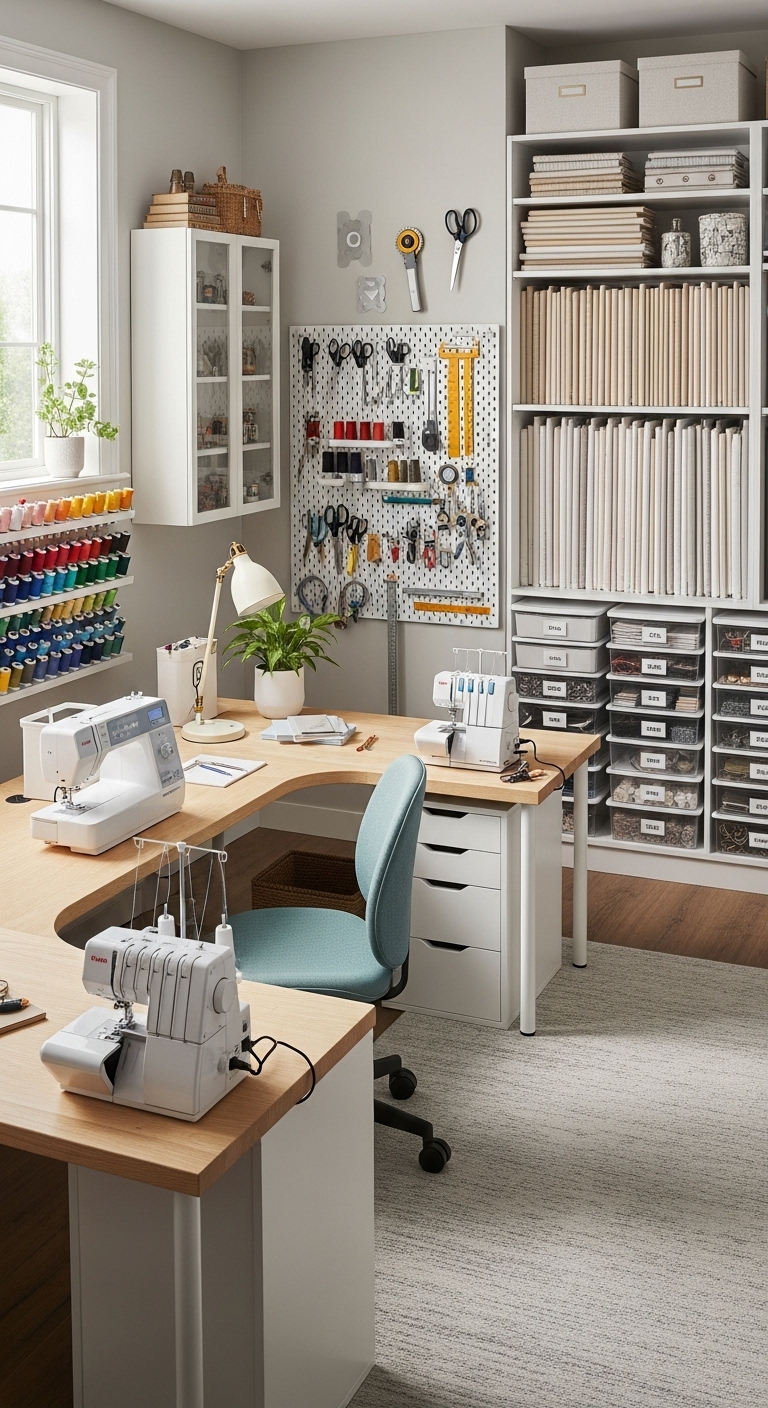
Slipped inside upright cardboard or rigid plastic tubes, your rolls of embroidery stabilizer and garment interfacing remain perfectly upright and easy to identify on an open shelf. This simple encasing method acts as a supportive sleeve, completely preventing slippery rolls from unrolling, buckling, or turning into a tangled nest of yardage at the bottom of your drawers.
Utilizing individual tubes creates a highly visible, uniform column layout that keeps your delicate backing materials tightly wound and immaculately organized. This low-profile trick instantly eliminates workspace clutter, ensuring that specialty rolls never unravel, crease, or absorb stray moisture while waiting for a project.
Affixing a clear label directly to the exposed top cap or rim of each tube allows you to instantly identify the exact type and weight of the material inside. You can quickly grab a lightweight fusible or a heavy tear-away backing without wasting time unrolling multiple lookalike products just to check their texture.
Implementing this budget-friendly storage hack is an incredibly smart, inexpensive way to manage essential structural supplies that are notoriously difficult to keep tidy. It transforms a floppy, awkward category of materials into a sleek and structured vertical grid, maximizing your shelving space while keeping your production workflow fast and effortless.
30#. Transparent Button Chests
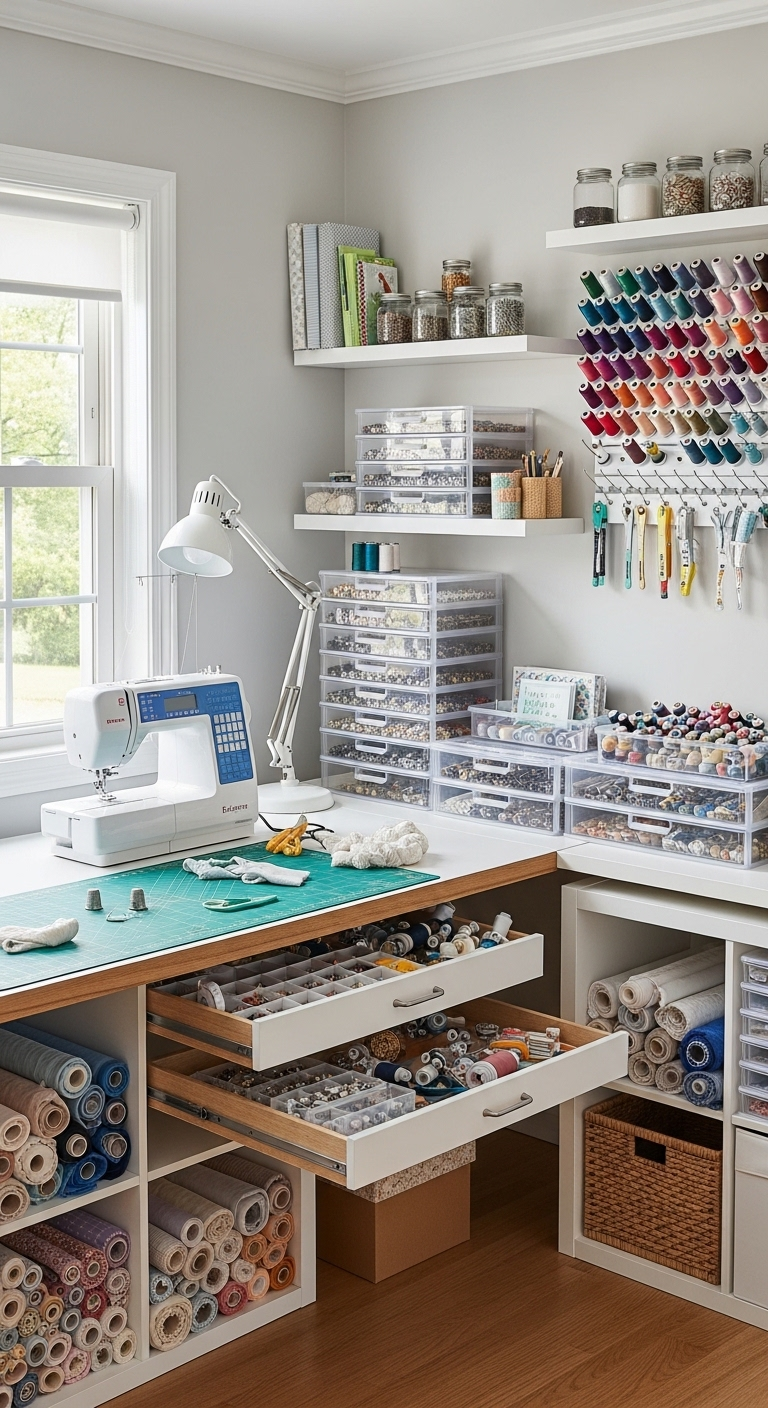
Utilizing a miniature chest of drawers is a spectacular strategy for organizing a growing button collection by color, size, and material composition. Instead of sifting through a chaotic, mixed jar, sorting your buttons into dedicated miniature compartments allows you to view your entire inventory at a single glance. This structured layout transforms selecting the perfect closure for a garment from a tedious chore into an inspiring design process.
These compact multi-drawer chests are perfectly scaled to sit comfortably atop a sewing desk or an open bookshelf without encroaching on your primary cutting or drafting space. They compress hundreds of tiny, loose items into a minimal desktop footprint, keeping your immediate work surfaces completely clear and orderly.
Beyond their practical utility, these tiny chests offer a beautiful way to showcase the rich colors and unique textures of your favorite vintage and specialty notions. By turning utilitarian fasteners into a curated visual display, you elevate the aesthetic of your workspace while keeping your essential crafting components perfectly cataloged and ready for production.
31#. Custom Thread Caddies
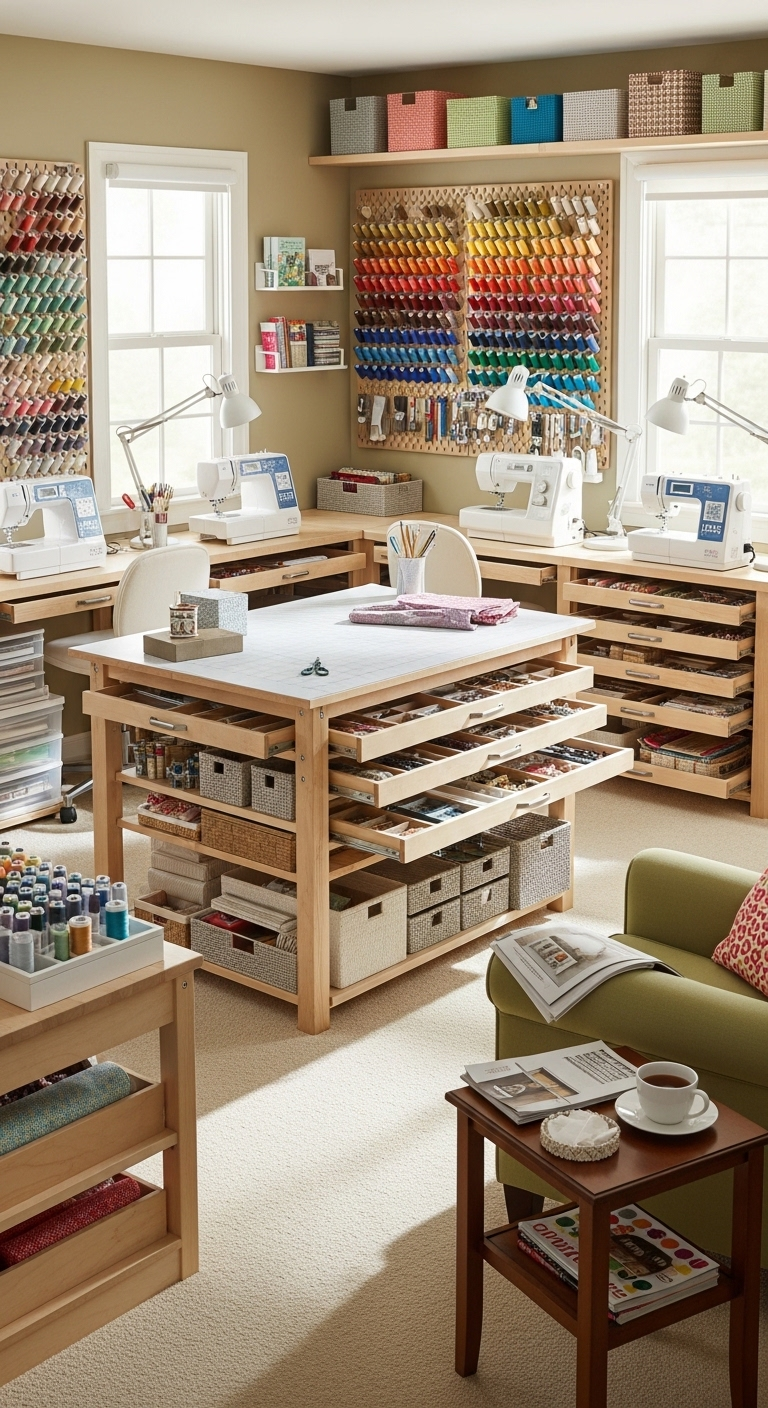
Crafting a custom insert or portable tray to hold your thread spools directly inside a drawer keeps your entire palette organized, upright, and perfectly neat. This mobile design allows you to lift the entire caddy out of its storage slot and bring it right to your sewing machine table whenever you are ready to construct a garment or match a color story.
Enclosing your threads inside a dedicated drawer completely shields your delicate spools from airborne workshop dust and harmful UV sunlight when they are not in use. This protection is absolutely critical for long-term fiber preservation, preventing premium cotton and polyester threads from fading, becoming brittle, or snapping mid-stitch due to light exposure.
This flexible, mobile setup is an ideal solution for makers who prefer completely clear, minimalist workspaces but still want their sewing notions within arm’s reach. It keeps your primary cutting and pressing tables entirely free of clutter, giving you more physical room to maneuver large fabric panels and heavy pattern blocks during assembly.
Integrating a removable drawer caddy adds a highly adaptable, professional layer to your studio workflow. It blends the pristine protection of deep storage with the speed of an open desktop display, ensuring your essential sewing threads remain organized, pristine, and entirely responsive to your daily creative needs.
32#. Under-Cabinet Task Lighting
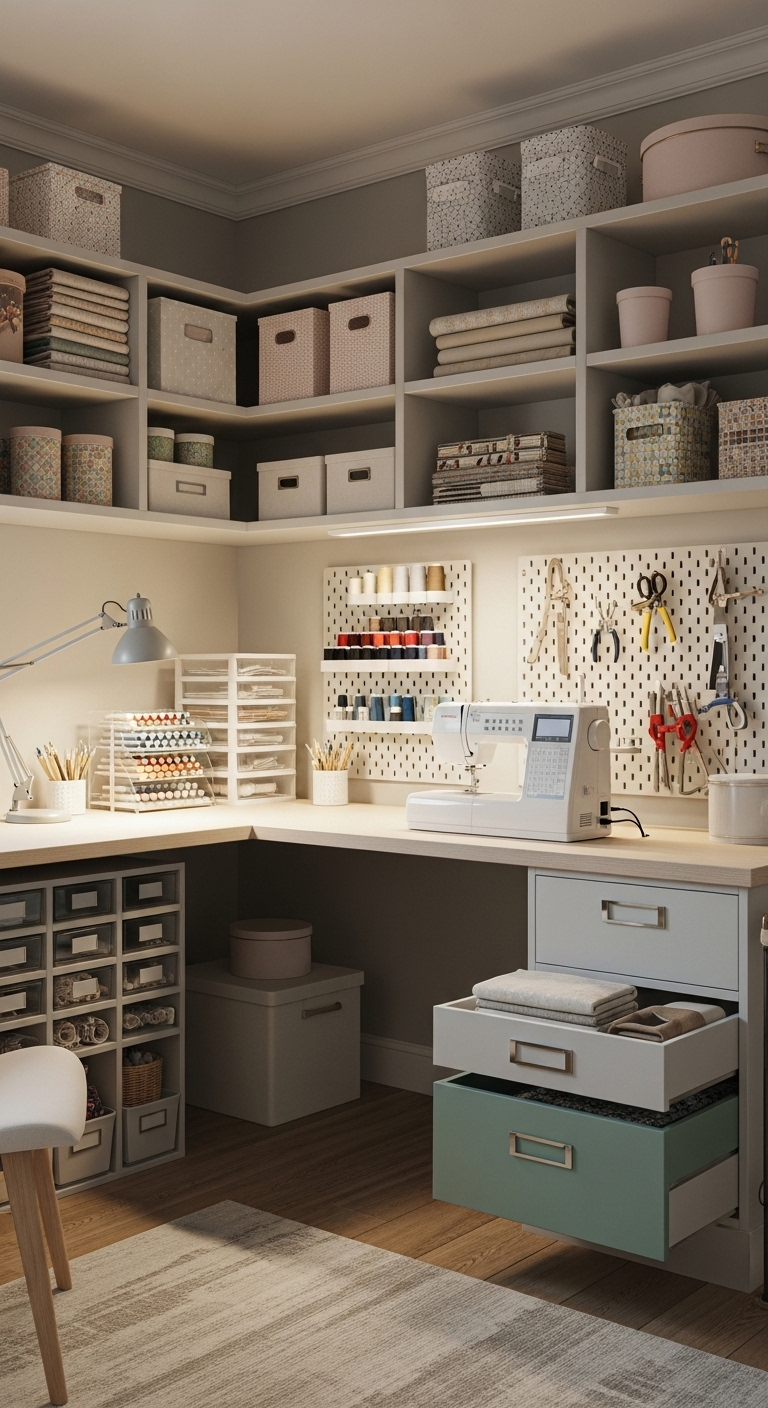
Installing low-profile LED light strips directly beneath your wall shelves completely eliminates frustrating shadows on your primary cutting mats and sewing machine beds. This steady, crisp illumination provides a perfectly uniform field of view, making it effortless to track delicate pencil markings, align grainlines, and see fine thread details during late-night production sessions.
Having a dedicated, direct light source trained onto your active project space significantly reduces eye strain and mental fatigue during intricate construction tasks. Because the light is positioned directly above your hands, it floods the machine needle plate and presser foot with clarity, making complex edge-stitching, topstitching, and seam-ripping incredibly simple to execute.
High-quality task lighting acts as a critical organizational layer, ensuring that every tool, marking gauge, and fabric grain is highly visible and easy to manage. Bright, well-lit surfaces prevent you from making costly cutting errors or misaligning pattern pieces, allowing you to maintain strict quality control over your garments from start to finish.
Beyond its technical utility, integrating sleek under-shelf lighting instantly elevates the design aesthetic of your studio, giving it a polished, highly professional appearance. It transforms a dark, overcast desk into an inviting, high-efficiency workstation, ensuring your creative environment remains inspiring and fully functional at any hour of the day.
33#. Hanging Macramé Project Bags
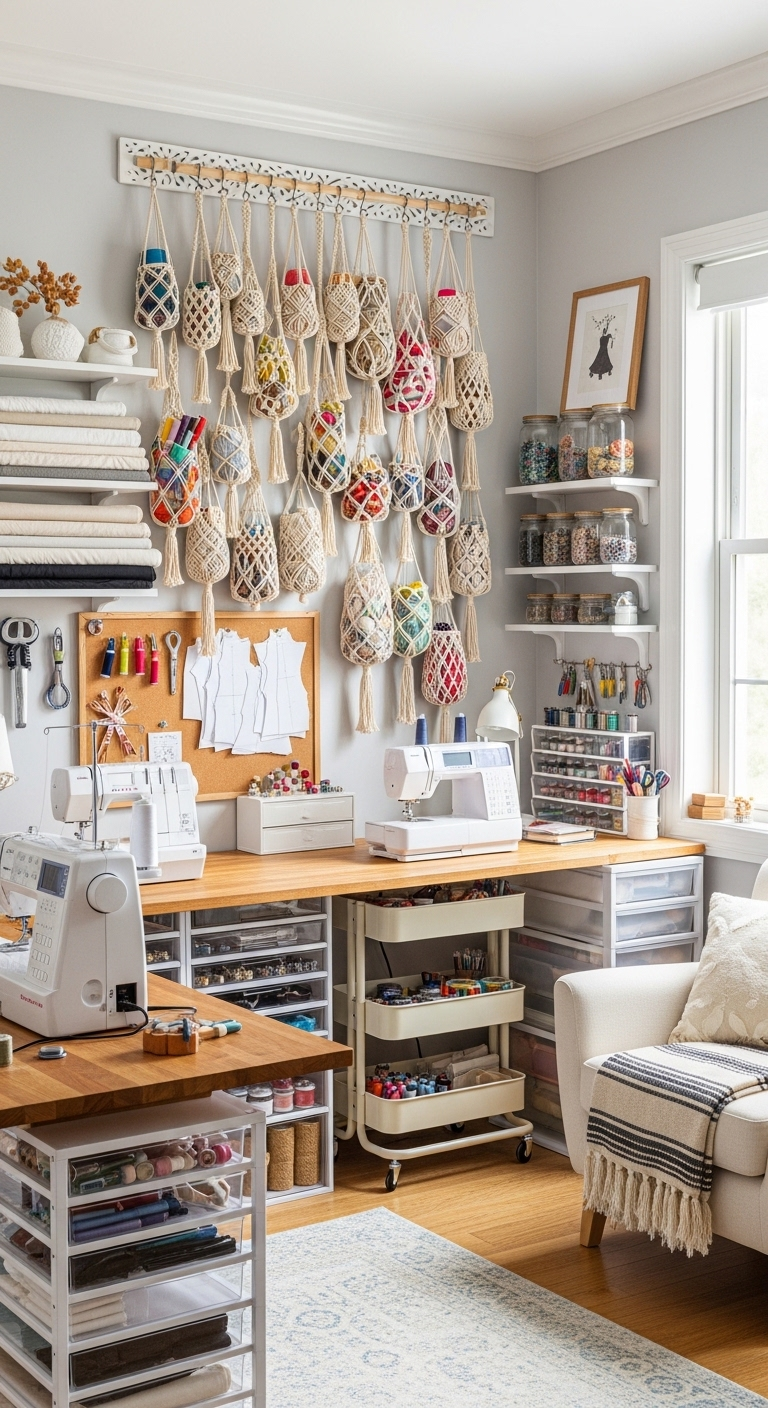
Slinging your active projects-in-progress into breathable woven bags is a wonderful way to protect unfinished garments and delicate blocks from gathering workshop dust or getting damaged by curious pets. Suspending these beautiful, textured totes from an open pegboard or a sleek door hook keeps your current works completely off the floor and safely out of harm’s way.
Utilizing vertical wall space to house your ongoing designs acts as a highly visible, tactile storyboard. Keeping your active fabrics and color palettes out in the open, rather than tucked away in dark bins, serves as a constant source of creative inspiration that gently coaxes you back to the sewing machine.
This vertical storage strategy is incredibly effective for maintaining an airy, beautifully organized layout, even when you are managing multiple detailed projects at the exact same time. It compresses bulky, loose fabric panels into a minimal, elevated footprint, allowing your studio to remain perfectly clear, spacious, and easy to navigate during heavy production weeks.
Beyond its physical efficiency, introducing natural woven fibers adds an organic texture and a warm, inviting charm to your creative environment. It effortlessly transforms a busy maker studio into a calm, peaceful retreat, proving that a high-output workspace can still feel deeply relaxing, grounded, and visually serene.
34#. Clear Pattern Envelope Bins
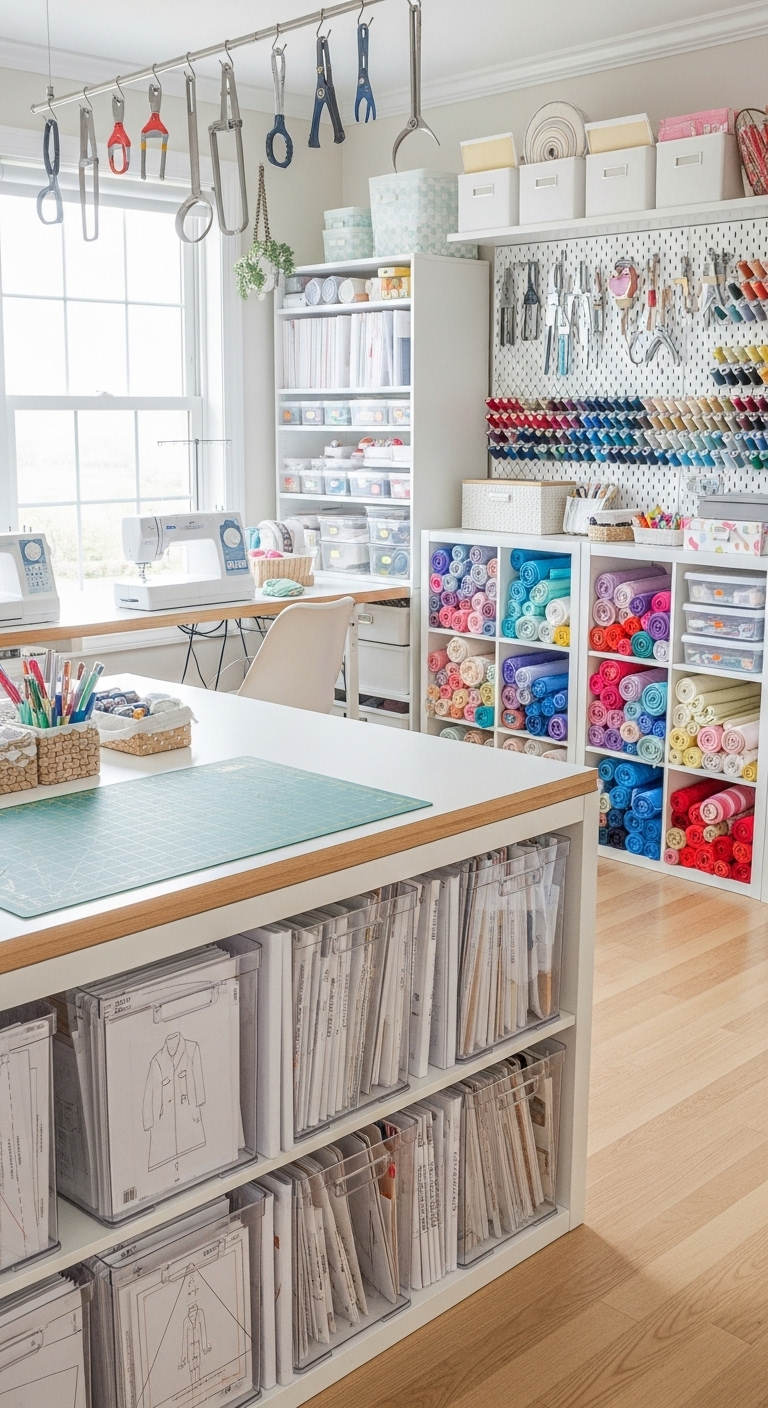
Storing your sewing patterns inside clear plastic bins is an incredibly helpful way to audit your design collection at a glance. Because the containers are completely transparent, you can flip through commercial pattern envelopes effortlessly to find exactly what you need without unstacking or disrupting the entire row.
Organizing your patterns systematically by garment category—such as separating dresses, tops, trousers, and outerwear—saves an immense amount of time during the project planning phase. Instead of digging through a mismatched pile, you can instantly pull the dedicated “tops” or “dresses” bin, locate your target style, and transition straight to cutting your fabric.
These sleek, modern bins are perfectly scaled to fit standard bookshelves, preventing a growing library of paper designs from slumping, creased edges, or sliding out of order. Enclosing them in rigid, transparent containers guards your delicate tissue layouts and instruction booklets against dust and tears, ensuring your foundational templates stay pristine for years.
Implementing this simple, visual filing system brings a clean and organized aesthetic to your studio shelves. It transforms a notoriously floppy, easily damaged category of supplies into a highly structured, modern library, keeping your creative assets beautifully preserved and completely production-ready.
35#. Magnetic Bobbin Rings
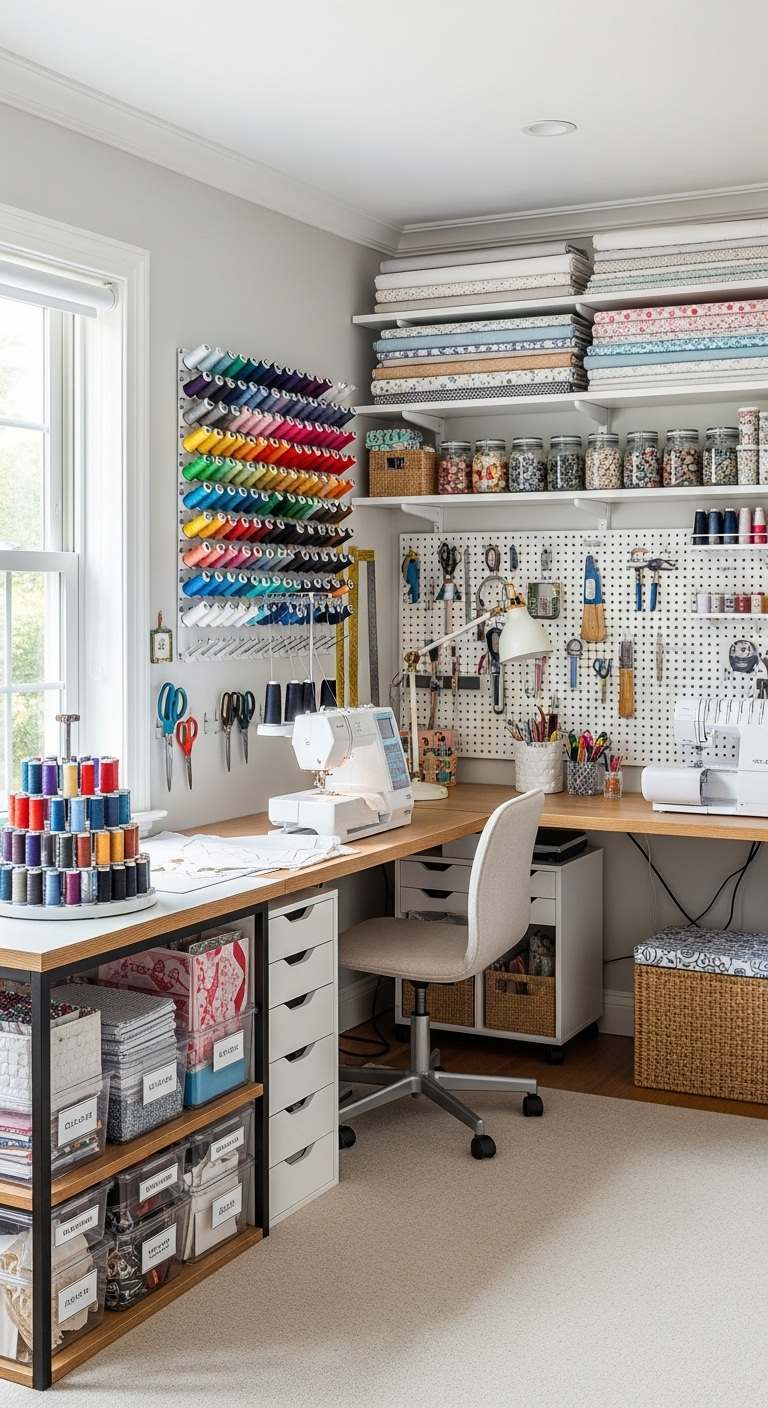
This smart silicone ring grips your bobbins firmly to stop threads from unwinding or rolling off your desk. Keeping this compact holder right next to your sewing machine ensures your essential colors stay organized.
You can instantly grab the exact thread shade you need without interrupting the creative flow of your project. The flexible material stretches easily to accommodate various bobbin sizes while maintaining a completely secure hold.
A cluttered sewing station quickly derails your productivity and causes unnecessary frustration during a busy design session. Incorporating this simple storage solution clears up your surface area so you can focus entirely on your craft.
Small adjustments to your daily workflow yield massive benefits for your overall efficiency and long-term peace of mind. Investing in practical, streamlined tools transforms a chaotic workspace into a highly functional and inspiring creative studio.
36#. Rolling Cutting Table Extensions
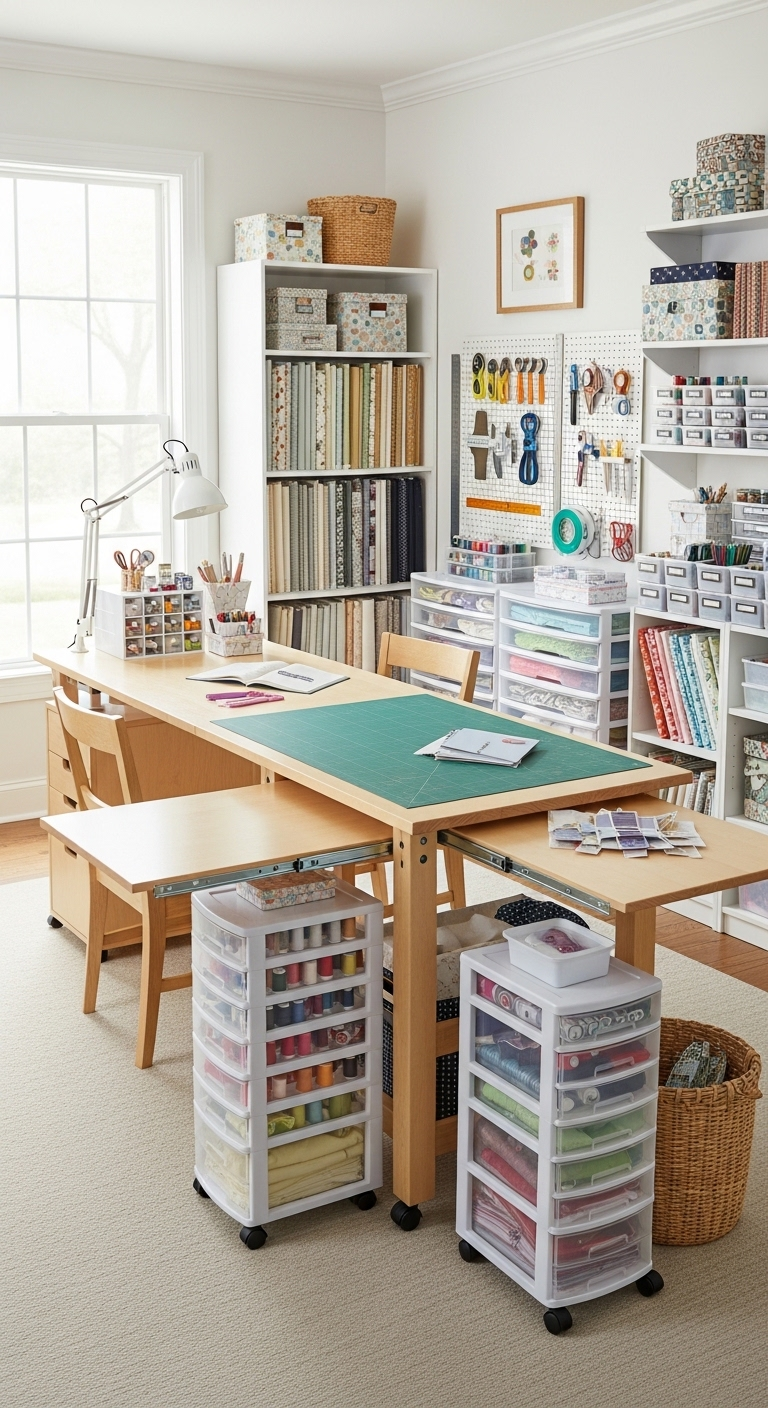
A rolling extension table provides the expansive surface area required for cutting and assembling large-scale quilting projects. You can easily bring this mobile unit out only when needed, avoiding a permanent footprint in your room.
The temporary workspace allows you to comfortably layout heavy fabric layers without sacrificing your permanent floor space daily. It offers the structural support necessary to manage substantial textile pieces without straining your posture or your equipment.
Once you complete a major project, simply slide the mobile extension against a wall or tuck it beneath an existing shelf. This quick transition instantly restores your room’s open feel and keeps your traffic lanes entirely clear and safe.
Opting for adaptable furniture is an excellent strategy for creators who regularly alternate between large and small projects. Integrating a versatile rolling surface ensures your studio remains highly functional without ever feeling cramped or cluttered.
37#. Wall-Mounted Template Hooks
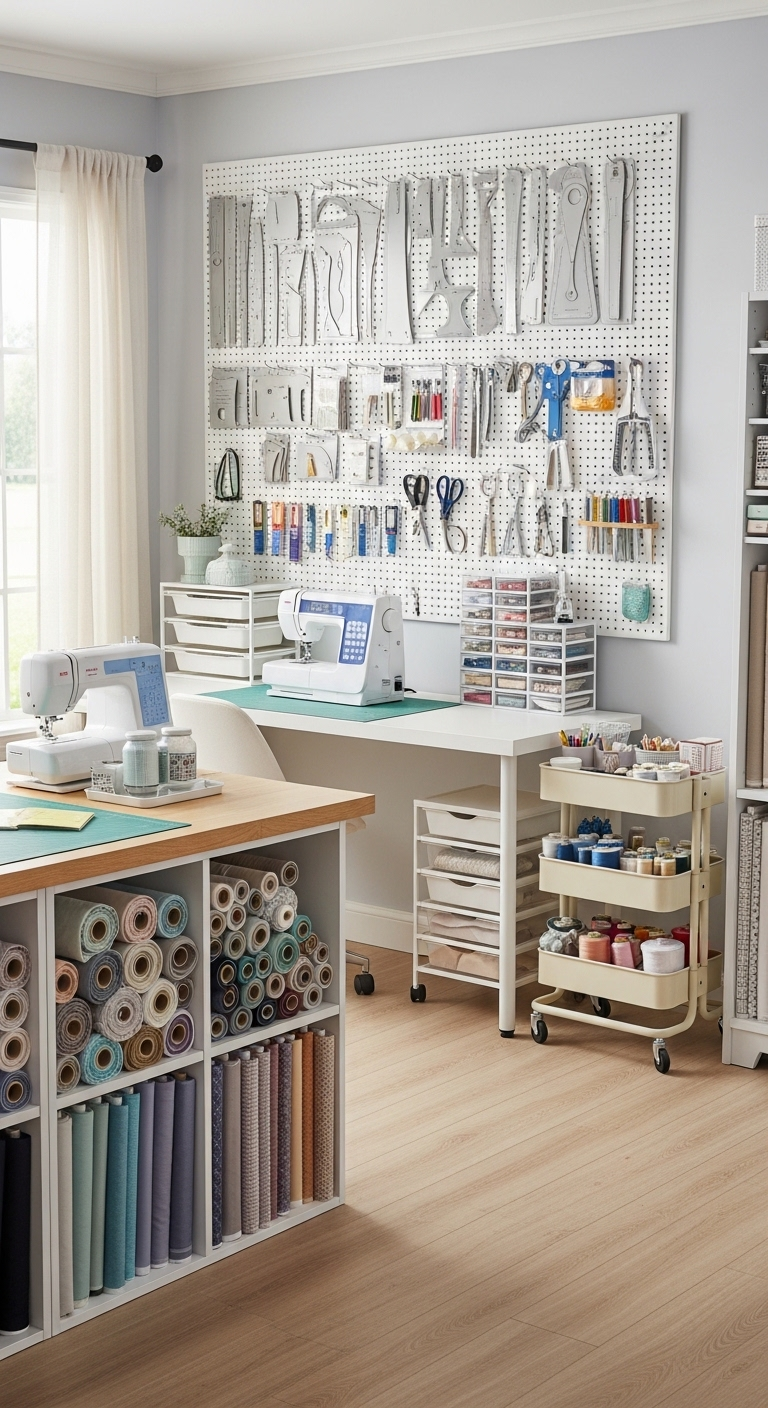
Hanging large pattern templates directly on the wall prevents delicate materials from getting creased, bent, or damaged in crowded drawers. This practical storage method ensures your essential design guides remain completely flat and ready for immediate use.
Utilizing your vertical wall space transforms standard technical tools into an eye-catching graphic display that celebrates your craft. Exposing your collection creates an inspiring focal point in the room that feels entirely intentional and design-focused.
Visible organization serves as an excellent visual prompt to remind you of diverse project options and upcoming creative ideas. Keeping these foundational pieces out in the open streamlines your preparation phase before starting a complex layout session.
This innovative approach offers a highly efficient way to manage bulky, intricate, or easily warped drafting components without hassle. Elevating your active materials preserves their structural integrity while turning a busy studio into a beautifully curated environment.
38#. Clear Vinyl Project Envelopes
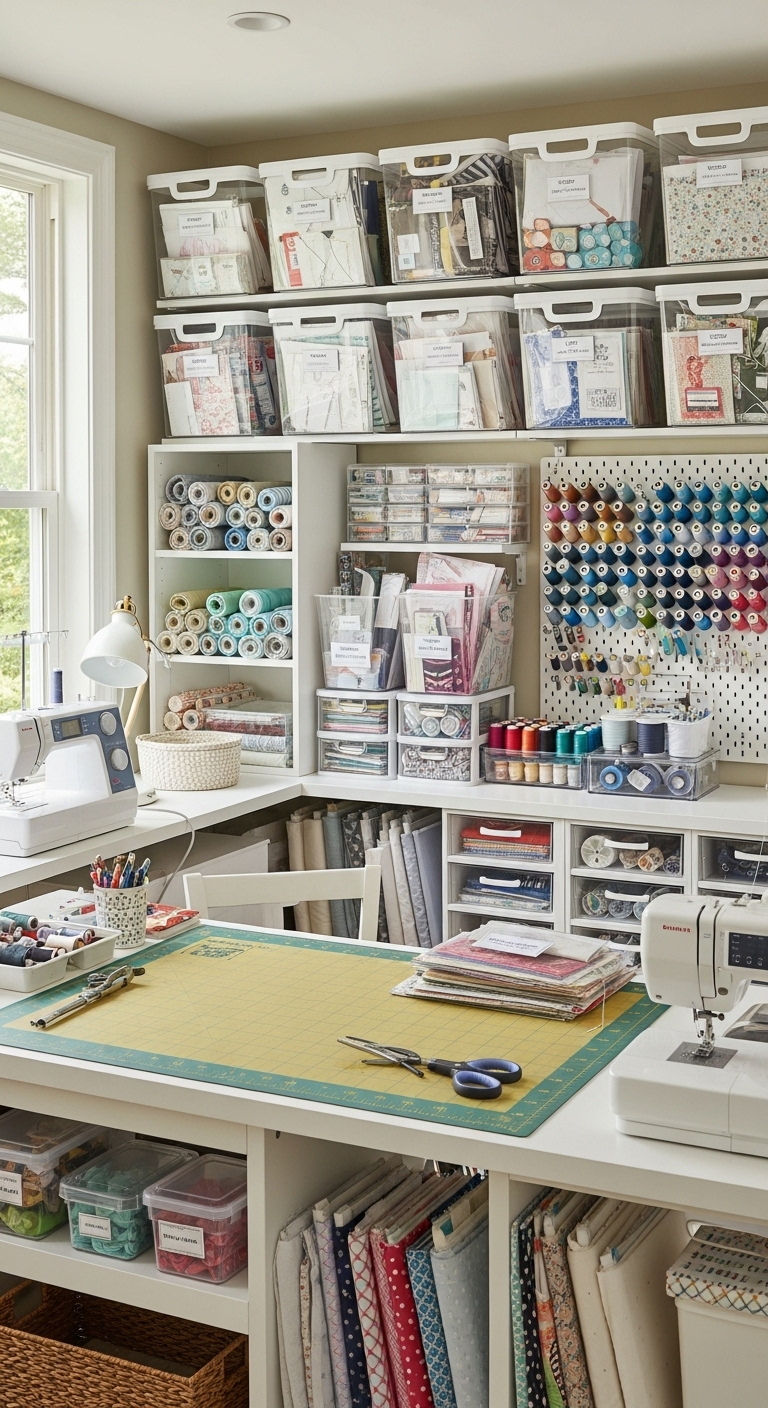
Storing your fabric, pattern pieces, and coordinating notions together in a single dedicated envelope establishes complete organization right from the start. This proactive method allows you to seamlessly resume work without wasting valuable time hunting for misplaced supplies around your room.
Grouping your essential materials into individual kits eliminates mid-project distractions and keeps your creative momentum moving forward completely uninterrupted. You can confidently dive straight into the construction process knowing every single component is already accounted for and perfectly matched.
These streamlined pouches stack neatly on an open shelf or slide effortlessly into a deep storage bin to maximize your space. This systematic arrangement keeps your workspace tidy while offering a clear, visual overview of all your upcoming creative endeavors.
Categorizing your materials this way serves as an excellent reference to help you recall the exact design vision for each garment. Investing a few minutes into this simple sorting habit ensures your materials remain pristine and ready for your next session.
39#. Tiered Button Sorting Trays
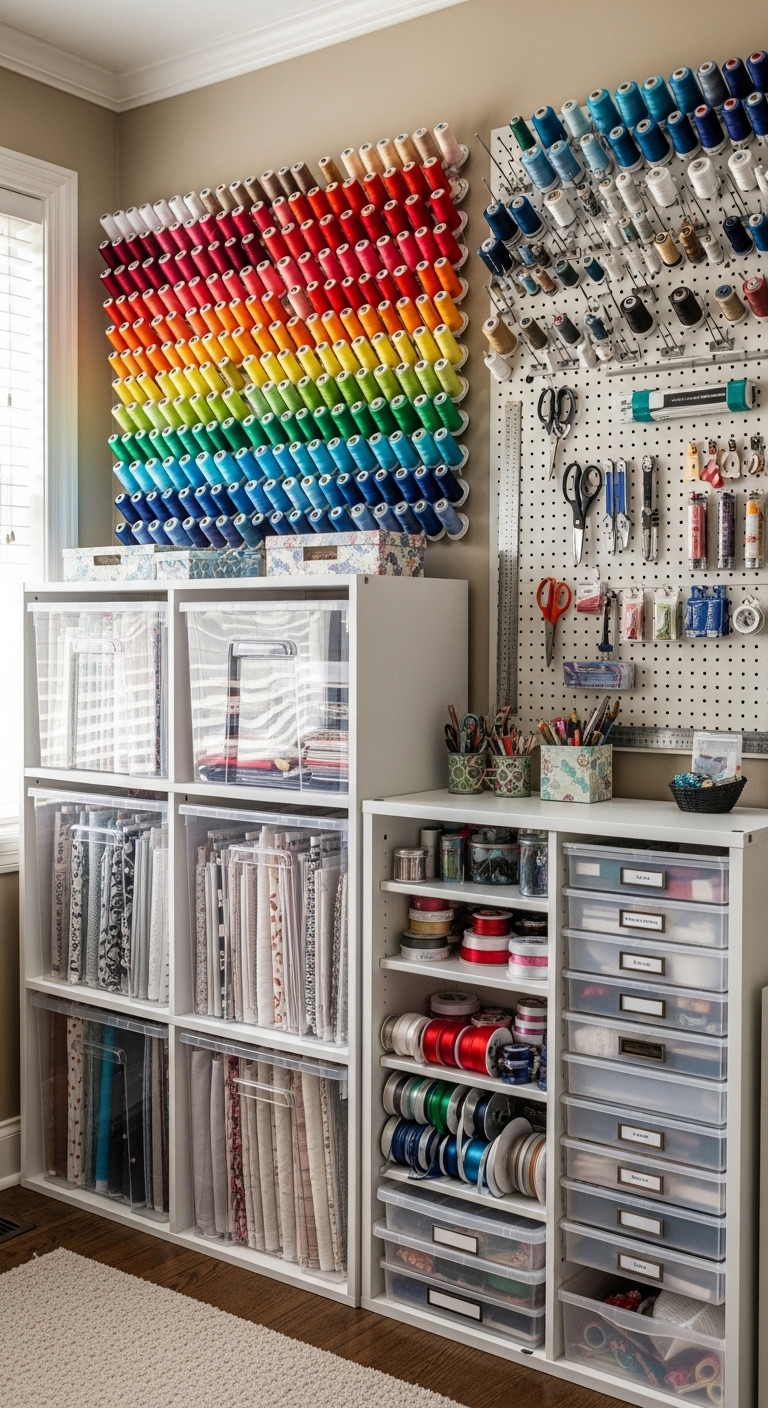
Utilizing a tiered tray on your work surface allows you to sort intricate buttons, beads, and fasteners seamlessly for any ongoing project. This elevated system keeps your smallest notions within arm’s reach, preventing them from scattering across the table or rolling onto the floor.
Arranging your essential haberdashery by color, size, or material turns a basic organizational task into a visually engaging design process. The open structure offers an immediate, clear view of your inventory so you can select the perfect accent piece instantly.
The vertical orientation utilizes upward space efficiently, leaving the rest of your main tabletop completely open for cutting and assembly. This structural layout adds an attractive layering effect to your studio setup, enhancing both the style and function of your room.
For creators who appreciate the fine details of garment construction, this storage method balances aesthetic charm with practical utility perfectly. Integrating a multi-level stand transforms a chaotic collection of small pieces into an inspiring and highly organized workspace.
40#. Under-Shelf Magnet Strips
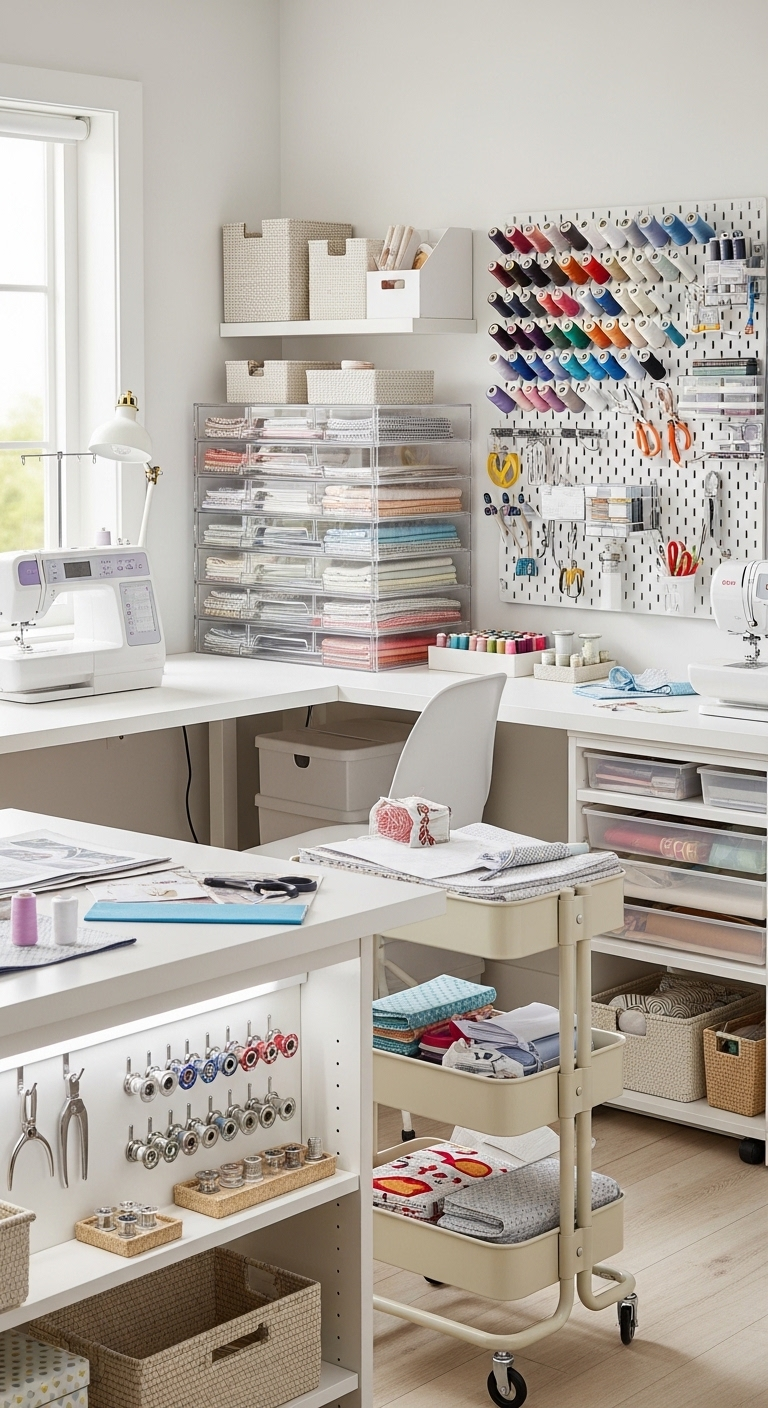
Mounting a heavy-duty magnetic strip beneath an upper shelf utilizes an overlooked area that would otherwise remain completely vacant. This clever installation keeps steel bobbins, small thread snips, and pins perfectly organized right at eye level without cluttering your desk.
Suspending your metallic notions above the main workspace ensures your central cutting and layout zones remain entirely open and functional. It offers a sleek, modern alternative to bulky plastic containers that constantly take up premium real estate on your tabletop.
Your most frequently used steel tools stay securely attached and instantly accessible the exact moment you need to reach for them. This smart approach appeals directly to creators looking to optimize every square inch of their studio for a fluid drafting process.
Maintaining a clear surface area directly reduces visual distractions and allows you to focus completely on intricate garment construction. Implementing this simple hardware trick ensures your active tools remain organized while elevating the overall efficiency of your workspace.
41#. Floating Fabric Display Rods
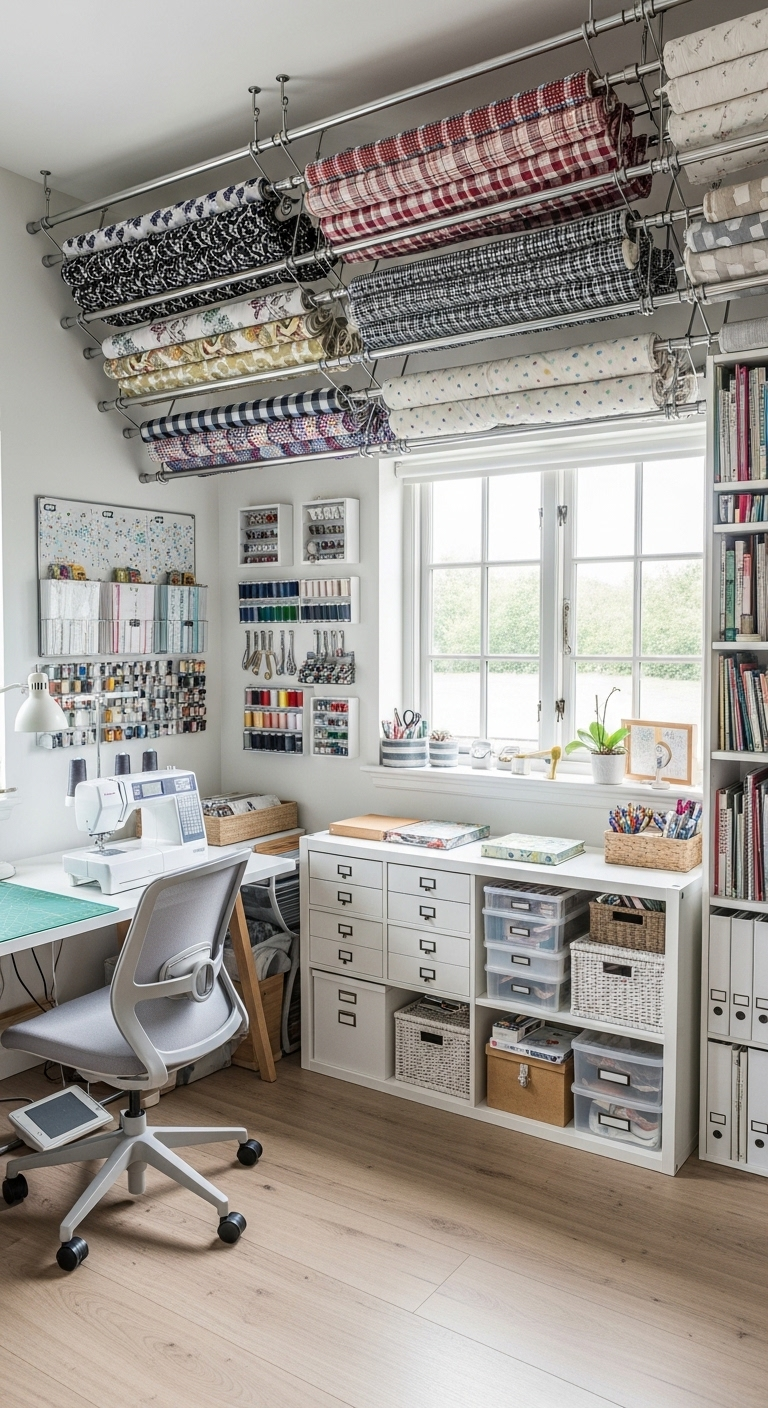
Hanging active yardage over wall-mounted curtain rods allows you to analyze fabric drape and color accuracy without unfolding the entire bolt. This clever method transforms your essential material inventory into a dynamic, textured display that naturally softens the room’s overall aesthetic.
Your visible textile collection evolves automatically as your current project interests and seasonal palettes shift throughout the design year. Utilizing high vertical surfaces keeps delicate luxury fibers completely wrinkle-free and pristine for your upcoming garment cutting sessions.
Exposing your favorite materials provides a continuous source of creative inspiration while saving valuable floor space in smaller studios. This approach ensures your most expensive or intricate textiles remain safely off the ground and away from high-traffic work zones.
Implementing a vertical display adds an artistic, multi-dimensional element to your broader studio layout and workflow planning strategy. Prioritizing accessible storage keeps your materials beautifully organized, highly visible, and perfectly preserved for your next major sewing endeavor.
42#. Clear Top Notion Bins
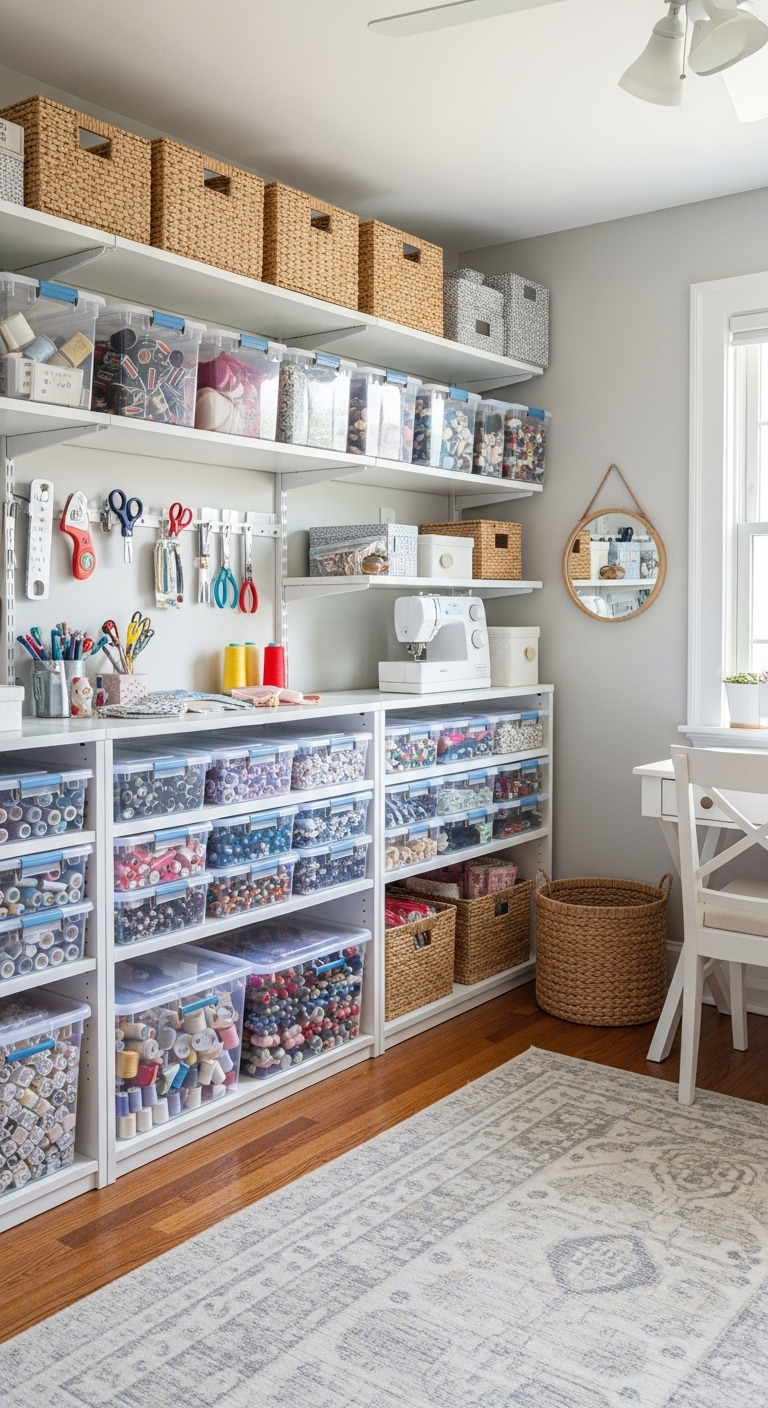
Utilizing clear, lidded storage containers allows you to audit your inventory instantly without moving multiple boxes or opening every single container. This transparent system provides an immediate view of specialized notions that are simply too bulky to fit into standard desk drawers.
Housing massive elastic rolls, shoulder pads, and bulk zippers in dedicated bins keeps your primary workspace completely organized and free of clutter. Protecting these substantial components under a secure seal prevents dust accumulation while keeping your essential supplies grouped by category.
Maintaining a crystal-clear perspective of your current materials naturally prevents accidental overbuying and minimizes redundant trips to the craft store. This simple visual habit ensures you always know exactly what is in stock before sketching out a new design.
Implementing structured, transparent bins offers a highly efficient method for managing voluminous wholesale notions without sacrificing precious floor space. Streamlining your bulk supply management keeps your workflow entirely predictable and maximizes your productivity during intensive creation sessions.
43#. Hanging Pattern Weight Pouch
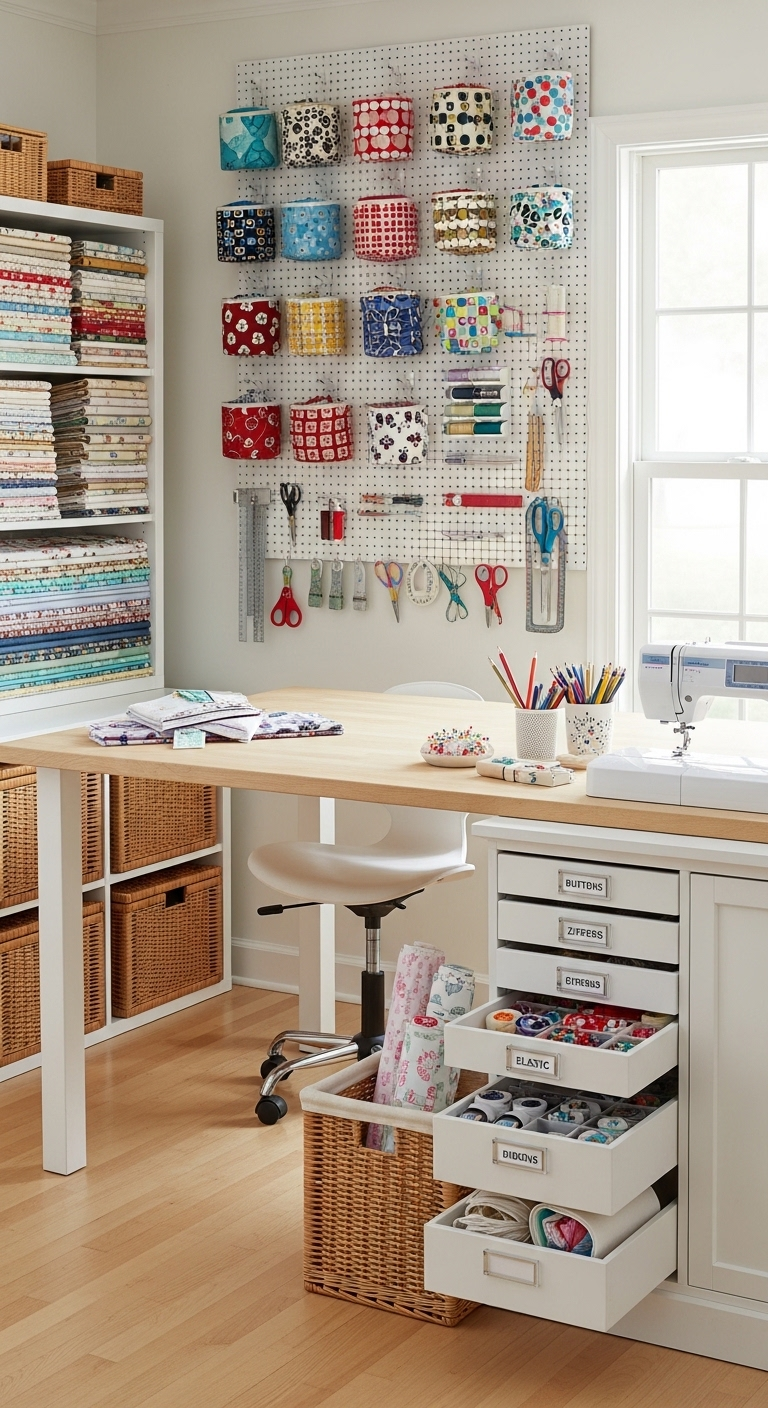
Crafting a dedicated fabric pouch to hang directly from your cutting table keeps your heavy layout weights organized and securely in place. This tailored pocket ensures your essential drafting tools remain within arm’s reach without cluttering your active cutting surface.
Suspending these heavy accessories off the main tabletop prevents them from rolling around or accidentally shifting your delicate paper patterns. Keeping the immediate boundary of your layout zone clear allows you to slide your shears smoothly across the fabric.
This quick sewing project offers an excellent opportunity to utilize leftover textile scraps while adding a personalized touch to your workspace. The straightforward construction process delivers immediate practical value for creators who desire a highly focused and tidy preparation area.
Clearing your central workspace of stray tools creates a more intentional and stress-free environment for measuring and drafting intricate garment pieces. Implementing a smart hanging pouch maximizes your efficiency and keeps your most important patterns completely pristine.
44#. Tiered Thread Cone Racks
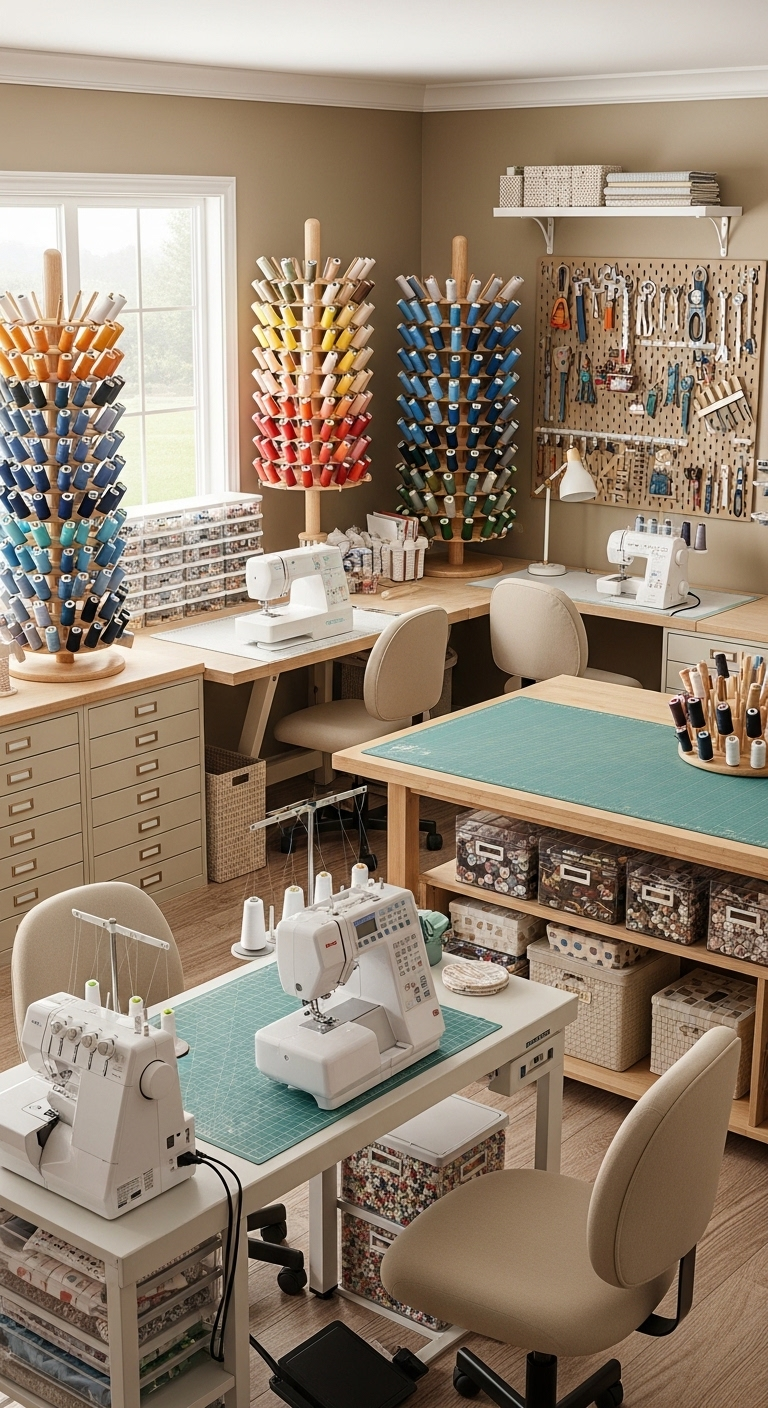
Investing in a dedicated cone rack keeps large, bulky serger spools perfectly organized and prevents intricate overlock threads from tangling. Arranging your substantial thread cones by color value across multiple tiers allows you to locate the exact shade instantly.
A multi-level display gives you an immediate, comprehensive view of your entire inventory during the critical design planning phase. This clear visibility eliminates guesswork when matching delicate overlocker threads to complex garment fabrics or specialized stretch textiles.
These sturdy organizers can be securely mounted to the wall or placed directly on a desktop to keep your active notions tidy. Elevating your bulk spools frees up valuable counter space right next to your machinery for a smoother workflow.
A dedicated storage system is an essential asset for any busy studio focused on achieving professional, high-quality garment construction. Streamlining your specialty thread collection ensures your machinery remains threaded correctly and ready for clean edge finishing.
45#. Rotating Notion Carousels
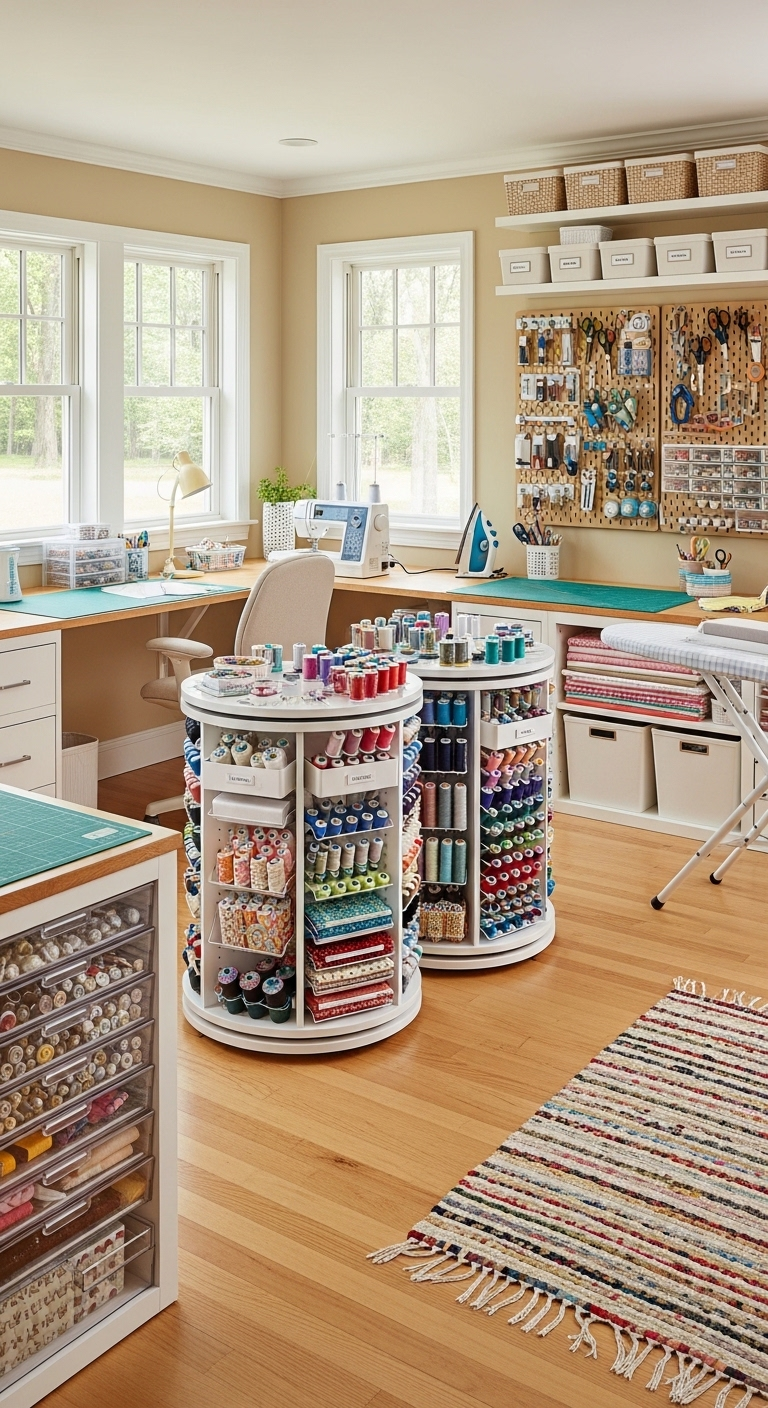
A rotating carousel on your main desk keeps essential drafting pens, marking pencils, and fabric shears unified in one centralized hub. A quick spin of the organizer brings your required tool directly to you, eliminating the need to interrupt your creative momentum.
This fluid movement allows you to select the exact utensil needed for pattern adjustments without constantly searching through deep desk drawers. Housing your primary marking instruments in a single spinning unit ensures your most frequent tasks remain fast and efficient.
This smart storage solution maintains a tidy tabletop environment while keeping your high-priority items within immediate arm’s reach at all times. It offers a practical and dynamic option for busy creative studios where project demands change rapidly throughout the day.
Keeping your immediate layout zone completely clear of loose utensils fosters a highly productive and stress-free creative workstation. Implementing a rotating desktop hub structures your tools logically, allowing you to focus entirely on executing precise design details.
46#. Framed Thread Art Vignettes
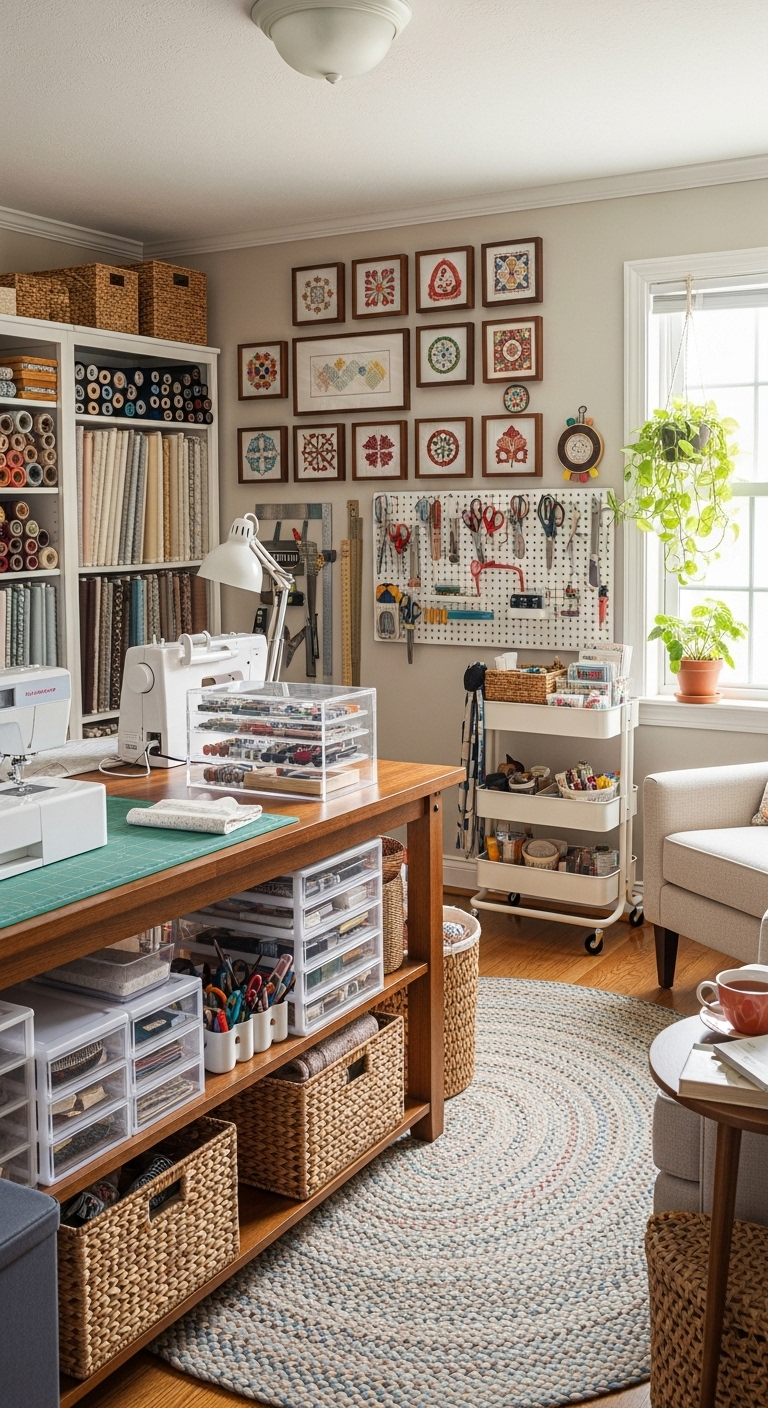
Displaying a curated selection of vibrant silk thread spools inside a deep shadow box frame celebrates the rich heritage of your textile craft. This unique design choice introduces an elegant pop of color and a sophisticated texture to your studio walls.
Exposing the natural sheen of premium silk fibers elevates standard production materials into an intentional and beautiful artistic statement. The rich reflections from the premium spools inject personality into the room while honoring the traditional roots of garment construction.
Your creative workspace deserves intentional decor elements that spark immediate inspiration during long hours of drafting and assembly. Framing your finest materials serves as a daily visual reminder of the premium colors and tactile qualities that drive your design passion.
Integrating artistic displays into a broader storage layout beautifully balances functional utility with a warm, personalized aesthetic. Transforming historical or luxury supplies into wall art ensures your studio feels incredibly inspiring, deeply creative, and artfully curated.
47#. Pull-Out Ironing Drawers
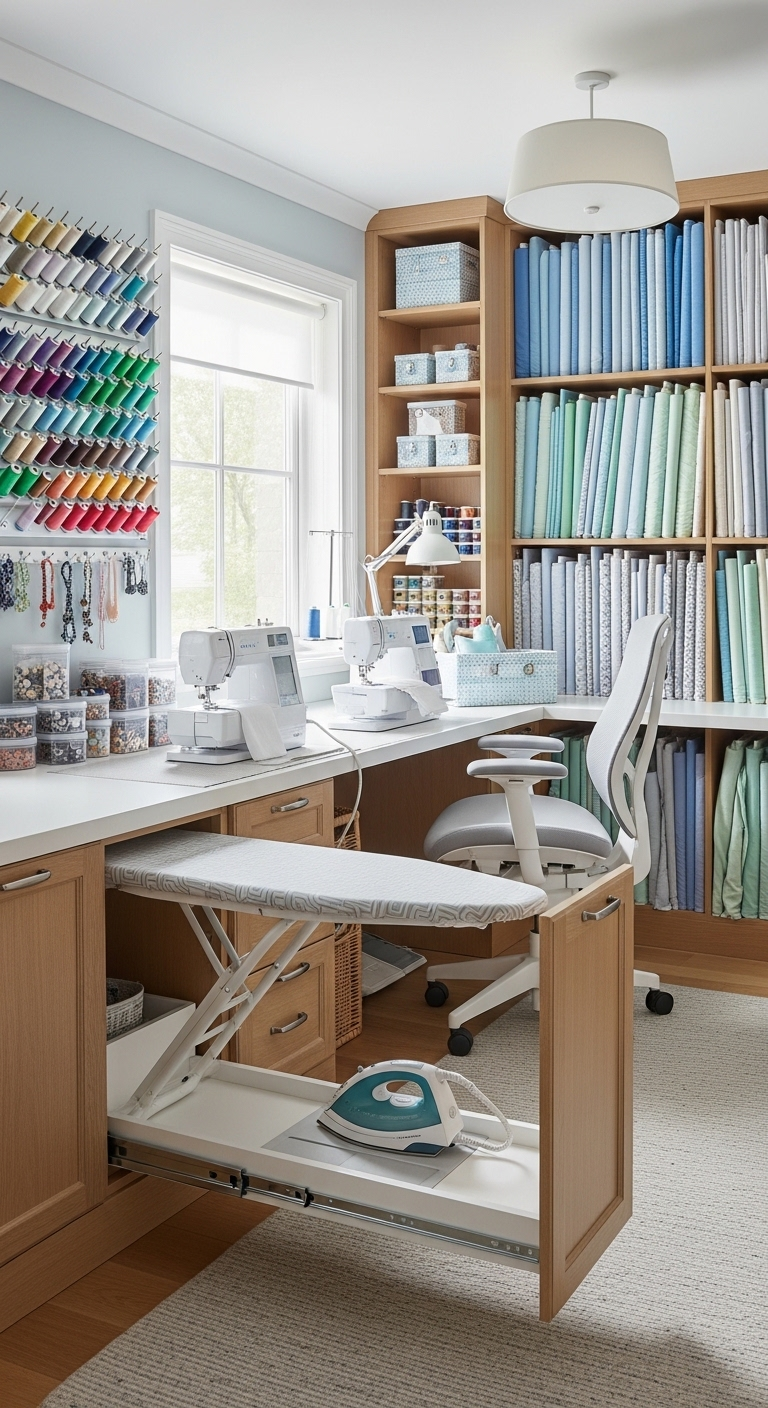
Integrating a built-in drawer that pulls out to reveal a hidden ironing board is an exceptionally smart space-saving upgrade for a studio remodel. This customized cabinet design keeps your essential pressing surface completely concealed until the exact moment you need to press a crisp seam.
Housing the entire pressing system within a standard drawer unit eliminates the clutter of traditional, freestanding metal frames. It allows you to maintain an active, highly efficient workflow without constantly tripping over bulky legs or tangled electrical cords.
This functional feature is incredibly advantageous for compact floor plans where a full-sized ironing board would block natural traffic lanes. Keeping the pressing apparatus tucked away ensures your environment remains entirely balanced, spacious, and visually uncluttered throughout the day.
Preserving a clear and open walkway creates a highly professional atmosphere that is perfect for consulting with clients or staging finished garments. Investing in hidden architectural details transforms a hectic production zone into a streamlined and sophisticated creative sanctuary.
48#. Color-Coded Fabric Labels
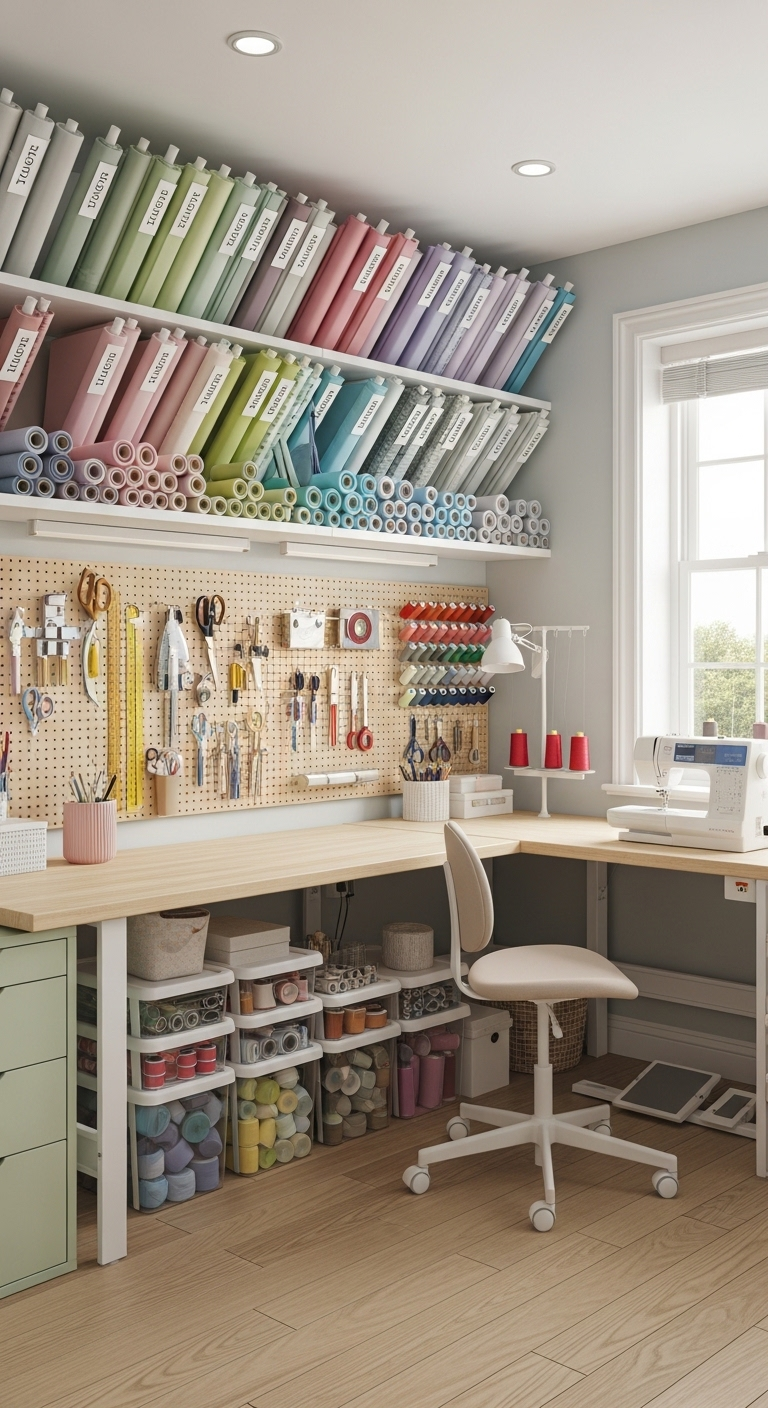
Applying vibrant color-coded stickers to your fabric shelves or bins allows you to identify specific material classifications at a glance. For instance, assigning bright blue labels to light cottons and rich green markers to heavy wools streamlines your physical inventory system.
This systematic visual categorization offers an instant overview of your entire collection without requiring you to pull down multiple bolts. Implementing a unified color key across your storage zones keeps your textile repository running efficiently as your supply expands.
This extra layer of organization saves you from manually unfurling and feeling every single textile to determine the weight for an upcoming project. The quick visual identification process drastically reduces preparation time and keeps your mind focused entirely on the construction phase.
Managing an extensive and diverse textile inventory requires logical, structured systems that prevent chaotic searching before a big deadline. Incorporating simple, high-visibility labeling habits keeps your premium materials perfectly organized and readily accessible for any design challenge.
49#. Magnetic Strip Machine Attachments
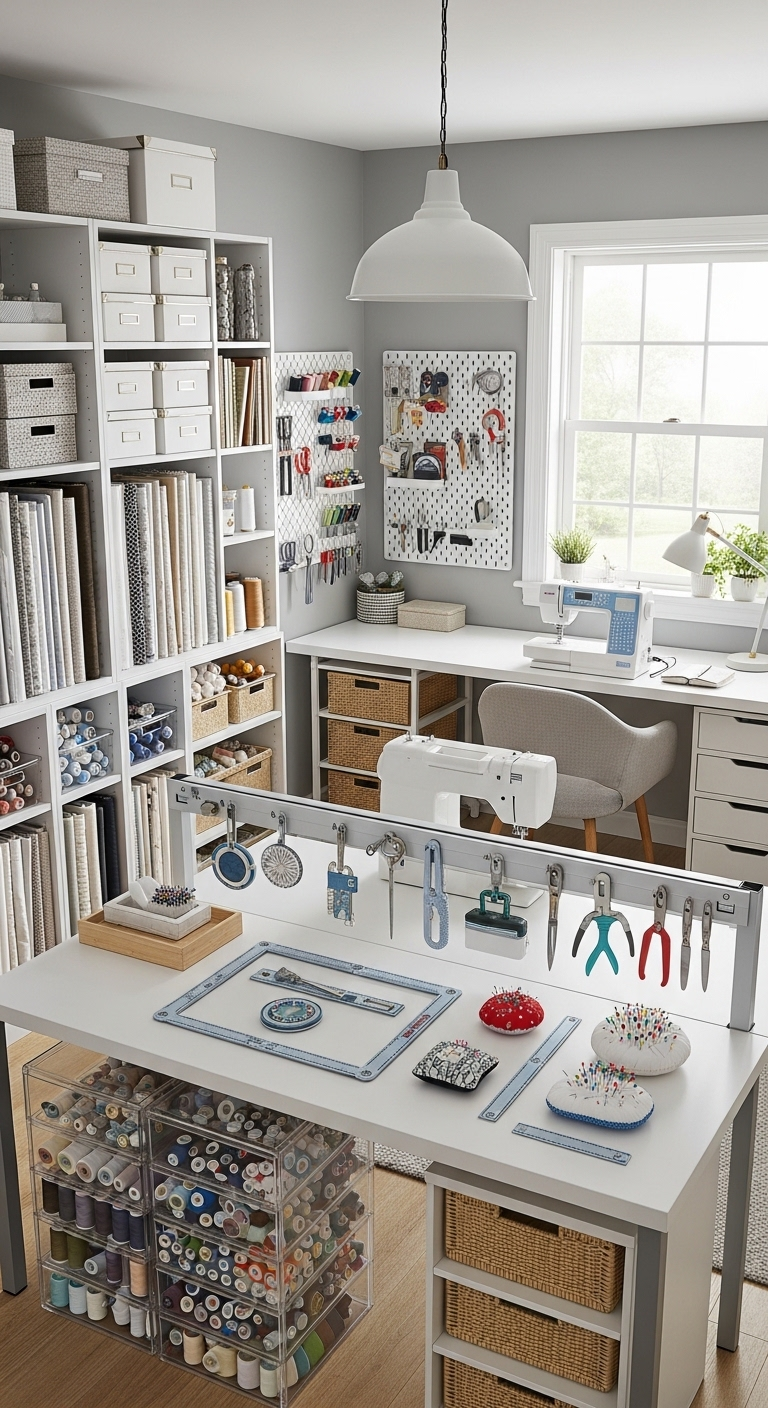
Attaching a low-profile magnetic strip directly to your sewing machine housing keeps steel snips and essential pins exactly where you work. This secure placement prevents tiny components from sliding off the slick machine bed and dropping onto the floor during fast stitching sequences.
Parking your most critical tools directly on the equipment frame creates an immediate, reliable staging area for urgent mid-seam adjustments. The constant magnetic pull ensures your sharp blades and delicate needles remain perfectly stationary despite the continuous vibrations of a high-speed motor.
This minor physical adjustment introduces an incredibly fluid rhythm to your daily construction process, significantly reducing wasted motion. Eliminating the frantic search for misplaced shears saves precious seconds on every single seam you assemble.
Having your core utensils instantly accessible is a fantastic strategy for busy creators managing tight production deadlines. Streamlining the physical layout of your primary workstation keeps your surface tidy and ensures your creative energy remains entirely focused.
50#. Desktop Trash Snips
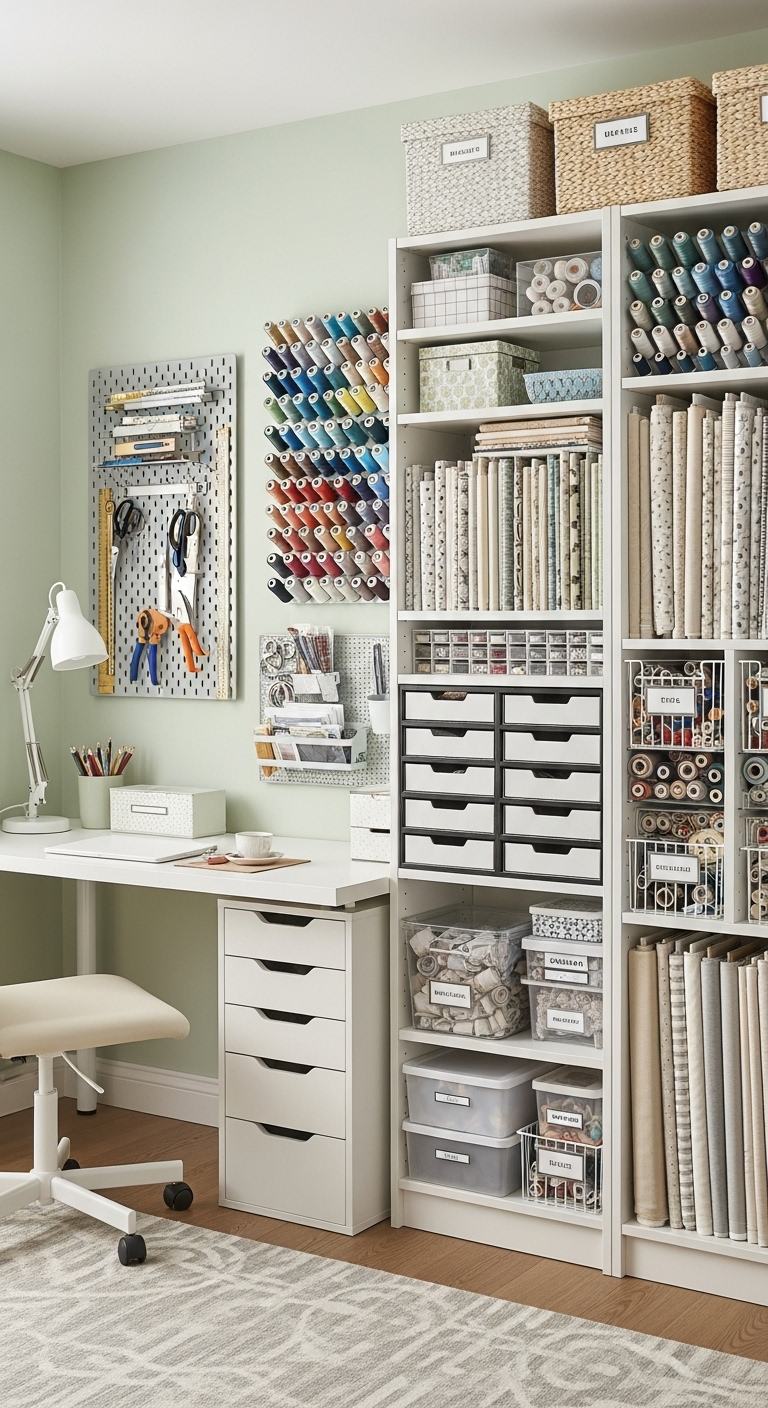
Suspending a weighted scrap bag directly from the edge of your cutting table creates an immediate landing zone for loose threads and fabric trimmings. This clever positioning ensures that stray textile waste falls right into the open pouch rather than scattering across your floor.
Preventing a buildup of production debris keeps your immediate workspace completely free of what creators playfully call sewing snow. Gathering these tiny fibers as you cut eliminates the frustration of tracking loose lint and fabric dust throughout your house.
This simple addition delivers practical value during intensive crafting sessions by keeping your pathways clear and completely safe. Maintaining an orderly floor area reduces visual clutter and allows you to move around your machinery with complete confidence.
Clearing away waste material continuously ensures that your final studio cleanup goes much faster at the end of a long afternoon. Prioritizing this easy habit protects your delicate textiles from picking up stray lint while preserving a beautifully inspiring creative environment.
Elevate Your Creative Flow
Creating an organized sanctuary is an ongoing project that truly evolves alongside your skills and your collection. By utilizing these tips and this complete sewing room organization guide, you can spend less time searching for lost pins and more time bringing your beautiful artistic visions to life.